!Placement
The Model 2.5i is a floorstanding tower speaker that requires no stands or mounting hardware other than the included SpikeKit. The Model 2.5i is designed for indoor use only. As the Model 2.5i is not a magnetically shielded loudspeaker, do not place it closer than 18 inches from a television. Unshielded magnets placed in close proximity to a television screen can cause discoloration of the picture. If you notice picture discoloration, move the speakers away from the TV until the problem disappears.
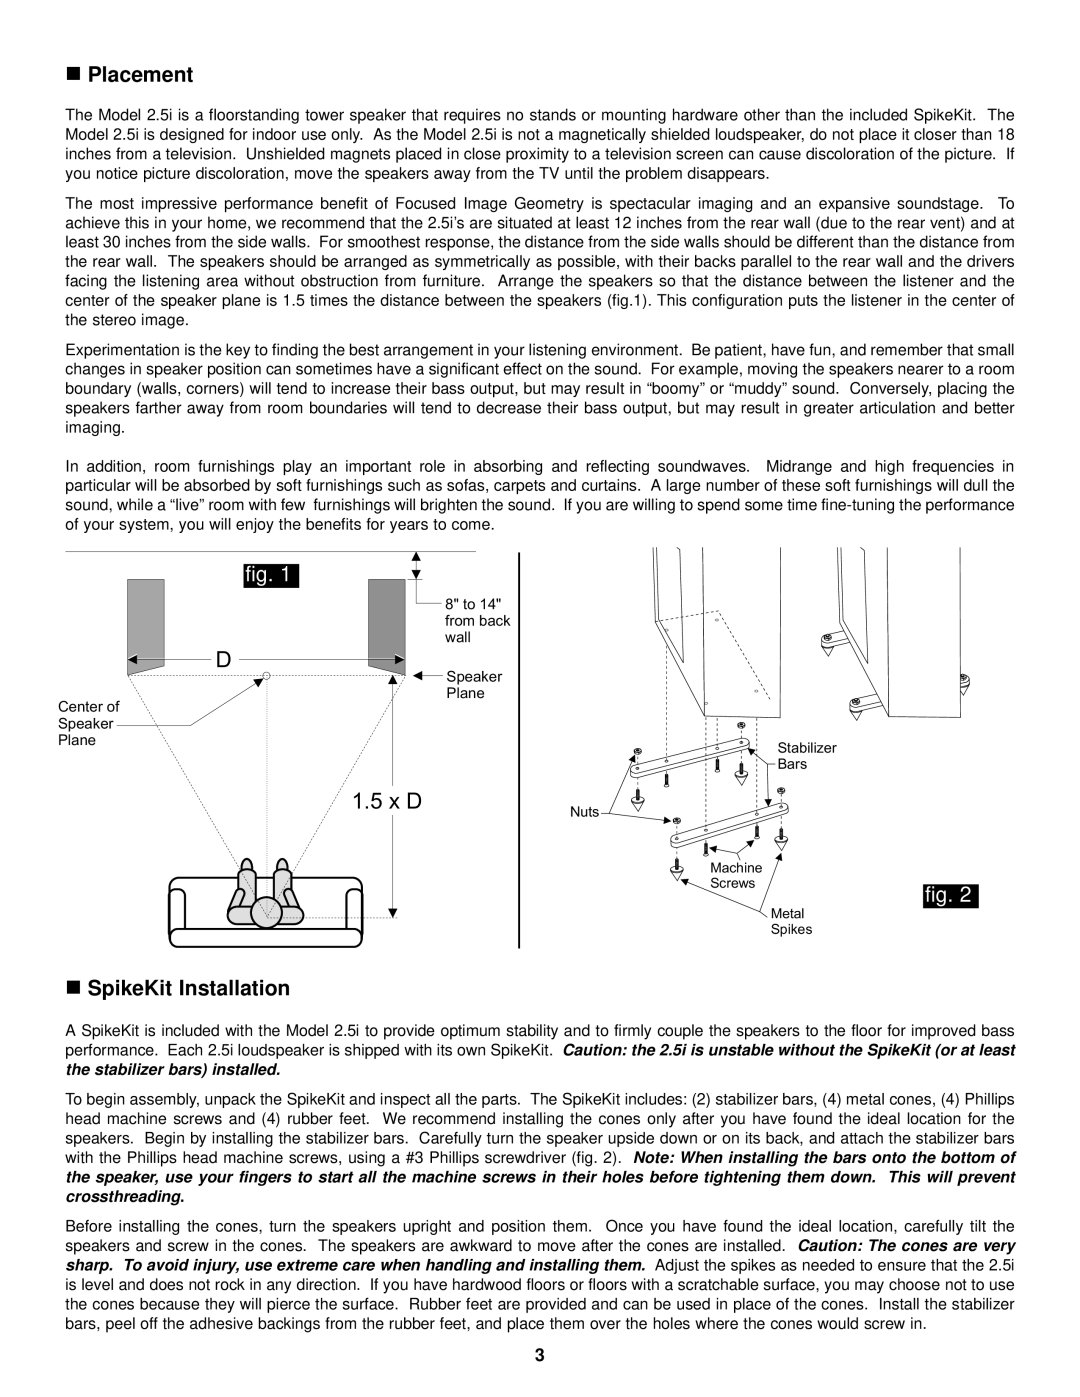
The most impressive performance benefit of Focused Image Geometry is spectacular imaging and an expansive soundstage. To achieve this in your home, we recommend that the 2.5i’s are situated at least 12 inches from the rear wall (due to the rear vent) and at least 30 inches from the side walls. For smoothest response, the distance from the side walls should be different than the distance from the rear wall. The speakers should be arranged as symmetrically as possible, with their backs parallel to the rear wall and the drivers facing the listening area without obstruction from furniture. Arrange the speakers so that the distance between the listener and the center of the speaker plane is 1.5 times the distance between the speakers (fig.1). This configuration puts the listener in the center of the stereo image.
Experimentation is the key to finding the best arrangement in your listening environment. Be patient, have fun, and remember that small changes in speaker position can sometimes have a significant effect on the sound. For example, moving the speakers nearer to a room boundary (walls, corners) will tend to increase their bass output, but may result in “boomy” or “muddy” sound. Conversely, placing the speakers farther away from room boundaries will tend to decrease their bass output, but may result in greater articulation and better imaging.
In addition, room furnishings play an important role in absorbing and reflecting soundwaves. Midrange and high frequencies in particular will be absorbed by soft furnishings such as sofas, carpets and curtains. A large number of these soft furnishings will dull the sound, while a “live” room with few furnishings will brighten the sound. If you are willing to spend some time
fig. 1
D
Center of
Speaker
Plane
8" to 14" from back wall
![]() Speaker Plane
Speaker Plane
Stabilizer Bars
1.5 x D
!SpikeKit Installation
Nuts
Machine |
|
|
Screws |
|
|
| fig. 2 | |
|
| |
| Metal | |
| Spikes | |
A SpikeKit is included with the Model 2.5i to provide optimum stability and to firmly couple the speakers to the floor for improved bass performance. Each 2.5i loudspeaker is shipped with its own SpikeKit. Caution: the 2.5i is unstable without the SpikeKit (or at least the stabilizer bars) installed.
To begin assembly, unpack the SpikeKit and inspect all the parts. The SpikeKit includes: (2) stabilizer bars, (4) metal cones, (4) Phillips head machine screws and (4) rubber feet. We recommend installing the cones only after you have found the ideal location for the speakers. Begin by installing the stabilizer bars. Carefully turn the speaker upside down or on its back, and attach the stabilizer bars with the Phillips head machine screws, using a #3 Phillips screwdriver (fig. 2). Note: When installing the bars onto the bottom of the speaker, use your fingers to start all the machine screws in their holes before tightening them down. This will prevent crossthreading.
Before installing the cones, turn the speakers upright and position them. Once you have found the ideal location, carefully tilt the speakers and screw in the cones. The speakers are awkward to move after the cones are installed. Caution: The cones are very sharp. To avoid injury, use extreme care when handling and installing them. Adjust the spikes as needed to ensure that the 2.5i is level and does not rock in any direction. If you have hardwood floors or floors with a scratchable surface, you may choose not to use the cones because they will pierce the surface. Rubber feet are provided and can be used in place of the cones. Install the stabilizer bars, peel off the adhesive backings from the rubber feet, and place them over the holes where the cones would screw in.
3