through the lath, being careful not to vibrate plaster off the wall.
5.If the frame and grille are to be painted in the wall, paint now before installing the baffle (see “Painting”).
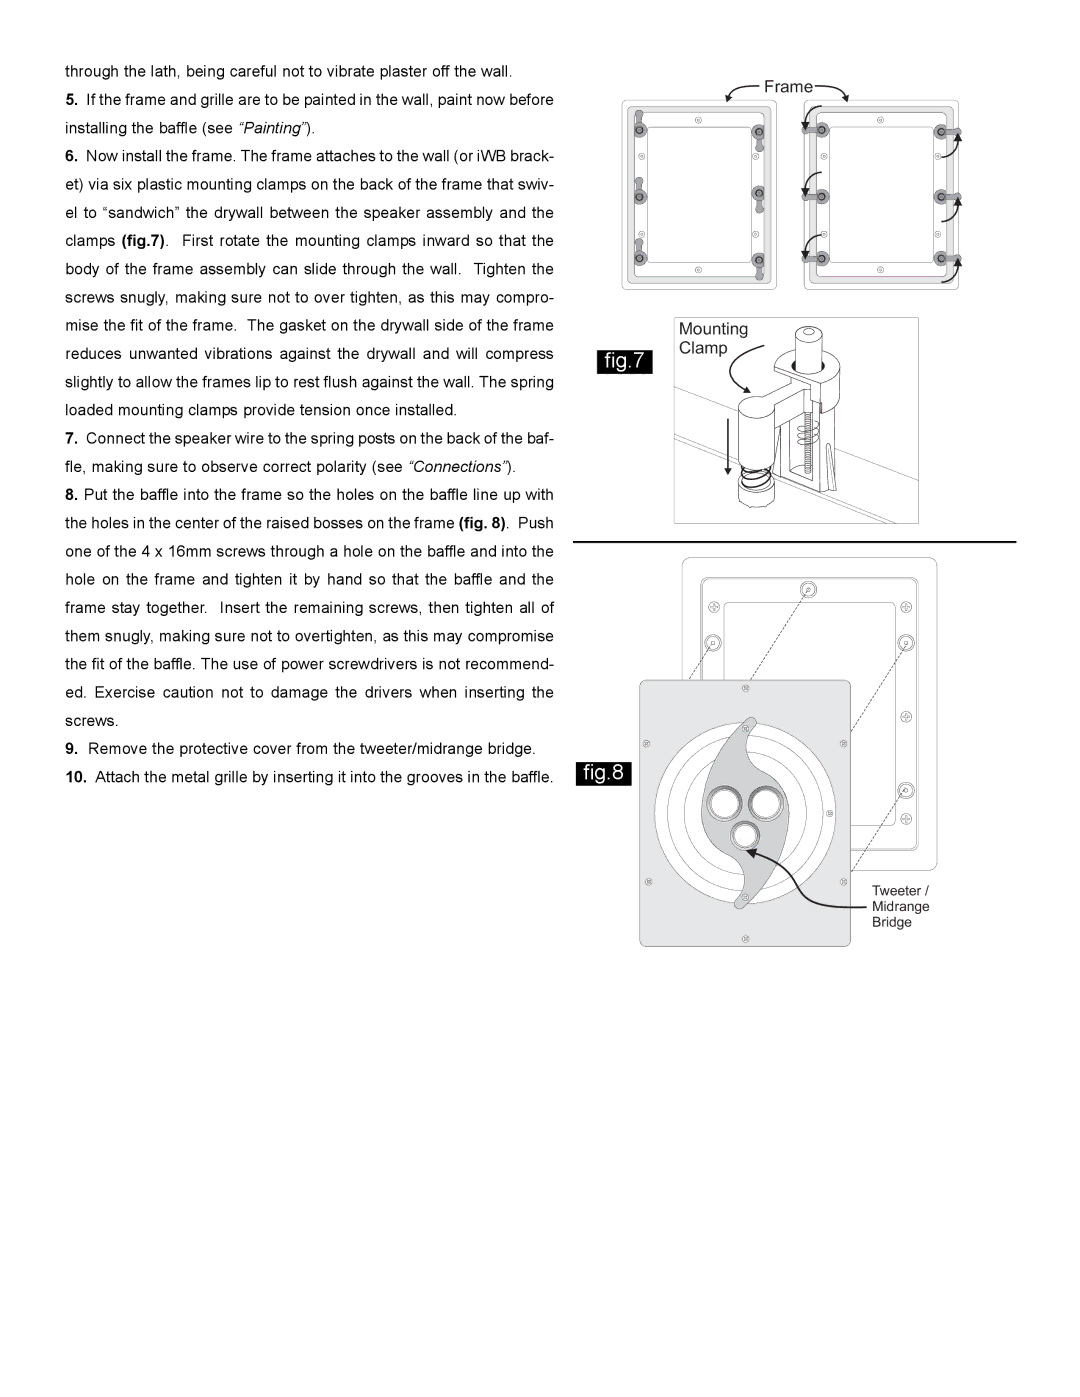
6.Now install the frame. The frame attaches to the wall (or iWB brack- et) via six plastic mounting clamps on the back of the frame that swiv- el to “sandwich” the drywall between the speaker assembly and the clamps (fig.7). First rotate the mounting clamps inward so that the body of the frame assembly can slide through the wall. Tighten the screws snugly, making sure not to over tighten, as this may compro- mise the fit of the frame. The gasket on the drywall side of the frame reduces unwanted vibrations against the drywall and will compress slightly to allow the frames lip to rest flush against the wall. The spring loaded mounting clamps provide tension once installed.
7.Connect the speaker wire to the spring posts on the back of the baf- fle, making sure to observe correct polarity (see “Connections”).
8.Put the baffle into the frame so the holes on the baffle line up with the holes in the center of the raised bosses on the frame (fig. 8). Push one of the 4 x 16mm screws through a hole on the baffle and into the hole on the frame and tighten it by hand so that the baffle and the frame stay together. Insert the remaining screws, then tighten all of them snugly, making sure not to overtighten, as this may compromise the fit of the baffle. The use of power screwdrivers is not recommend- ed. Exercise caution not to damage the drivers when inserting the screws.
9.Remove the protective cover from the tweeter/midrange bridge.
10.Attach the metal grille by inserting it into the grooves in the baffle.
![]() Frame
Frame ![]()
Mounting
fig.7 Clamp
fig.8
Tweeter /
Midrange
Bridge