Nighthawk KN-COEG-3 manual Part One - Your Nighthawk CO and Gas Alarm, Wall Mounted Alarm

Models: KN-COEG-3

1 25
Download 25 pages 38.34 Kb
Page 9
Image 9
Wall Mounted Alarm
Blinking Dot

Part One – Your Nighthawk CO and Gas Alarm

Wall Mounted Alarm

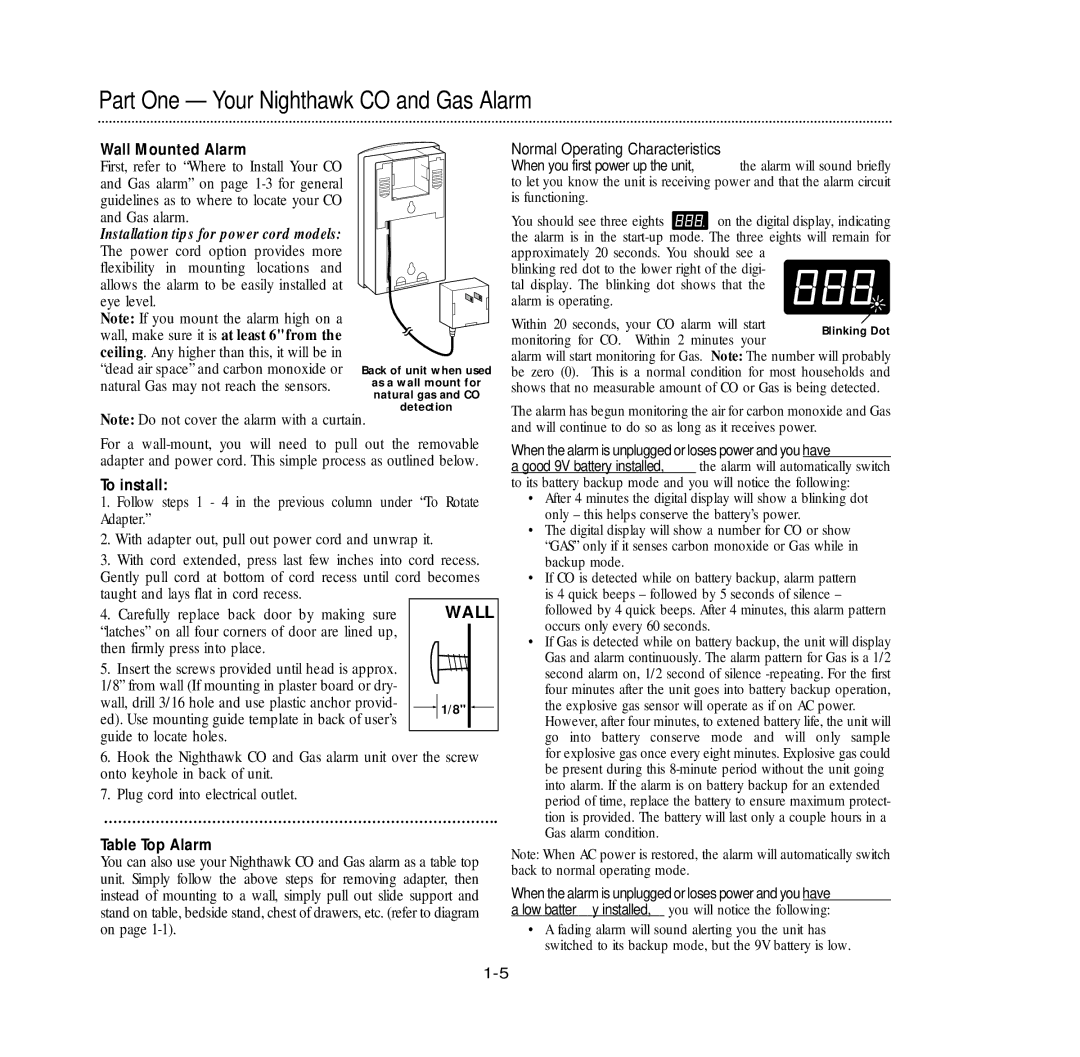
First, refer to “Where to Install Your CO and Gas alarm” on page 1-3 for general guidelines as to where to locate your CO and Gas alarm.

Installation tips for power cord models:

The power cord option provides more flexibility in mounting locations and allows the alarm to be easily installed at eye level.

Note: If you mount the alarm high on a wall, make sure it is at least 6" from the ceiling. Any higher than this, it will be in “dead air space” and carbon monoxide or natural Gas may not reach the sensors.

Back of unit when used

as a wall mount for natural gas and CO detection

Normal Operating Characteristics

When you first power up the unit, the alarm will sound briefly to let you know the unit is receiving power and that the alarm circuit is functioning.

You should see three eights Normal Operating Characteristics on the digital display, indicating the alarm is in the start-up mode. The three eights will remain for approximately 20 seconds. You should see a

blinking red dot to the lower right of the digi- tal display. The blinking dot shows that the alarm is operating.

Within 20 seconds, your CO alarm will start monitoring for CO. Within 2 minutes your

alarm will start monitoring for Gas. Note: The number will probably be zero (0). This is a normal condition for most households and shows that no measurable amount of CO or Gas is being detected.

The alarm has begun monitoring the air for carbon monoxide and Gas

Note: Do not cover the alarm with a curtain.

and will continue to do so as long as it receives power.

For a wall-mount, you will need to pull out the removable adapter and power cord. This simple process as outlined below.

To install:

1.Follow steps 1 - 4 in the previous column under “To Rotate Adapter.”

2.With adapter out, pull out power cord and unwrap it.

3.With cord extended, press last few inches into cord recess. Gently pull cord at bottom of cord recess until cord becomes taught and lays flat in cord recess.

4. Carefully replace back door by making sure

WALL


“latches” on all four corners of door are lined up,


then firmly press into place.


5. Insert the screws provided until head is approx.


1/8” from wall (If mounting in plaster board or dry-


wall, drill 3/16 hole and use plastic anchor provid-


1/8"


ed). Use mounting guide template in back of user’s


guide to locate holes.


6.Hook the Nighthawk CO and Gas alarm unit over the screw onto keyhole in back of unit.

7.Plug cord into electrical outlet.

Table Top Alarm

You can also use your Nighthawk CO and Gas alarm as a table top unit. Simply follow the above steps for removing adapter, then instead of mounting to a wall, simply pull out slide support and stand on table, bedside stand, chest of drawers, etc. (refer to diagram on page 1-1).

1-5

When the alarm is unplugged or loses power and you have a good 9V battery installed, the alarm will automatically switch to its battery backup mode and you will notice the following:

After 4 minutes the digital display will show a blinking dot only – this helps conserve the battery’s power.

The digital display will show a number for CO or show “GAS” only if it senses carbon monoxide or Gas while in backup mode.

If CO is detected while on battery backup, alarm pattern is 4 quick beeps – followed by 5 seconds of silence – followed by 4 quick beeps. After 4 minutes, this alarm pattern occurs only every 60 seconds.

If Gas is detected while on battery backup, the unit will display Gas and alarm continuously. The alarm pattern for Gas is a 1/2 second alarm on, 1/2 second of silence -repeating. For the first four minutes after the unit goes into battery backup operation, the explosive gas sensor will operate as if on AC power.

However, after four minutes, to extened battery life, the unit will

go into battery conserve mode and will only sample for explosive gas once every eight minutes. Explosive gas could be present during this 8-minute period without the unit going into alarm. If the alarm is on battery backup for an extended period of time, replace the battery to ensure maximum protect- tion is provided. The battery will last only a couple hours in a Gas alarm condition.

Note: When AC power is restored, the alarm will automatically switch back to normal operating mode.

When the alarm is unplugged or loses power and you have a low battery installed, you will notice the following:

A fading alarm will sound alerting you the unit has switched to its backup mode, but the 9V battery is low.

Page 9
Image 9
Nighthawk KN-COEG-3 Part One - Your Nighthawk CO and Gas Alarm, Wall Mounted Alarm, Normal Operating Characteristics