straight away, rather than leaving it lying around. Before replacing the lid, make sure that no contamination such as dust, hair, salt, sand etc. has fallen onto the O-ring or O-ring recess, as a precaution we recommend to inspect the O-ring every time the lid is opened and to carry out the maintenance if necessary.

Procedure:

Place the lid on a firm non-slip level surface.

The O-ring can be extracted using an O-ring extractor tool (make sure the tool as no sharp edges). Alternatively use the flats of the thumbs to gently stretch the O-ring on two faces (Fig. 4) thus making a small loop protruding a few mm. The loop can then be grasped between finger and thumb, to pull the O-ring over the lip.

Clean the O-ring recess (the square groove where the O-ring sits) with a cotton bud.

Inspect the O-ring all the way round its surface for damage such as cuts tears or contamination. This should be done visually and also by feeling the surface texture between finger and thumb.

IF THE O-RING IS DAMAGED OR SUSPECTED OF BEING DAMAGED, DISCARD IT IMMEDIATELY. A spare O -ring is supplied with your housing, or a replacement O-ring can be obtained from 10 BAR. If the O-ring is contaminated or suspected of being contaminated, clean it with a cotton cloth that is free of all chemicals or contamination. After cleaning inspect the O-ring again.

Once the O-ring has been inspected and verified fit for use, apply a SMALL amount of Silicone grease to the O-ring. The silicone grease must be evenly distributed round the O-ring

Replace the O-ring into the groove; run a finger round the O-ring, to make sure it is snugly seated in the groove.

(Fig. 4) Stretch the O-ring

4.7Mounting the camera in the housing:

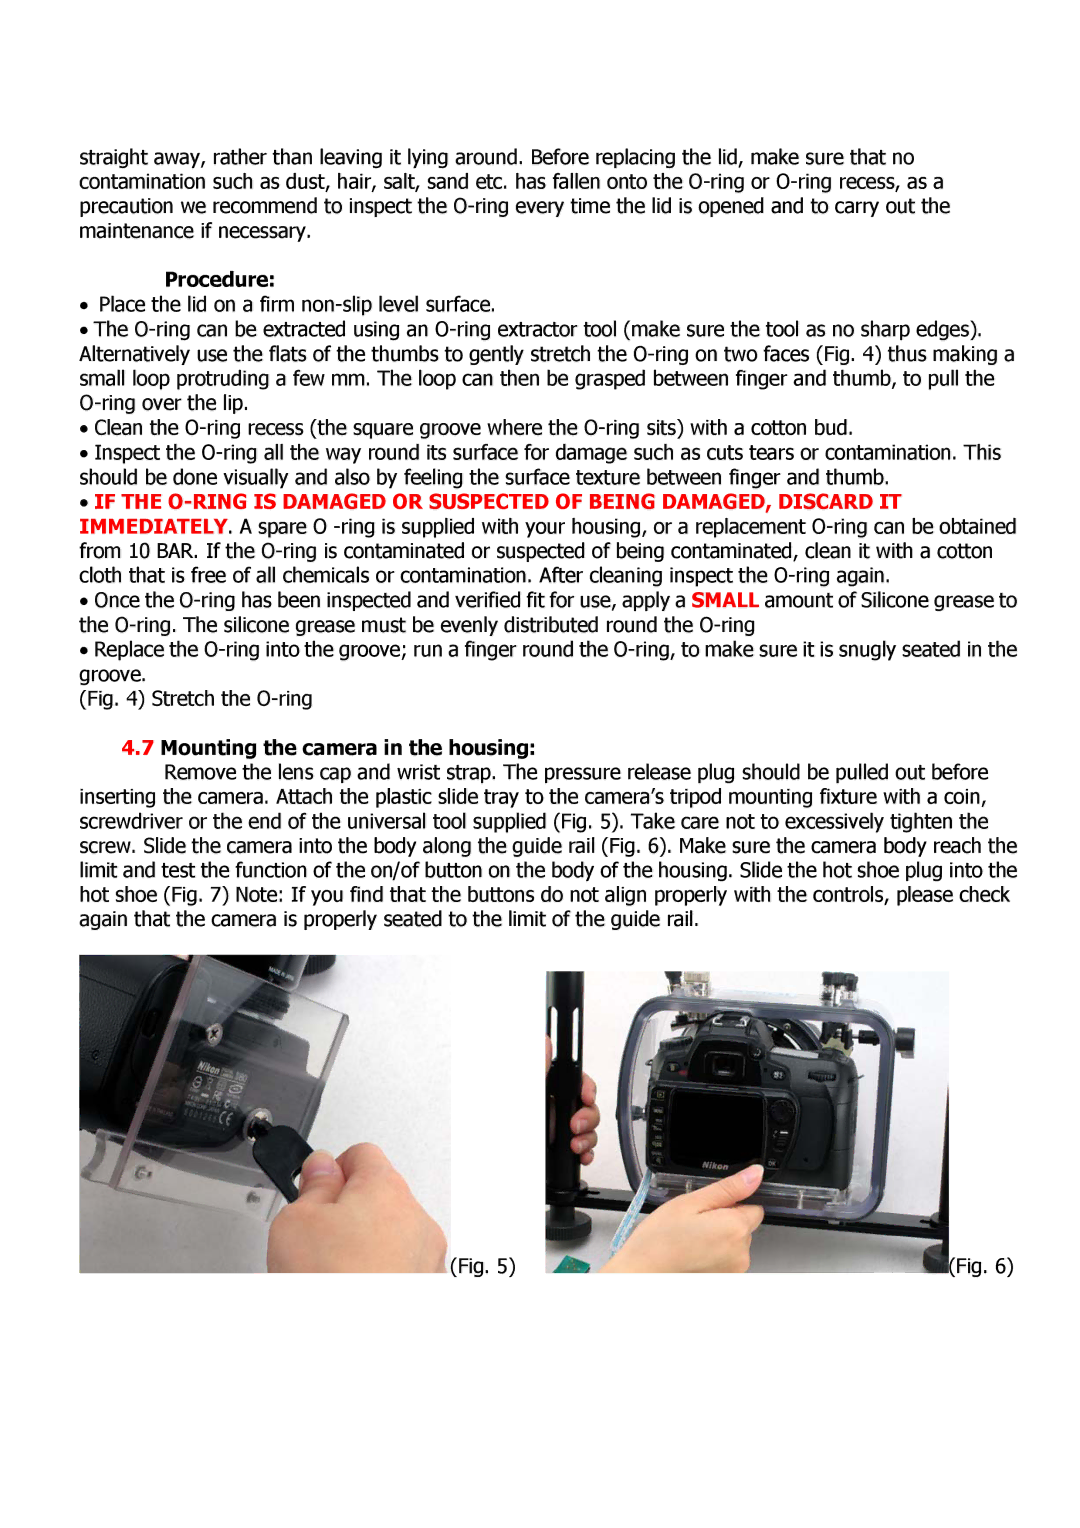
Remove the lens cap and wrist strap. The pressure release plug should be pulled out before inserting the camera. Attach the plastic slide tray to the camera’s tripod mounting fixture with a coin, screwdriver or the end of the universal tool supplied (Fig. 5). Take care not to excessively tighten the screw. Slide the camera into the body along the guide rail (Fig. 6). Make sure the camera body reach the limit and test the function of the on/of button on the body of the housing. Slide the hot shoe plug into the hot shoe (Fig. 7) Note: If you find that the buttons do not align properly with the controls, please check again that the camera is properly seated to the limit of the guide rail.

(Fig. 5)

(Fig. 6)

Page 6
Image 6
Nikon D80 user manual Procedure, Mounting the camera in the housing

D80 specifications

The Nikon D80 is a digital single-lens reflex (DSLR) camera that was launched in 2006, appealing to both photography enthusiasts and semi-professionals with its robust build and advanced features. It was introduced as an upgrade to the popular D70s, incorporating several new technologies that enhanced performance and image quality.

At the heart of the D80 is a 10.2-megapixel CCD sensor, delivering impressive image resolution and detail. This sensor, combined with the EXPEED image processing technology, enables the camera to produce vibrant colors and reduced noise even at higher ISO settings. The D80 offers an ISO range of 100 to 1600, expandable to 3200, accommodating various lighting conditions and allowing for greater flexibility during low-light shooting.

One of the standout features of the D80 is its 2.5-inch LCD screen, which provides a clear and vibrant display for composing shots and reviewing images. The screen also supports Live View functionality, a notable addition that allows users to take photos using the LCD instead of the optical viewfinder, making it easier to capture difficult angles.

The D80 employs an advanced 11-point autofocus system, ensuring precise focusing on subjects. This system includes a center cross-type sensor for improved accuracy, enhancing the camera’s capability in dynamic shooting situations. Furthermore, the D80 offers a compatibility with a wide range of Nikon F-mount lenses, providing photographers with the flexibility to experiment with different focal lengths and effects.

In terms of continuous shooting, the D80 can shoot at a rate of up to 3 frames per second, making it suitable for capturing fast-moving subjects. The camera also includes a built-in flash, which is beneficial for filling in shadows during outdoor photography. For those looking to explore advanced options, the D80 features a variety of exposure modes, including program, aperture priority, shutter priority, and manual modes.

The Nikon D80 operates on a rechargeable lithium-ion battery, providing a significant number of shots per charge, making it a reliable choice for extended shoots. It also supports CompactFlash memory cards, ensuring ample storage for high-resolution images.

Overall, the Nikon D80 stands out with its blend of innovative features, solid performance, and user-friendly design, making it a popular choice among dedicated photographers looking to enhance their craft without venturing into the realm of professional-grade cameras.