10.Always take all the right eye pics first then all the left eye pics. If you take scleral pics, start with the iris of that eye, followed by the four quadrants of the sclera (normally Left, Right, Upper, Lower).
11.Adjust the camera position until the pupil of the iris is centered on the viewfinder. With this type of 1:1+ photography, focus is accomplished by moving the camera toward or away from the subject.
12.Adjust focus until the image is sharp around the collarette at the four cardinal points.
13.Take picture.
14.Check exposure. The image may appear differently on the monitor than the LCD viewer.
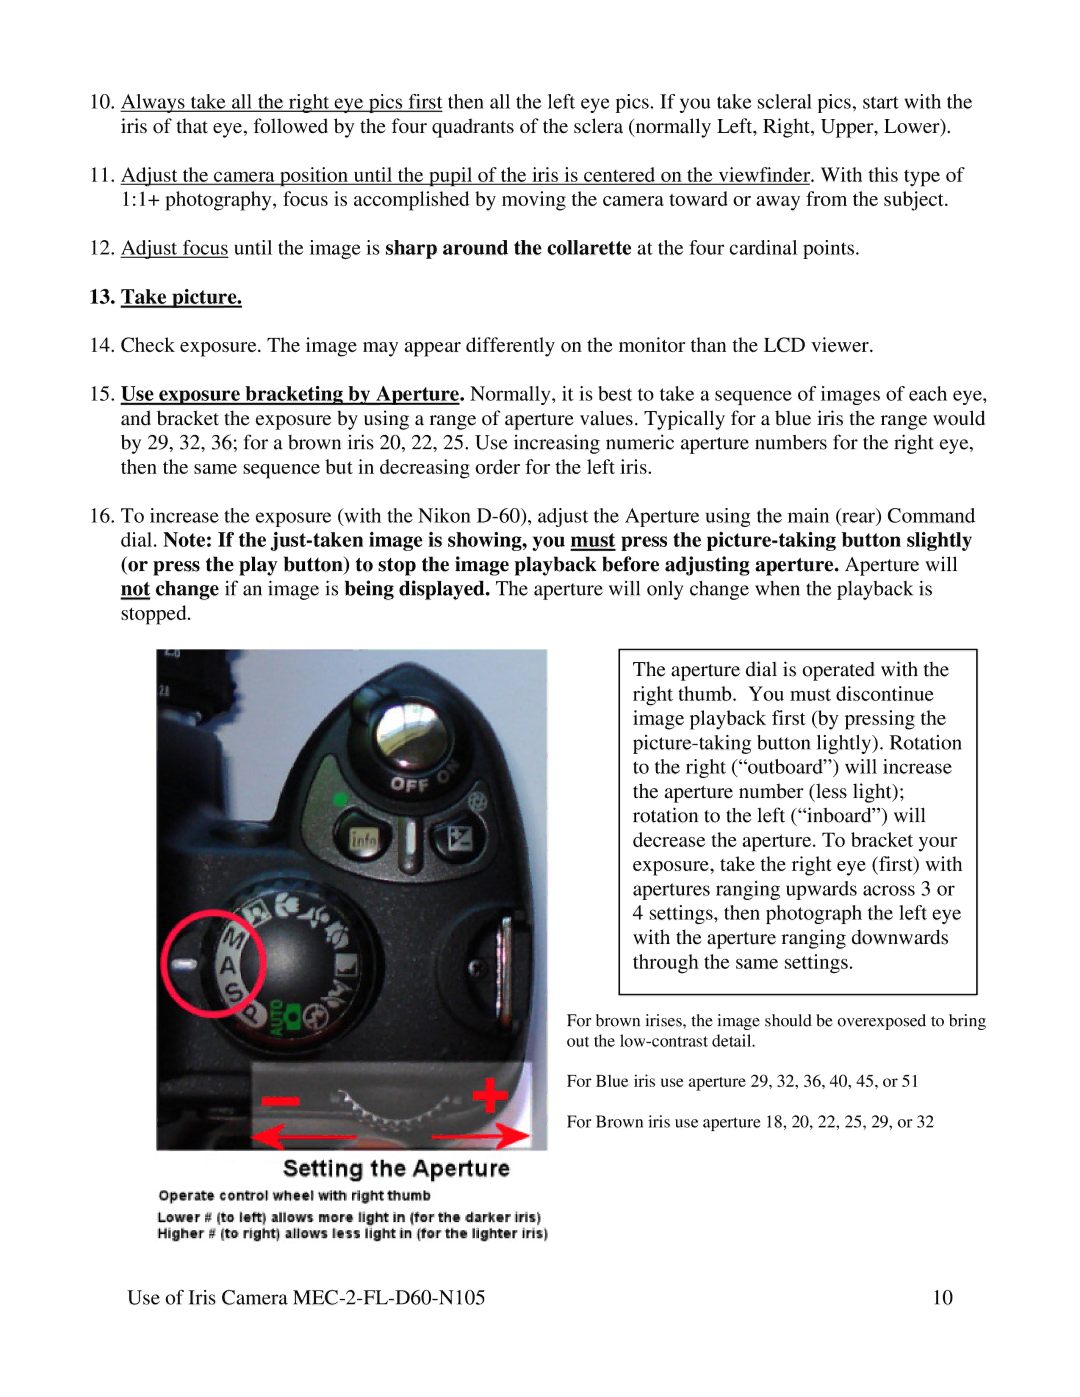
15.Use exposure bracketing by Aperture. Normally, it is best to take a sequence of images of each eye, and bracket the exposure by using a range of aperture values. Typically for a blue iris the range would by 29, 32, 36; for a brown iris 20, 22, 25. Use increasing numeric aperture numbers for the right eye, then the same sequence but in decreasing order for the left iris.
16.To increase the exposure (with the Nikon
The aperture dial is operated with the right thumb. You must discontinue image playback first (by pressing the
For brown irises, the image should be overexposed to bring out the
For Blue iris use aperture 29, 32, 36, 40, 45, or 51
For Brown iris use aperture 18, 20, 22, 25, 29, or 32
Use of Iris Camera | 10 |
