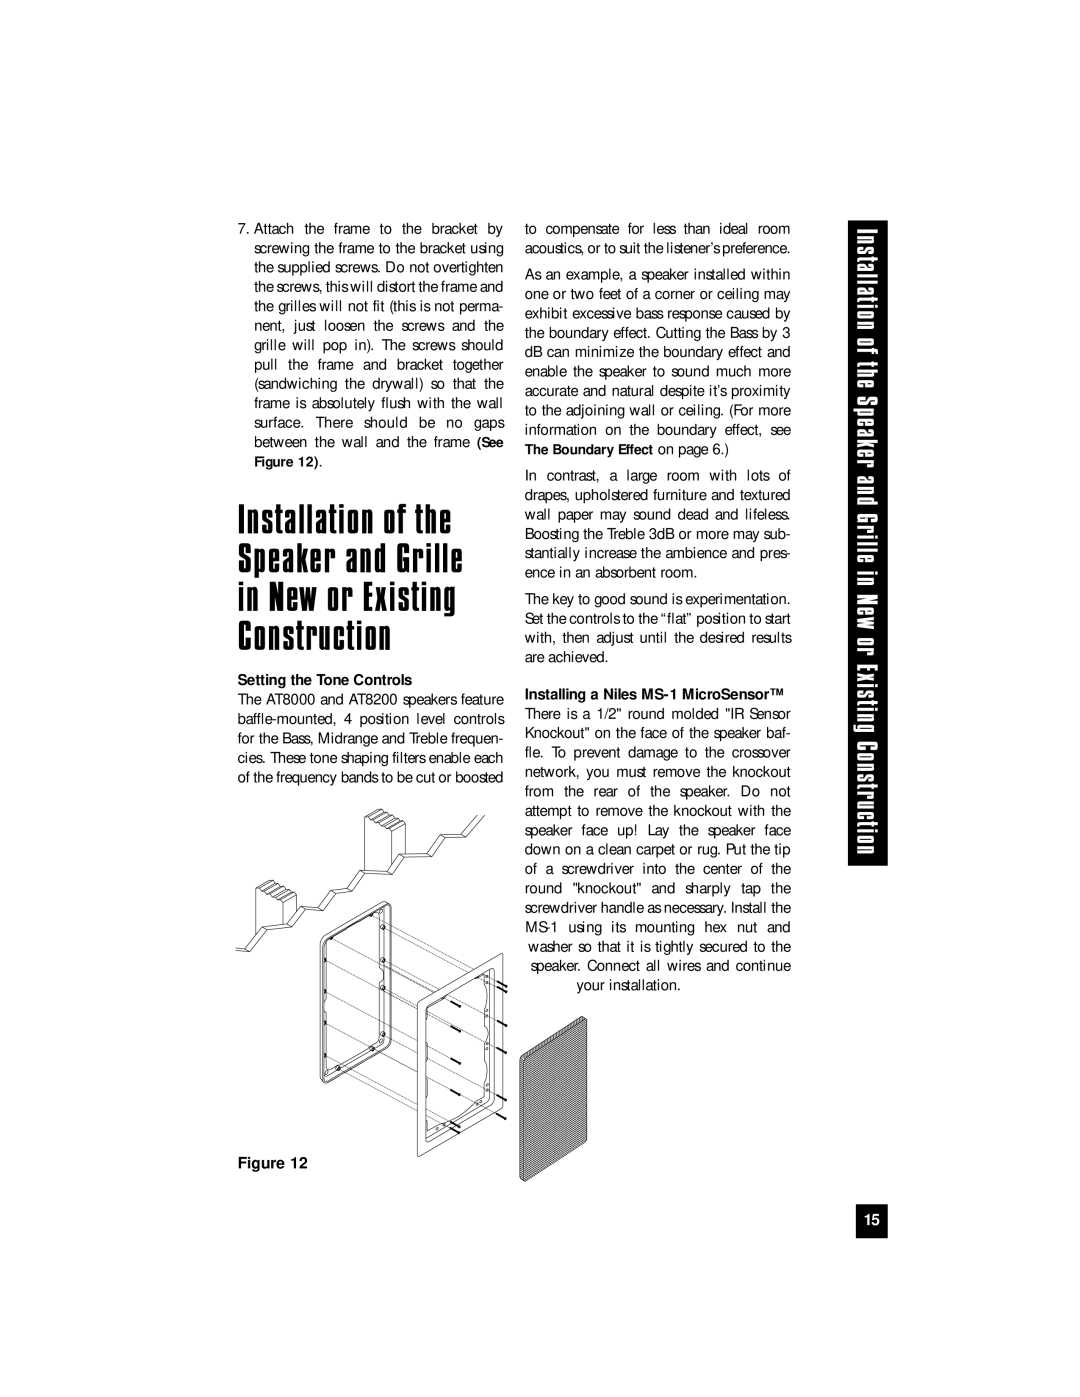
7.Attach the frame to the bracket by screwing the frame to the bracket using the supplied screws. Do not overtighten the screws, this will distort the frame and the grilles will not fit (this is not perma- nent, just loosen the screws and the grille will pop in). The screws should pull the frame and bracket together (sandwiching the drywall) so that the frame is absolutely flush with the wall surface. There should be no gaps between the wall and the frame (See Figure 12).
Installation of the Speaker and Grille in New or Existing Construction
Setting the Tone Controls
The AT8000 and AT8200 speakers feature
Figure 12
to compensate for less than ideal room acoustics, or to suit the listener’s preference.
As an example, a speaker installed within one or two feet of a corner or ceiling may exhibit excessive bass response caused by the boundary effect. Cutting the Bass by 3 dB can minimize the boundary effect and enable the speaker to sound much more accurate and natural despite it’s proximity to the adjoining wall or ceiling. (For more information on the boundary effect, see The Boundary Effect on page 6.)
In contrast, a large room with lots of drapes, upholstered furniture and textured wall paper may sound dead and lifeless. Boosting the Treble 3dB or more may sub- stantially increase the ambience and pres- ence in an absorbent room.
The key to good sound is experimentation. Set the controls to the “flat” position to start with, then adjust until the desired results are achieved.
Installing a Niles MS-1 MicroSensor™
There is a 1/2" round molded "IR Sensor Knockout" on the face of the speaker baf- fle. To prevent damage to the crossover network, you must remove the knockout from the rear of the speaker. Do not attempt to remove the knockout with the speaker face up! Lay the speaker face down on a clean carpet or rug. Put the tip of a screwdriver into the center of the round "knockout" and sharply tap the screwdriver handle as necessary. Install the
your installation.
Installation of the Speaker and Grille in New or Existing Construction
15