Installation Fundamentals
Installation
Fundamentals
Running the Speaker Wire in New Construction
If you have doubts about whether you are capable of installing a Niles ceiling mount loudspeakers, consult a Niles dealer or professional installer. They have special tools, techniques, and experience to make the impossible possible. The installer can provide you with an estimate before any work is done.
Scheduling and Preparation
Plan to schedule the speaker wiring after the electrical wiring is finished. That way you can avoid wire routes which could potentially induce hum over the speaker wire. The basic rules are:
•Never run speaker wire through the same hole as an electrical cable.
•Never run speaker wire into the same J-box as electrical cable.
•Avoid running the speaker wire beside the electrical cable. Keep your speaker cable at a distance of at least 18"-22" from any electrical power cable.
Figure 7
Side-by-side wiring is unavoidable in par- ticular spots in every house, just move the speaker wire route away as soon as possi- ble. If construction forces a side by side run for more than ten feet, install metal conduit or shielded speaker wire. Low- voltage wires such as doorbells, inter- coms, telephone, security, or television cannot cause interference or hum on your speaker wires, so you can safely run all of them at the same time, through the same holes, side-by-side.
Before you drill any holes, mount the speaker brackets in the desired speaker locations and mount p-rings or open backed J-boxes where the in-wall volume controls and stereo equipment will be.
Safety First!
Wear gloves, safety goggles and head pro- tection when drilling. Avoid nails, they ruin bits and they can create injury. Pay particu- lar care when using “hole-hogs” and other powerful electric drills; the torque of the drill when suddenly stopped by a nail can break the wrist of a strong man.
Drilling
Use a bit that is large enough for the wires you plan to run. An auger bit is the pre- ferred bit for rough-in wiring. It will actu- ally pull itself through the wood, so that the drill motor, not you, does most of the work. You may be drilling a lot of holes, so this is an important consideration.
Always drill the holes in the center of the stud. If you have to notch the stud or drill the hole closer than one inch from the edge of the stud, protect the wire with a nail plate (See Figure 7).
When drilling holes in ceiling joists drill in the center of the joists and try to locate the hole near the end of the joist. DO NOT drill through a “gluelam” or any load bearing beam without the direction of your contractor.
Installation in Existing Construction
IMPORTANT: Before you cut into any wall, review the sections on running wire and speaker placement.
1.When determining the location of the speaker cutout keep in mind that the mounting dogs will extend 3/4" beyond the cutout. make sure that you do not place the edge of the cutout directly next to a ceiling joist. Locate the joists using a stud sensor or hand-knocking.
2.Once you have determined a possible position for the cutout, drill a 1/8” pilot hole just barely through the ceiling (1/2” to 5/8” deep in most homes) about an inch below the center of your proposed speaker location. BE VERY CAREFUL NOT TO DRILL THROUGH EXISTING WIRES, PIPES, OR STRUC- TURE. IF YOU FEEL ANY EXTRA RESIS- TANCE AS YOU ARE DRILLING, STOP.
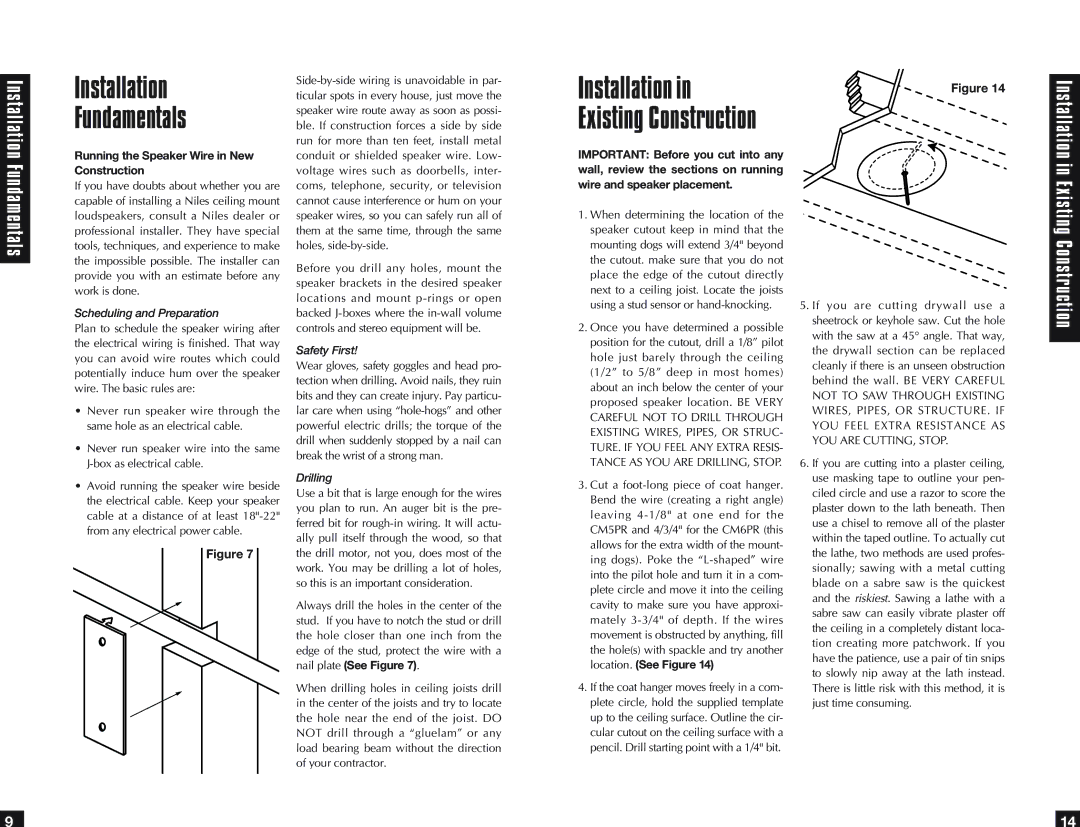
3.Cut a foot-long piece of coat hanger. Bend the wire (creating a right angle) leaving 4-1/8" at one end for the CM5PR and 4/3/4" for the CM6PR (this allows for the extra width of the mount- ing dogs). Poke the “L-shaped” wire into the pilot hole and turn it in a com- plete circle and move it into the ceiling cavity to make sure you have approxi- mately 3-3/4" of depth. If the wires movement is obstructed by anything, fill the hole(s) with spackle and try another location. (See Figure 14)
4.If the coat hanger moves freely in a com- plete circle, hold the supplied template up to the ceiling surface. Outline the cir- cular cutout on the ceiling surface with a pencil. Drill starting point with a 1/4" bit.
Figure 14
5.If you are cutting drywall use a sheetrock or keyhole saw. Cut the hole with the saw at a 45° angle. That way, the drywall section can be replaced cleanly if there is an unseen obstruction behind the wall. BE VERY CAREFUL NOT TO SAW THROUGH EXISTING WIRES, PIPES, OR STRUCTURE. IF YOU FEEL EXTRA RESISTANCE AS YOU ARE CUTTING, STOP.
6.If you are cutting into a plaster ceiling, use masking tape to outline your pen- ciled circle and use a razor to score the plaster down to the lath beneath. Then use a chisel to remove all of the plaster within the taped outline. To actually cut the lathe, two methods are used profes- sionally; sawing with a metal cutting blade on a sabre saw is the quickest and the riskiest. Sawing a lathe with a sabre saw can easily vibrate plaster off the ceiling in a completely distant loca- tion creating more patchwork. If you have the patience, use a pair of tin snips to slowly nip away at the lath instead. There is little risk with this method, it is just time consuming.
Installation in Existing Construction