Installation in New Construction
Installation in New Construction
Insulating the Wall Cavity
If feasible, fill the wall cavity with insula- tion at this point.
Mounting The New Construction Bracket
The hole saving bracket enables a faster and cleaner final installation of the speak- er. It forces the drywall installer to cut out the speaker hole for you and provides wire ties for the speaker wire, reducing the risks of accidental loss or movement of the wire. In addition, it enables you to align your speakers with other ceiling fixtures with great accuracy since you can really see exactly where the speaker will be.
To install the bracket, first attach the QuickSnap™ new construction wings to the bracket by snapping them into the sides of the bracket. The wings can be shortened by breaking them along the scored lines if the length will interfere with corner or eaves.
The wings and brackets have centering lines to simplify placement of the speakers.
Screw one side of the assembled bracket with wings to the joist using one of the supplied screws. Level the bracket. Screw the other side of the bracket/wing assem- bly to the joist. Two screws on each side make for a very secure installation. Secure the wire to the bracket using bracket’s wire tie. The drywall installers will cut the drywall to the exact size of the bracket.
(See Figure 12)
Concealing Speaker Wire for a Future Installation
Attach the speaker wire in a loop between the ceiling joists and carefully mark the exact location of the wire on a set of plans. Ask the general contractor to inform the drywall installers that the speaker wire loops are concealed for future installa- tions. (See Figure13)
Installation in Existing Construction
IMPORTANT: Before you cut into any wall, review the sections on running wire and speaker placement.
1. When determining the location of the |
speaker cutout keep in mind that the |
mounting dogs will extend 3/4" beyond |
the cutout. make sure that you do not |
place the edge of the cutout directly |
next to a ceiling joist. Locate the joists |
using a stud sensor or |
2. Once you have determined a possible |
position for the cutout, drill a 1/8” pilot |
hole just barely through the ceiling |
(1/2” to 5/8” deep in most homes) |
about an inch below the center of your |
proposed speaker location. BE VERY |
CAREFUL NOT TO DRILL THROUGH |
EXISTING WIRES, PIPES, OR STRUC- |
TURE. IF YOU FEEL ANY EXTRA RESIS- |
TANCE AS YOU ARE DRILLING, STOP. |
3. Cut a |
Bend the wire (creating a right angle) |
leaving |
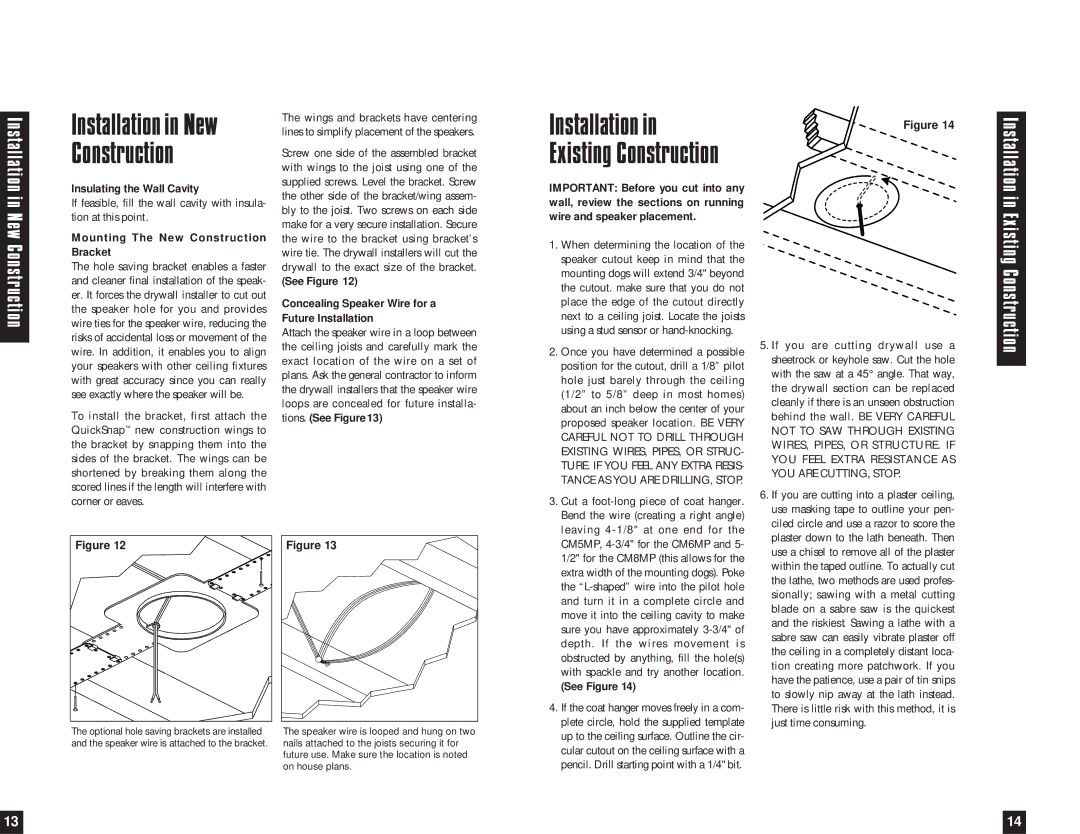
Figure 14
5. If you are cutting drywall use a |
sheetrock or keyhole saw. Cut the hole |
with the saw at a 45° angle. That way, |
the drywall section can be replaced |
cleanly if there is an unseen obstruction |
behind the wall. BE VERY CAREFUL |
NOT TO SAW THROUGH EXISTING |
WIRES, PIPES, OR STRUCTURE. IF |
YOU FEEL EXTRA RESISTANCE AS |
YOU ARE CUTTING, STOP. |
6. If you are cutting into a plaster ceiling, |
use masking tape to outline your pen- |
ciled circle and use a razor to score the |
Installation in Existing Construction
Figure 12 |
Figure 13 |
CM5MP, |
1/2" for the CM8MP (this allows for the |
extra width of the mounting dogs). Poke |
the |
and turn it in a complete circle and |
move it into the ceiling cavity to make |
sure you have approximately |
depth. If the wires movement is |
obstructed by anything, fill the hole(s) |
with spackle and try another location. |
(See Figure 14) |
4. If the coat hanger moves freely in a com- |
plete circle, hold the supplied template |
plaster down to the lath beneath. Then |
use a chisel to remove all of the plaster |
within the taped outline. To actually cut |
the lathe, two methods are used profes- |
sionally; sawing with a metal cutting |
blade on a sabre saw is the quickest |
and the riskiest. Sawing a lathe with a |
sabre saw can easily vibrate plaster off |
the ceiling in a completely distant loca- |
tion creating more patchwork. If you |
have the patience, use a pair of tin snips |
to slowly nip away at the lath instead. |
There is little risk with this method, it is |
just time consuming. |
The optional hole saving brackets are installed | The speaker wire is looped and hung on two |
and the speaker wire is attached to the bracket. | nails attached to the joists securing it for |
| future use. Make sure the location is noted |
| on house plans. |
up to the ceiling surface. Outline the cir- |
cular cutout on the ceiling surface with a |
pencil. Drill starting point with a 1/4" bit. |
13 |
| 14 |
|
|
|