Easy Installation
The MP Multipurpose series speakers
Installer Selectable Acoustic Fine Tuning (CM8MP Only)
Installation Considerations
Features and Benefits
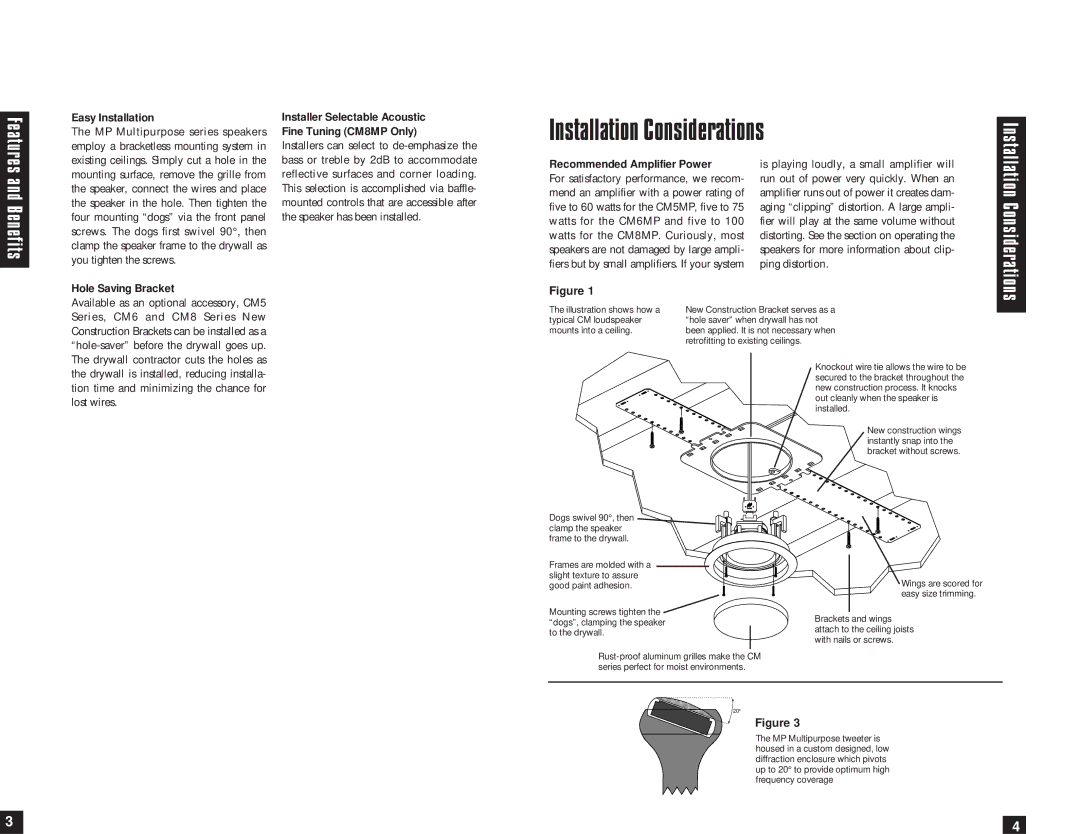
employ a bracketless mounting system in existing ceilings. Simply cut a hole in the mounting surface, remove the grille from the speaker, connect the wires and place the speaker in the hole. Then tighten the four mounting “dogs” via the front panel screws. The dogs first swivel 90°, then clamp the speaker frame to the drywall as you tighten the screws.
Hole Saving Bracket
Installers can select to
Recommended Amplifier Power
For satisfactory performance, we recom- mend an amplifier with a power rating of five to 60 watts for the CM5MP, five to 75 watts for the CM6MP and five to 100 watts for the CM8MP. Curiously, most speakers are not damaged by large ampli- fiers but by small amplifiers. If your system
Figure 1
is playing loudly, a small amplifier will run out of power very quickly. When an amplifier runs out of power it creates dam- aging “clipping” distortion. A large ampli- fier will play at the same volume without distorting. See the section on operating the speakers for more information about clip- ping distortion.
Available as an optional accessory, CM5 Series, CM6 and CM8 Series New Construction Brackets can be installed as a
The illustration shows how a typical CM loudspeaker mounts into a ceiling.
Dogs swivel 90°, then clamp the speaker frame to the drywall.
New Construction Bracket serves as a “hole saver” when drywall has not been applied. It is not necessary when retrofitting to existing ceilings.
Knockout wire tie allows the wire to be secured to the bracket throughout the new construction process. It knocks out cleanly when the speaker is installed.
New construction wings instantly snap into the bracket without screws.
Installation Considerations
Frames are molded with a slight texture to assure
good paint adhesion.
Mounting screws tighten the ![]() “dogs”, clamping the speaker
“dogs”, clamping the speaker
to the drywall.
Wings are scored for easy size trimming.
Brackets and wings attach to the ceiling joists with nails or screws.
20°
Figure 3
The MP Multipurpose tweeter is housed in a custom designed, low diffraction enclosure which pivots up to 20° to provide optimum high frequency coverage
3 | 4 |
|
