Niles Audio Speaker manual Installing the Bracket, NEW Construction Installing a Bracket

Models: Speaker

1 28
Download 28 pages 25.07 Kb
Page 16
Image 16

NEW CONSTRUCTION: INSTALLING A BRACKET

The hole-saving bracket enables a faster and cleaner final installation of the loudspeaker. It forces the drywall installer to cut out the loudspeaker hole for you and provides wire ties for the loud- speaker wire, reducing the risks of accidental loss or movement of the wire. In addition, it enables you to align your loudspeakers with other ceiling fixtures with greater accuracy, since you can see exactly where the loudspeaker will be.

INSTALLING THE BRACKET

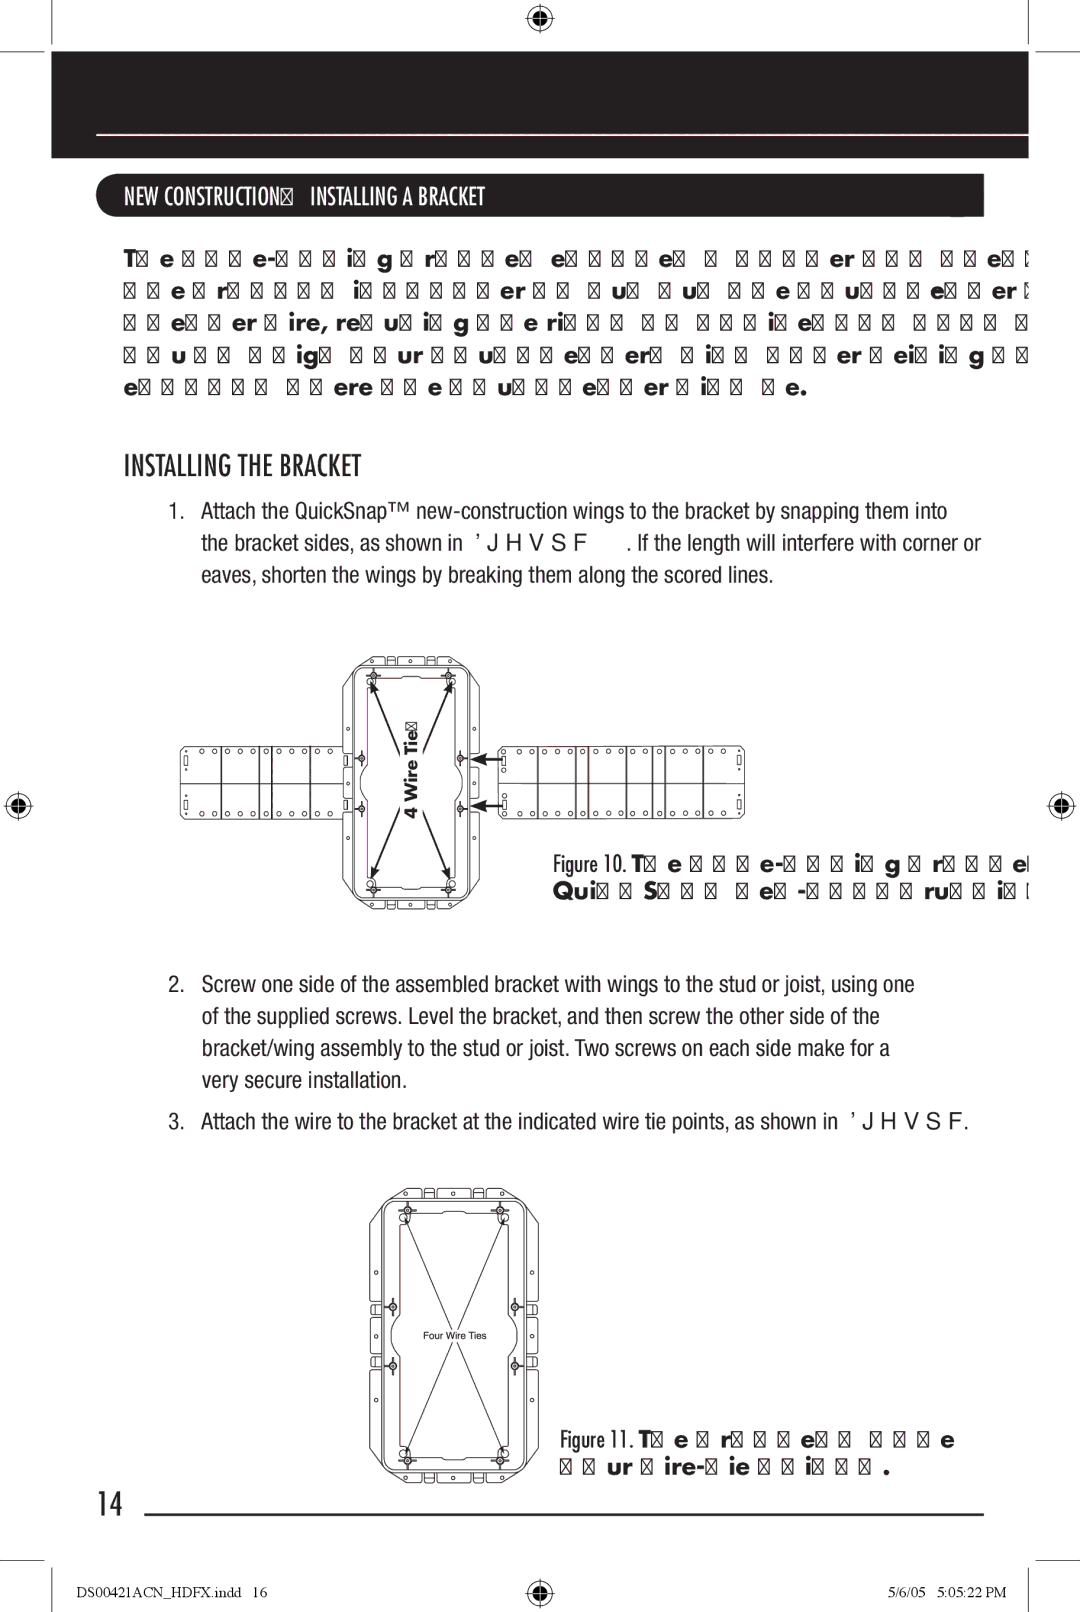
1.Attach the QuickSnap™ new-construction wings to the bracket by snapping them into the bracket sides, as shown in Figure 10. If the length will interfere with corner or eaves, shorten the wings by breaking them along the scored lines.

4 Wire Ties

Figure 10. The hole-saving brackets include

QuickSnap new-construction wings.

2.Screw one side of the assembled bracket with wings to the stud or joist, using one of the supplied screws. Level the bracket, and then screw the other side of the bracket/wing assembly to the stud or joist. Two screws on each side make for a very secure installation.

3.Attach the wire to the bracket at the indicated wire tie points, as shown in Figure 11.

Figure 11. The brackets have four wire-tie points.

14

DS00421ACN_HDFX.indd 16

5/6/05 5:05:22 PM

Page 16
Image 16
Niles Audio Speaker manual Installing the Bracket, NEW Construction Installing a Bracket