
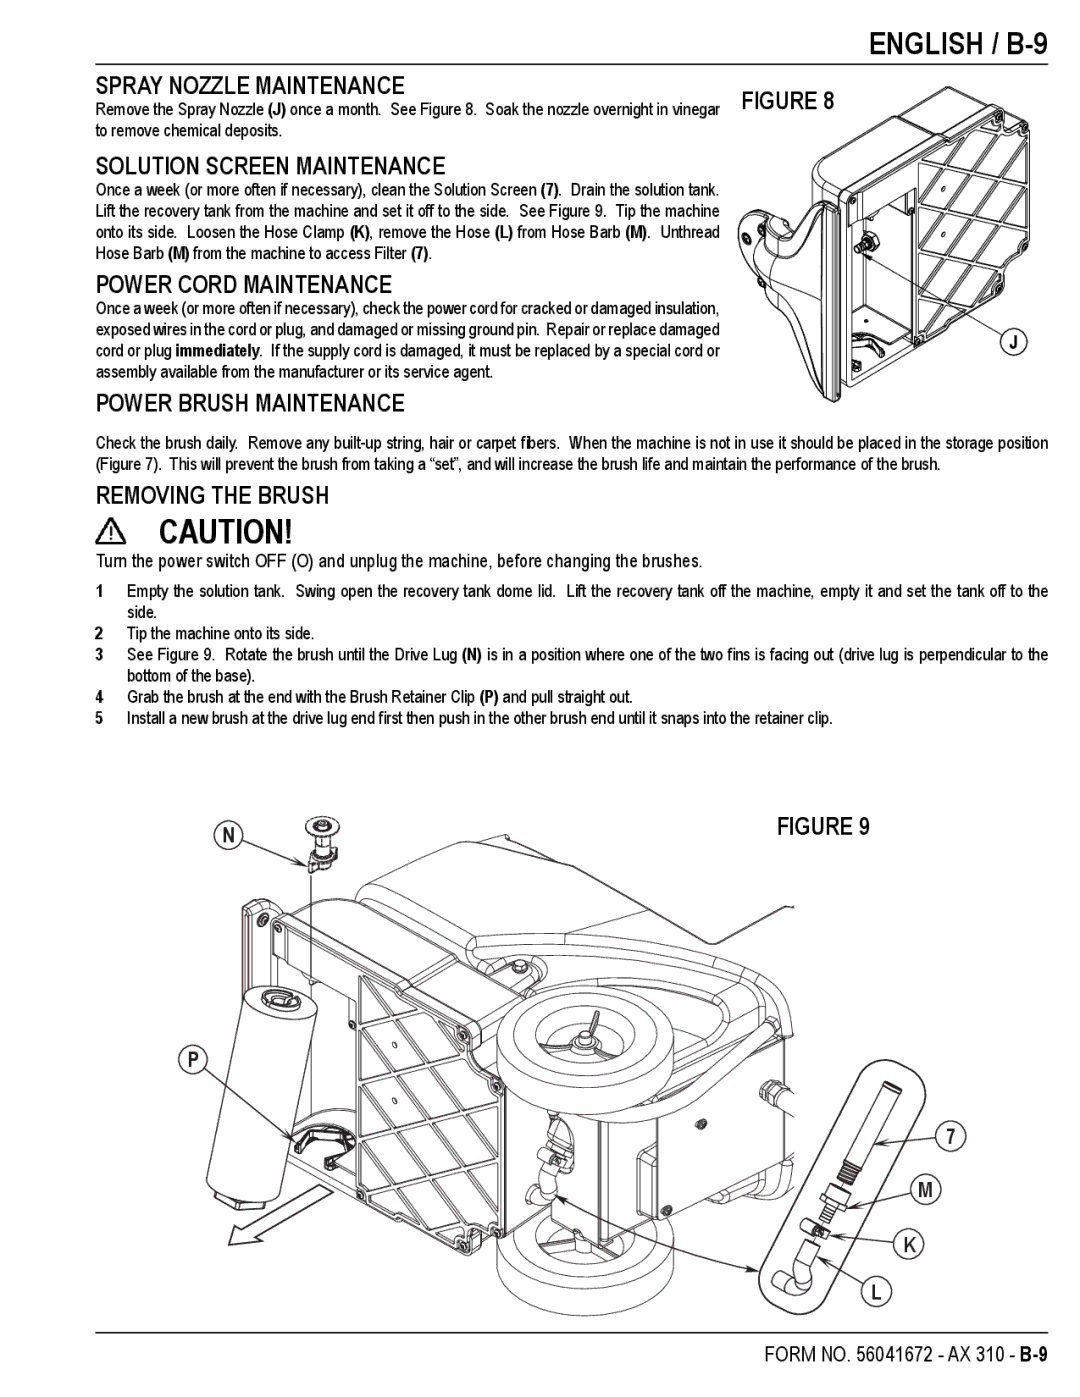
AX 310 specifications
The Nilfisk-Advance America AX 310 is a powerful and versatile floor cleaning machine designed for commercial applications where durability, efficiency, and ease of use are paramount. Combining advanced technology with user-friendly features, the AX 310 enables operators to achieve optimal cleaning results while minimizing downtime and maintenance costs.One of the standout features of the AX 310 is its compact design, which makes it ideal for cleaning tight spaces, such as retail stores, hospitals, and schools. Despite its smaller form factor, the machine is equipped with a significant cleaning path, allowing for thorough cleaning in a shorter amount of time. The powerful brush motor ensures efficient dirt and debris removal, while the robust suction system guarantees effective water recovery.
The AX 310 is powered by an efficient battery system, providing the flexibility for cord-free operation. This is particularly beneficial in large areas or environments where trip hazards from power cords could pose safety risks. The machine offers a runtime that caters to even the most demanding cleaning schedules, enabling users to cover vast areas without interruptions.
Incorporating advanced technologies, the AX 310 features an intuitive control panel that simplifies operation. Users can easily adjust settings and monitor battery levels at a glance, ensuring that cleaning tasks can be completed efficiently. The machine also offers various cleaning modes tailored for different surfaces and cleaning requirements, making it highly adaptable for different applications.
Another notable characteristic of the AX 310 is its eco-friendly design. The machine operates quietly, reducing noise pollution and allowing for use in noise-sensitive environments. Additionally, its low water consumption levels contribute to sustainability efforts, making it an excellent choice for organizations aiming to minimize their environmental impact.
Built with high-quality materials and components, the AX 310 is designed for durability. Its robust construction means that it can withstand the rigors of daily commercial use, providing a long lifespan with minimal maintenance. This reliability not only enhances productivity but also ensures that operators can focus on their cleaning tasks without worrying about frequent breakdowns.
In conclusion, the Nilfisk-Advance America AX 310 combines compact design, efficient cleaning capabilities, and advanced technology to deliver a superior cleaning solution for commercial environments. Its user-friendly features and eco-conscious design make it an ideal choice for businesses looking to improve their cleaning operations while adhering to sustainability practices.