Resistance is felt only as you push your feet back- ward, not as you pull forward. Always keep the weight of your body on the ski you are pushing backward. Avoid leaning forward. Keep your weight over your feet, your shoulders back and your head
up. Find a focal point; this will help you keep your head up and your back straight.
range of motion for your stride. Increase the leg resistance if you slide away from the hip pad. As you exercise, you may want to increase or decrease your stride depending on your comfort level. Once this motion feels comfortable, move on.
ADD ARM SWINGS TO THE LEG MOTION
1. Continue your leg motion. Keep one hand on the handlebar or the hip pad for balance. Swing the other arm at your side; when your left leg is for- ward, your left arm should swing back. Repeat this same process with your other hand.
2. Try swinging both arms when you are comfortable
swinging each arm separately. Swing both arms
naturally. A full arm swing motion allows your hands to extend just beyond your hips. Practice this
motion until it feels comfortable.
COMBINE THE ARM AND LEG MOTIONS
1. Set the arm resistance to a comfortable level. Grasp the handgrips. Continue your leg motion.
2. Pull the handgrips through your natural arm swing. When your right leg is forward, your right hand should be back and when your left leg is forward, your left hand should be back. Practice this motion until it feels comfortable to you.
Below are some tips to help you coordinate the cross- country skiing motion:
1. If coordinating the arm and leg motion is difficult, concentrate on the leg motion only. Incorporate the arm motion once you feel comfortable with the leg motion. Do not bring your feet in front of your body until you are comfortable with the motion.
2. When you incorporate the arm motion, try to swing your arms naturally. Allow one arm to pull the other forward. Keep the arm cord taught.
3. Keep your waist in contact with the hip pad at all times to hold back your forward motion. If you feel like you are sliding away from the hip pad, increase the leg resistance.
HOW TO U SE THE S KI E XERCISER
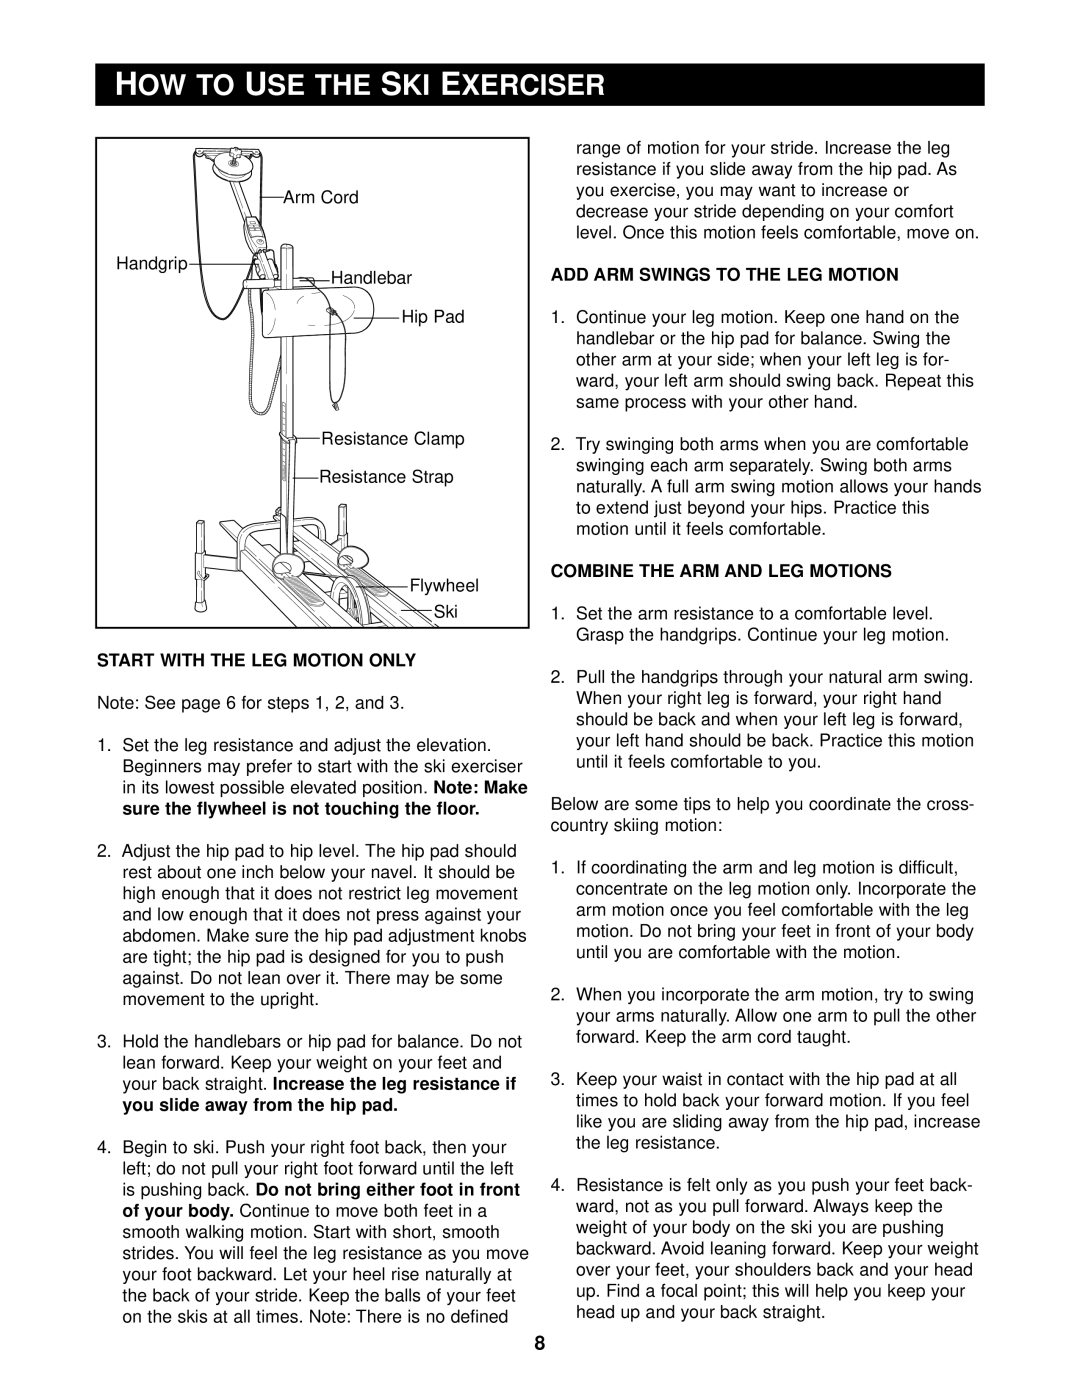
Arm Cord
Handgrip

 Handlebar
Hip Pad

 Resistance Clamp

 Resistance Strap
 Flywheel
Ski
START WITH THE LEG MOTION ONLY
Note: See page 6 for steps 1, 2, and 3.
1.Set the leg resistance and adjust the elevation. Beginners may prefer to start with the ski exerciser in its lowest possible elevated position. Note: Make sure the flywheel is not touching the floor.
2.Adjust the hip pad to hip level. The hip pad should rest about one inch below your navel. It should be high enough that it does not restrict leg movement and low enough that it does not press against your abdomen. Make sure the hip pad adjustment knobs are tight; the hip pad is designed for you to push against. Do not lean over it. There may be some movement to the upright.
3.Hold the handlebars or hip pad for balance. Do not lean forward. Keep your weight on your feet and your back straight.Increase the leg resistance if
you slide away from the hip pad.
4.Begin to ski. Push your right foot back, then your
left; do not pull your right foot forward until the left
is pushing back. Do not bring either foot in front4.
of your body. Continue to move both feet in a smooth walking motion. Start with short, smooth strides. You will feel the leg resistance as you move your foot backward. Let your heel rise naturally at the back of your stride. Keep the balls of your feet on the skis at all times. Note: There is no defined

![]()
![]() Handlebar
Handlebar![]()
![]() Resistance Clamp
Resistance Clamp![]()
![]() Resistance Strap
Resistance Strap![]() Flywheel
Flywheel