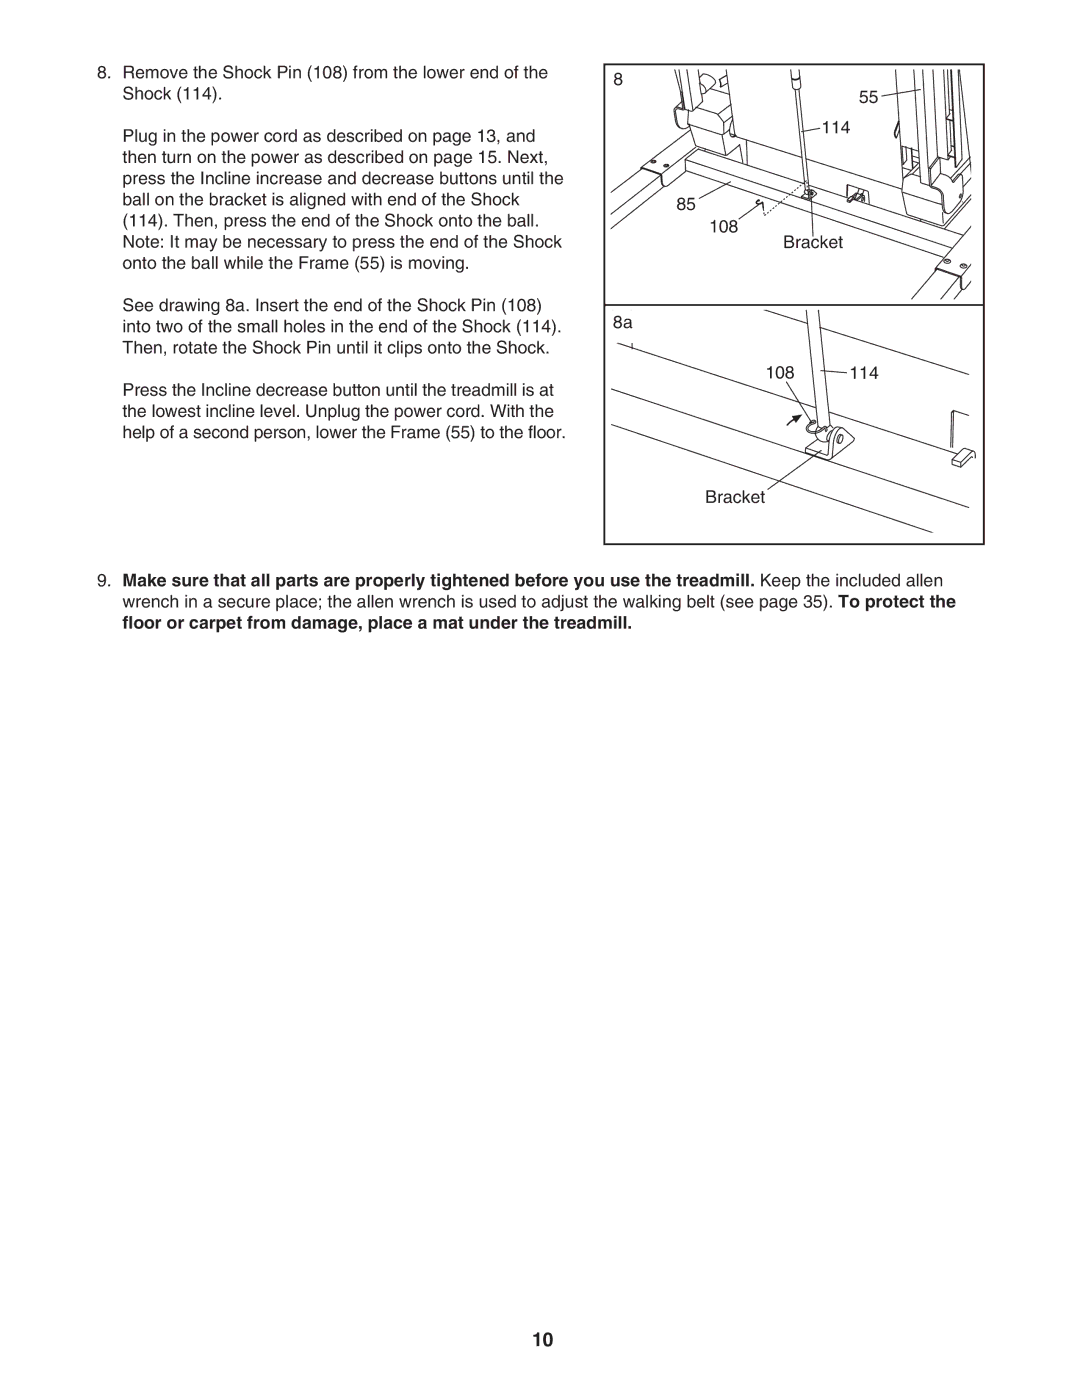
8. Remove the Shock Pin (108) from the lower end of the | 8 |
| |
Shock (114). | 55 | ||
| |||
Plug in the power cord as described on page 13, and |
| 114 | |
|
| ||
then turn on the power as described on page 15. Next, |
|
| |
press the Incline increase and decrease buttons until the |
|
| |
ball on the bracket is aligned with end of the Shock | 85 |
| |
(114). Then, press the end of the Shock onto the ball. | 108 |
| |
Note: It may be necessary to press the end of the Shock |
| ||
Bracket | |||
onto the ball while the Frame (55) is moving. |
|
| |
See drawing 8a. Insert the end of the Shock Pin (108) | 8a |
| |
into two of the small holes in the end of the Shock (114). |
| ||
Then, rotate the Shock Pin until it clips onto the Shock. |
|
| |
Press the Incline decrease button until the treadmill is at | 108 | 114 | |
|
| ||
the lowest incline level. Unplug the power cord. With the |
|
| |
help of a second person, lower the Frame (55) to the floor. |
|
| |
| Bracket |
| |
9.Make sure that all parts are properly tightened before you use the treadmill. Keep the included allen wrench in a secure place; the allen wrench is used to adjust the walking belt (see page 35). To protect the floor or carpet from damage, place a mat under the treadmill.
10
