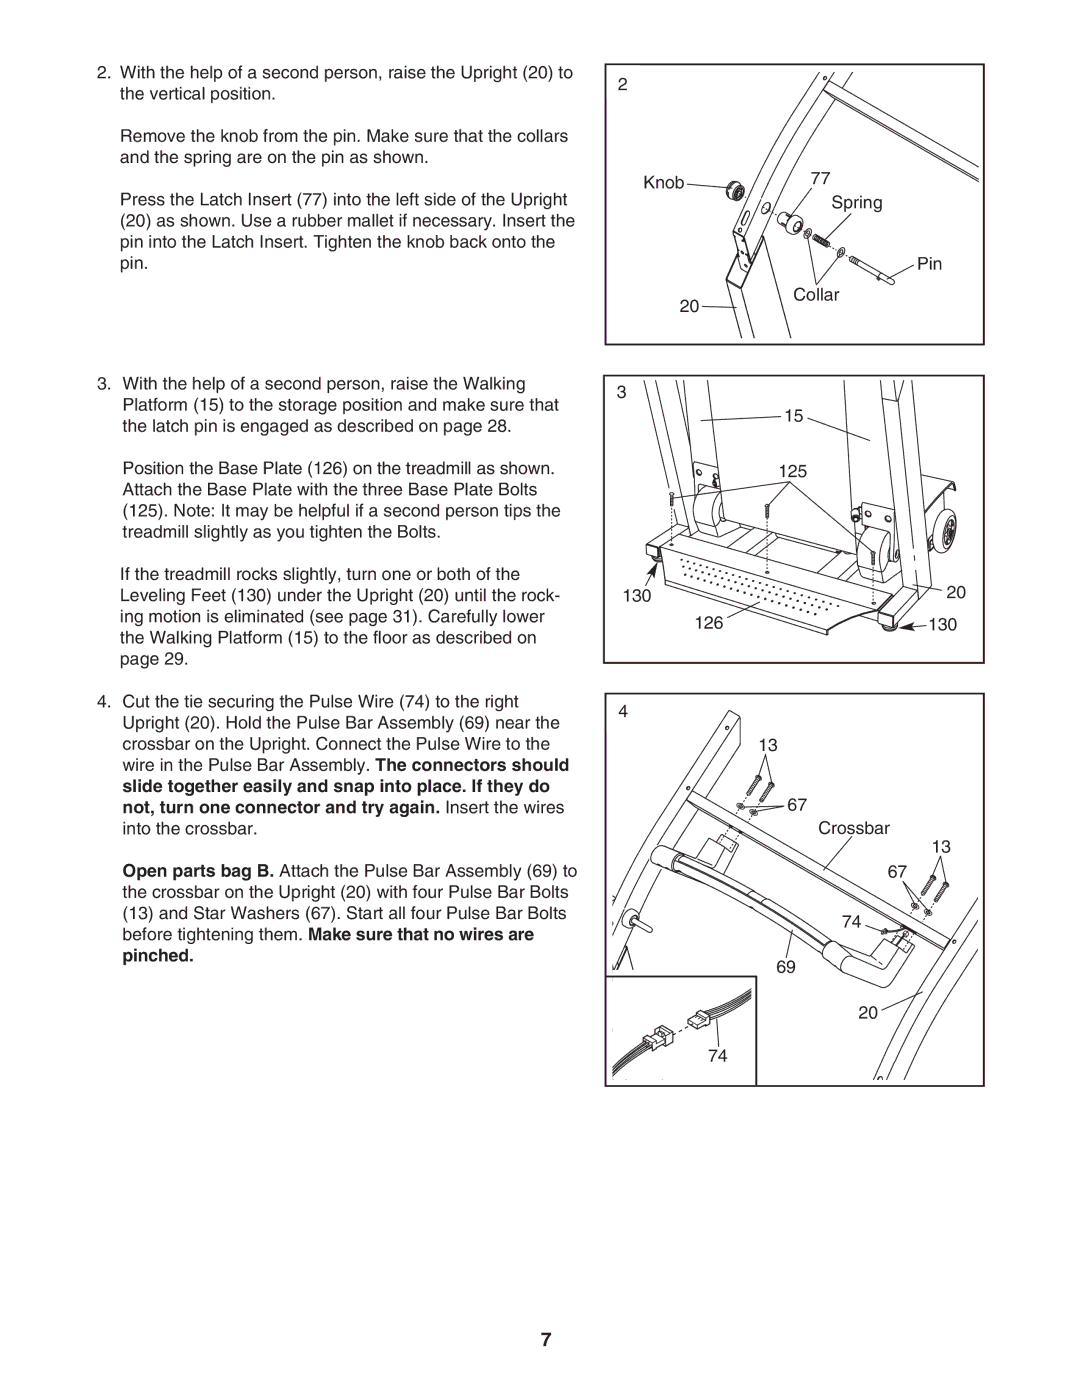
2.With the help of a second person, raise the Upright (20) to the vertical position.
Remove the knob from the pin. Make sure that the collars and the spring are on the pin as shown.
Press the Latch Insert (77) into the left side of the Upright
(20)as shown. Use a rubber mallet if necessary. Insert the pin into the Latch Insert. Tighten the knob back onto the pin.
3.With the help of a second person, raise the Walking Platform (15) to the storage position and make sure that the latch pin is engaged as described on page 28.
Position the Base Plate (126) on the treadmill as shown. Attach the Base Plate with the three Base Plate Bolts (125). Note: It may be helpful if a second person tips the treadmill slightly as you tighten the Bolts.
If the treadmill rocks slightly, turn one or both of the Leveling Feet (130) under the Upright (20) until the rock- ing motion is eliminated (see page 31). Carefully lower the Walking Platform (15) to the floor as described on page 29.
4.Cut the tie securing the Pulse Wire (74) to the right Upright (20). Hold the Pulse Bar Assembly (69) near the crossbar on the Upright. Connect the Pulse Wire to the wire in the Pulse Bar Assembly. The connectors should slide together easily and snap into place. If they do not, turn one connector and try again. Insert the wires into the crossbar.
Open parts bag B. Attach the Pulse Bar Assembly (69) to the crossbar on the Upright (20) with four Pulse Bar Bolts (13) and Star Washers (67). Start all four Pulse Bar Bolts before tightening them. Make sure that no wires are pinched.
2 |
|
Knob | 77 |
| Spring |
| Pin |
20 | Collar |
| |
3 |
|
| 15 |
| 125 |
130 | 20 |
126 | 130 |
4 |
|
| 13 |
| 67 |
| Crossbar |
| 13 |
| 67 |
| 74 |
| 69 |
| 20 |
74 |
|
7