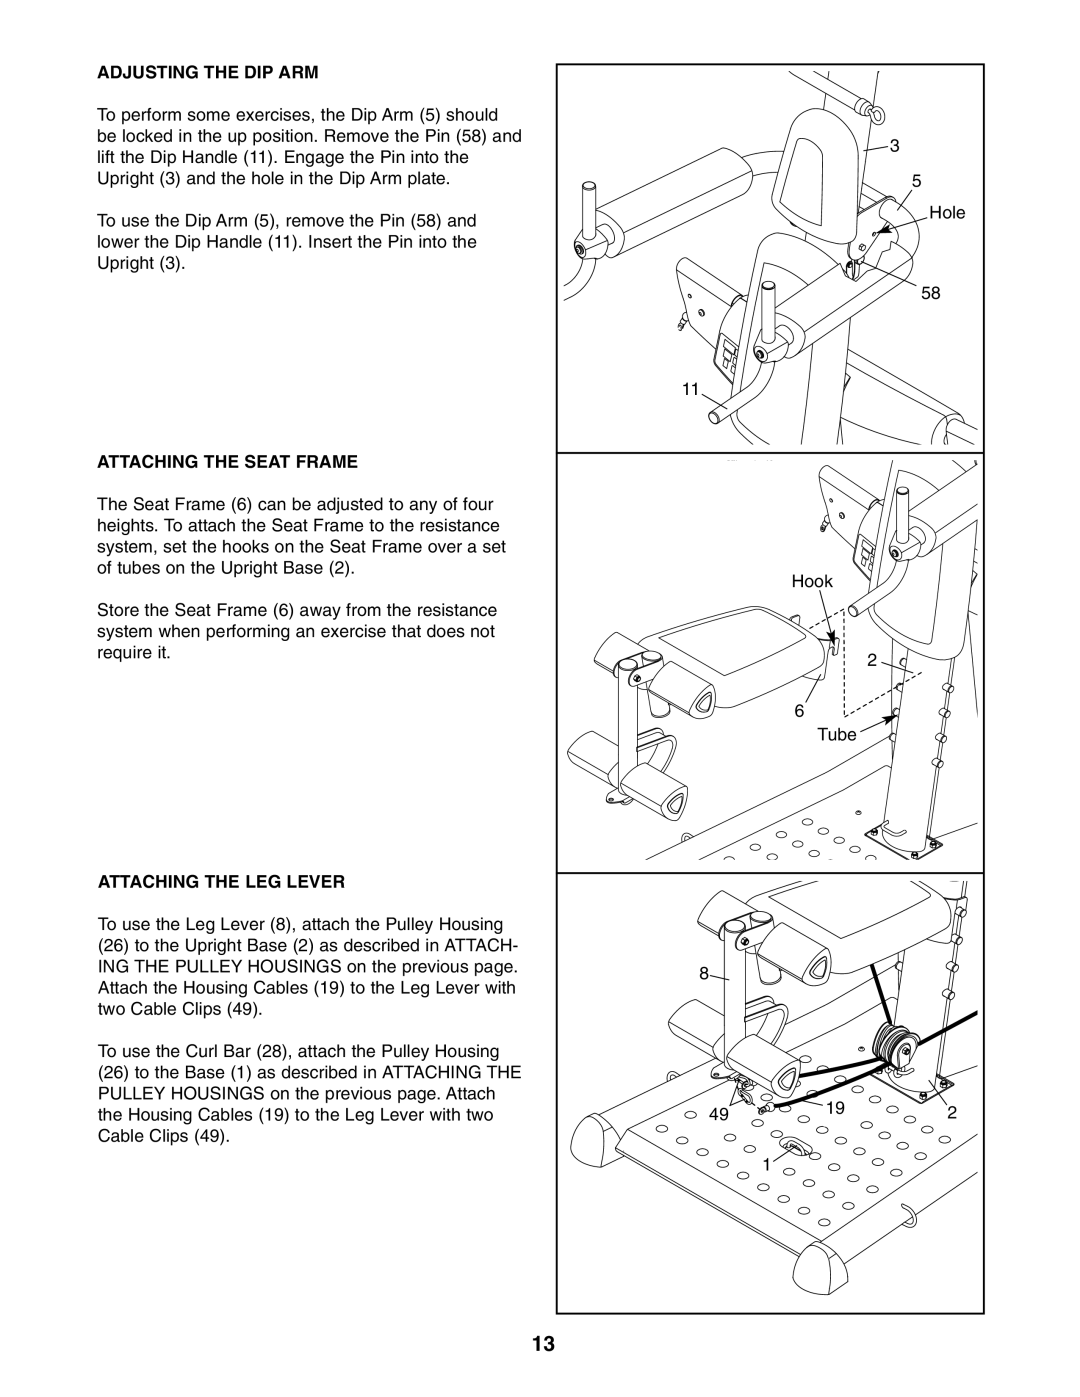
ADJUSTING THE DIP ARM
To perform some exercises, the Dip Arm (5) should be locked in the up position. Remove the Pin (58) and lift the Dip Handle (11). Engage the Pin into the Upright (3) and the hole in the Dip Arm plate.
To use the Dip Arm (5), remove the Pin (58) and lower the Dip Handle (11). Insert the Pin into the Upright (3).
ATTACHING THE SEAT FRAME
The Seat Frame (6) can be adjusted to any of four heights. To attach the Seat Frame to the resistance system, set the hooks on the Seat Frame over a set of tubes on the Upright Base (2).
Store the Seat Frame (6) away from the resistance system when performing an exercise that does not require it.
ATTACHING THE LEG LEVER
To use the Leg Lever (8), attach the Pulley Housing
(26)to the Upright Base (2) as described in ATTACH- ING THE PULLEY HOUSINGS on the previous page. Attach the Housing Cables (19) to the Leg Lever with two Cable Clips (49).
To use the Curl Bar (28), attach the Pulley Housing
(26)to the Base (1) as described in ATTACHING THE PULLEY HOUSINGS on the previous page. Attach the Housing Cables (19) to the Leg Lever with two Cable Clips (49).
|
| 3 |
|
| 5 |
|
| Hole |
|
| 58 |
11 |
|
|
| Hook |
|
|
| 2 |
| 6 |
|
| Tube |
|
8 |
|
|
49 | 19 | 2 |
| 1 |
|
13
