HOW TO USE THE MANUAL MODE
1 | Plug in the power cord. |
|
| |
| Follow the instructions on page 7 to plug in the |
|
| |
| power cord. When the power cord is plugged in, the |
|
| |
| displays on the console will flash once. (Note: If the |
|
| |
| key is in the console when the power cord is |
|
| |
| plugged in, the letters “PO” will |
|
| |
| flash in the SPEED display. If |
|
|
|
|
|
|
| |
| this occurs, remove the key.) |
|
|
|
| Next, press the on/off switch |
| “On” |
|
| on the front of the treadmill to |
|
|
|
|
|
|
| |
| the “on” position. |
|
|
|
2 | Insert the key fully into the console. |
|
| ||
| Stand on the foot rails of |
|
|
| |
|
|
|
|
| |
|
|
|
| ||
| the treadmill. Locate the |
|
|
| |
| clip attached to the key |
|
|
| |
| and slide it onto your |
|
|
|
|
|
|
|
|
| |
|
|
|
|
| |
| waistband. Next, insert |
|
|
| |
|
|
|
| ||
| the key fully into the con- |
|
| ||
| sole. After a moment, the displays will light. Note: |
|
| ||
| When you are familiar with the console, you may go |
|
| ||
| directly to step 4 if desired. The first time you use |
|
| ||
| the console, please follow all steps. |
|
| ||
3 Select the MANUAL mode.
When the key is
inserted, the MANUAL mode will be selected. If
a different program has been selected, press
the PROGRAM SELECT
button repeatedly until a
4 | Press the START/ENTER button or the SPEED | ||
“+” button to start the walking belt. | |||
| |||
| After the button is pressed, there will be a brief | ||
| pause; the walking belt will then begin to move at | ||
| 1.0 mph. Hold the handrails and begin walking. | ||
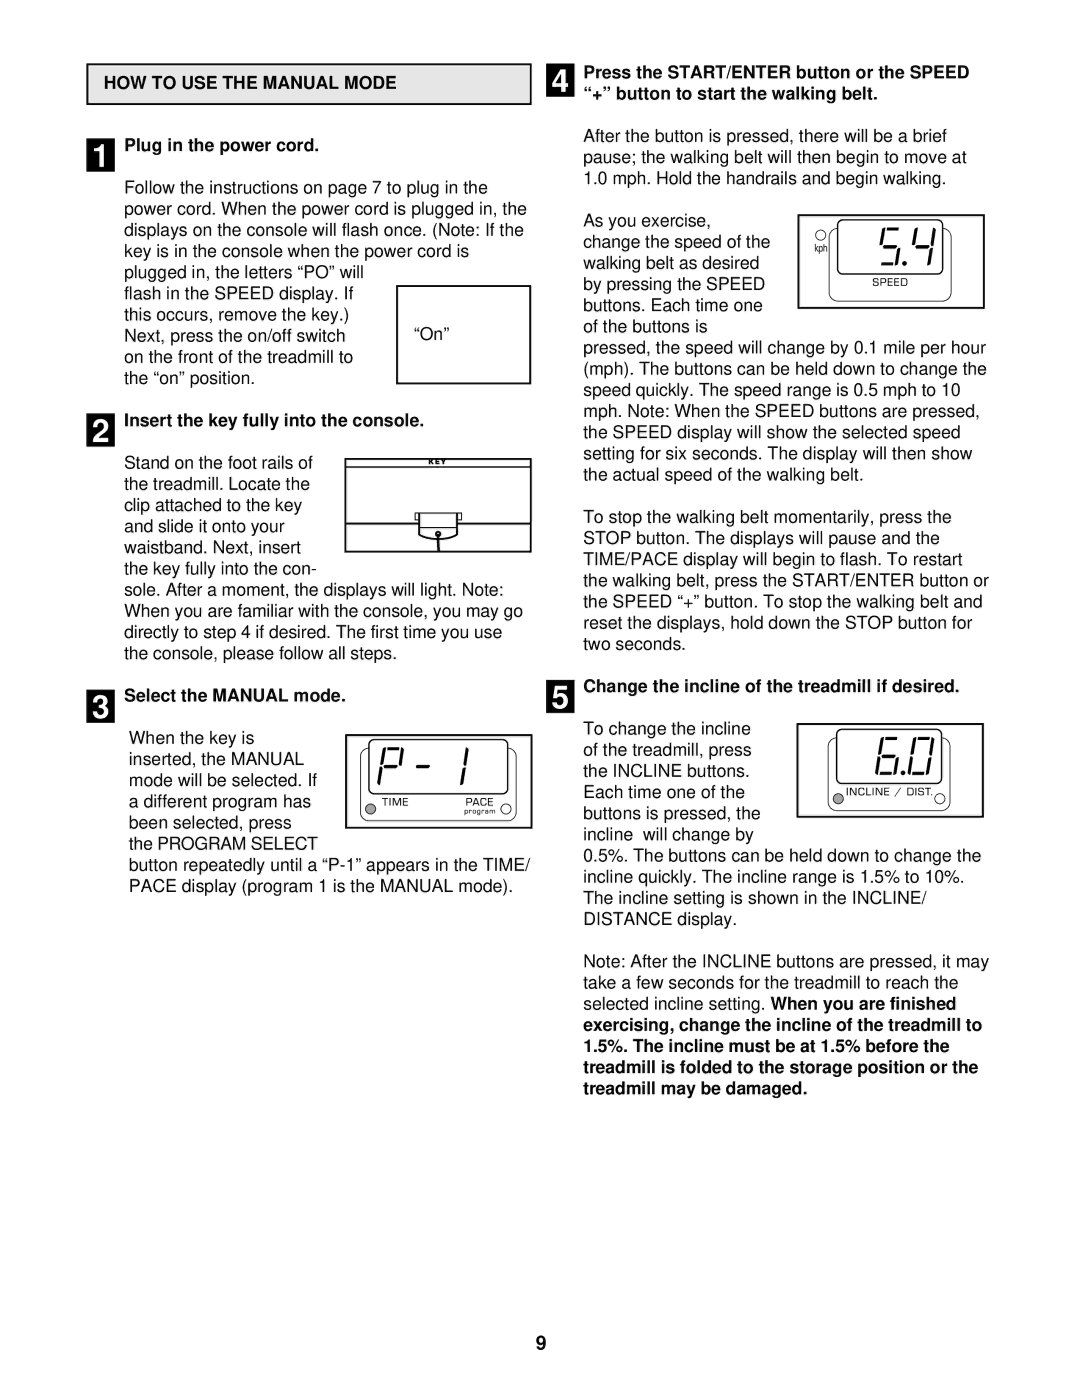
| As you exercise, |
| |
|
| ||
| change the speed of the |
| |
| walking belt as desired |
| |
| by pressing the SPEED |
| |
| buttons. Each time one |
| |
|
| ||
| of the buttons is | ||
| pressed, the speed will change by 0.1 mile per hour | ||
| (mph). The buttons can be held down to change the | ||
| speed quickly. The speed range is 0.5 mph to 10 | ||
| mph. Note: When the SPEED buttons are pressed, | ||
| the SPEED display will show the selected speed | ||
| setting for six seconds. The display will then show | ||
| the actual speed of the walking belt. | ||
| To stop the walking belt momentarily, press the | ||
| STOP button. The displays will pause and the | ||
| TIME/PACE display will begin to flash. To restart | ||
| the walking belt, press the START/ENTER button or | ||
| the SPEED “+” button. To stop the walking belt and | ||
| reset the displays, hold down the STOP button for | ||
| two seconds. | ||
5 | Change the incline of the treadmill if desired. | |||||
| To change the incline |
|
|
|
|
|
|
|
|
|
|
| |
| of the treadmill, press |
|
|
|
|
|
| the INCLINE buttons. |
|
|
|
|
|
| Each time one of the |
|
|
|
|
|
|
|
|
|
|
| |
|
|
|
|
|
| |
| buttons is pressed, the |
|
|
|
|
|
|
|
|
|
|
| |
| incline will change by |
|
|
|
|
|
| 0.5%. The buttons can be held down to change the | |||||
| incline quickly. The incline range is 1.5% to 10%. | |||||
| The incline setting is shown in the INCLINE/ | |||||
| DISTANCE display. |
|
|
|
|
|
| Note: After the INCLINE buttons are pressed, it may | |||||
| take a few seconds for the treadmill to reach the | |||||
| selected incline setting. | When you are finished | ||||
exercising, change the incline of the treadmill to 1.5%. The incline must be at 1.5% before the treadmill is folded to the storage position or the treadmill may be damaged.
9