4 Maintenance
Your depth sounder is designed for years of trouble free operation assuming proper installation and care are provided. Following the operation and installation guidelines in this manual should ensure optimum performance of the instrument. In the unlikely event that the instrument shall fail to perform or shall need servicing, contact the dealer whom you purchased your Explorer D210 from.
5 Installation
Instrument Installation
The instrument can be easily installed in different types of instrument panels.
1.Select a suitable location for the instrument. When selecting the location for mounting, the following are recommended:
•Controls of the instrument must be accessible to the user.
•Electrical connections must be routed to the boat system as directly as possible, minimising the length of cable where practical.
•Location should provide as much protection from the elements as possible.
•The panel for mounting the instrument should be 3 mm to 19 mm (1/8 to 3/4 inch) thick.
•The space behind the instrument panel must have a depth of at least 95 mm (3.75 inches).
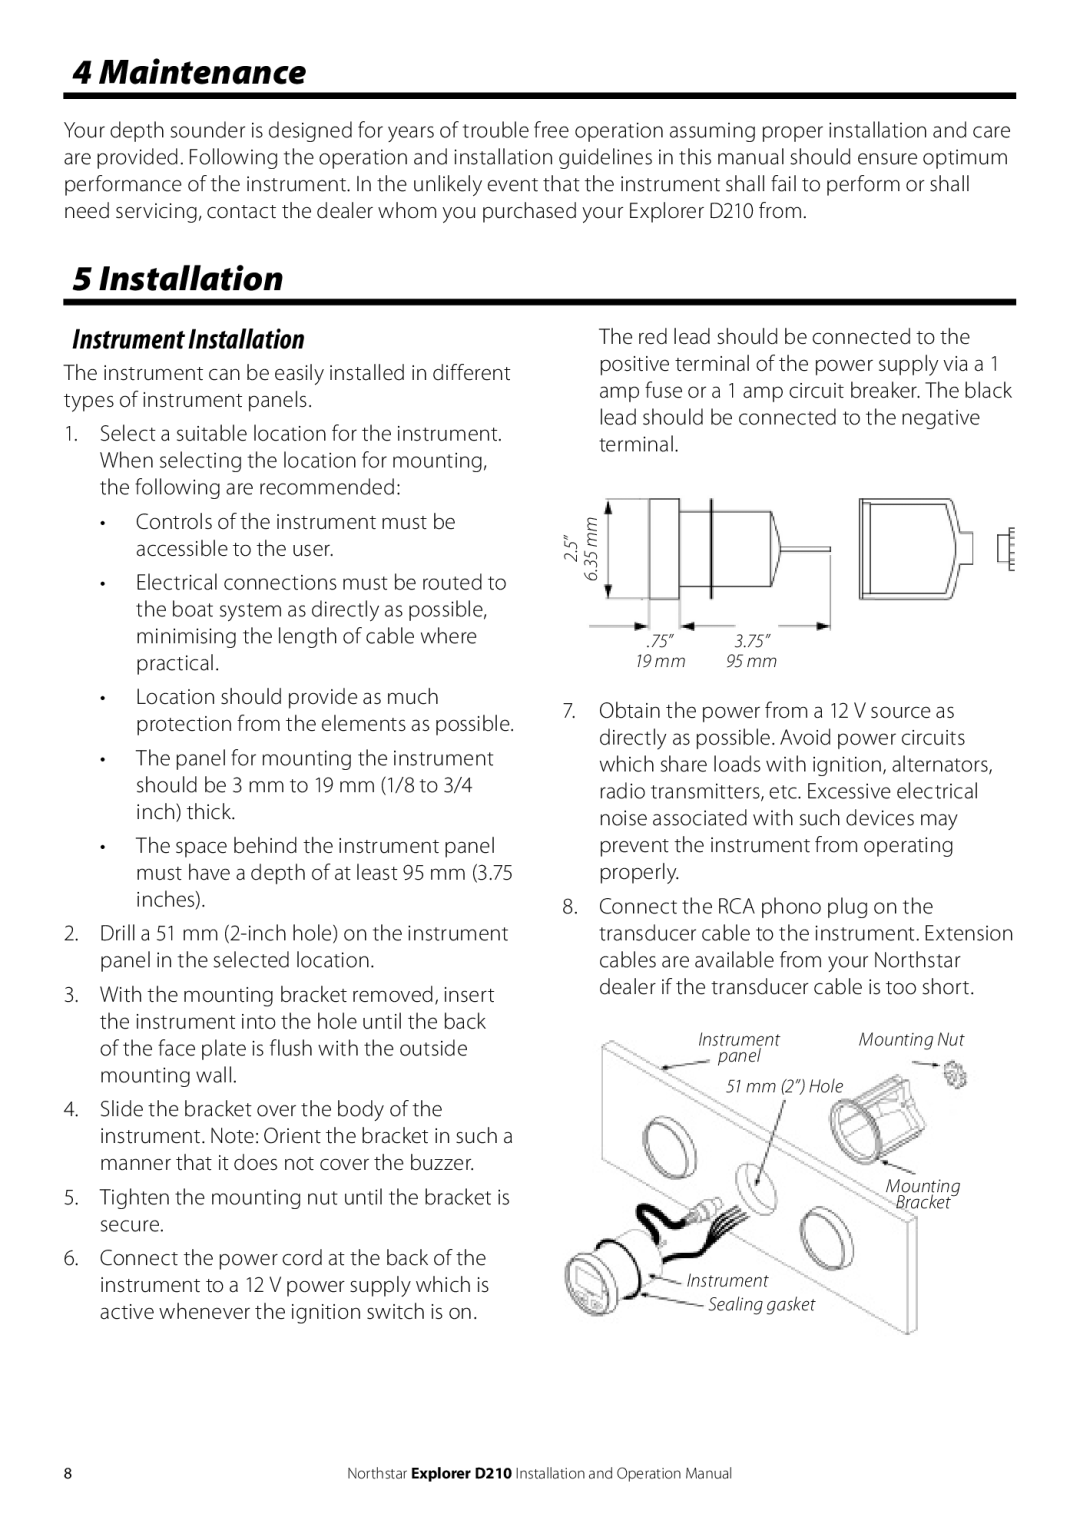
2.Drill a 51 mm
3.With the mounting bracket removed, insert the instrument into the hole until the back of the face plate is flush with the outside mounting wall.
4.Slide the bracket over the body of the instrument. Note: Orient the bracket in such a manner that it does not cover the buzzer.
5.Tighten the mounting nut until the bracket is secure.
6.Connect the power cord at the back of the instrument to a 12 V power supply which is active whenever the ignition switch is on.
The red lead should be connected to the positive terminal of the power supply via a 1 amp fuse or a 1 amp circuit breaker. The black lead should be connected to the negative terminal.
2.5” 6.35 mm
.75” | 3.75” |
19 mm | 95 mm |
7.Obtain the power from a 12 V source as directly as possible. Avoid power circuits which share loads with ignition, alternators, radio transmitters, etc. Excessive electrical noise associated with such devices may prevent the instrument from operating properly.
8.Connect the RCA phono plug on the transducer cable to the instrument. Extension cables are available from your Northstar dealer if the transducer cable is too short.
Instrument | Mounting Nut |
panel |
|
51 mm (2”) Hole |
|
| Mounting |
| Bracket |
Instrument |
|
Sealing gasket |
|
8 | Northstar Explorer D210 Installation and Operation Manual |