ILF360, ILF530 specifications
The NuTone ILF530 and ILF360 are part of the innovative line of ventilation and air quality solutions offered by NuTone, a trusted name in home improvement products. These units are designed to enhance the comfort and livability of homes while ensuring a clean and healthy indoor environment.The NuTone ILF530 is a high-performance inline fan that boasts a powerful motor capable of delivering impressive airflow. This fan is perfect for larger spaces or areas where traditional bathroom exhaust fans may struggle to keep up. One of its standout features is its whisper-quiet operation, which allows it to effectively ventilate rooms without intrusive noise. The ILF530 is also equipped with a built-in damper to prevent backdraft and ensure optimal air flow efficiency.
On the other hand, the NuTone ILF360 is a slightly smaller, yet highly efficient model designed for moderate-sized areas. Similar to the ILF530, it focuses on delivering a quiet operation while maintaining high airflow performance. It also includes a robust motor and a durable design, making it suitable for both residential and commercial applications. Its compact size makes it easy to install in tight spaces or within existing ductwork.
Both models leverage advanced technology for enhanced performance. The NuTone ILF series incorporates energy-efficient designs that adhere to modern energy standards, helping homeowners reduce their energy consumption while still enjoying superior ventilation. These fans feature durable construction materials, ensuring longevity and reliability over time.
A common characteristic of the ILF530 and ILF360 is their versatility. They can be utilized for various applications, including bathrooms, kitchens, laundry rooms, and attics. This versatility makes them essential for any comprehensive ventilation system, as they help to manage moisture, eliminate odors, and promote overall air quality.
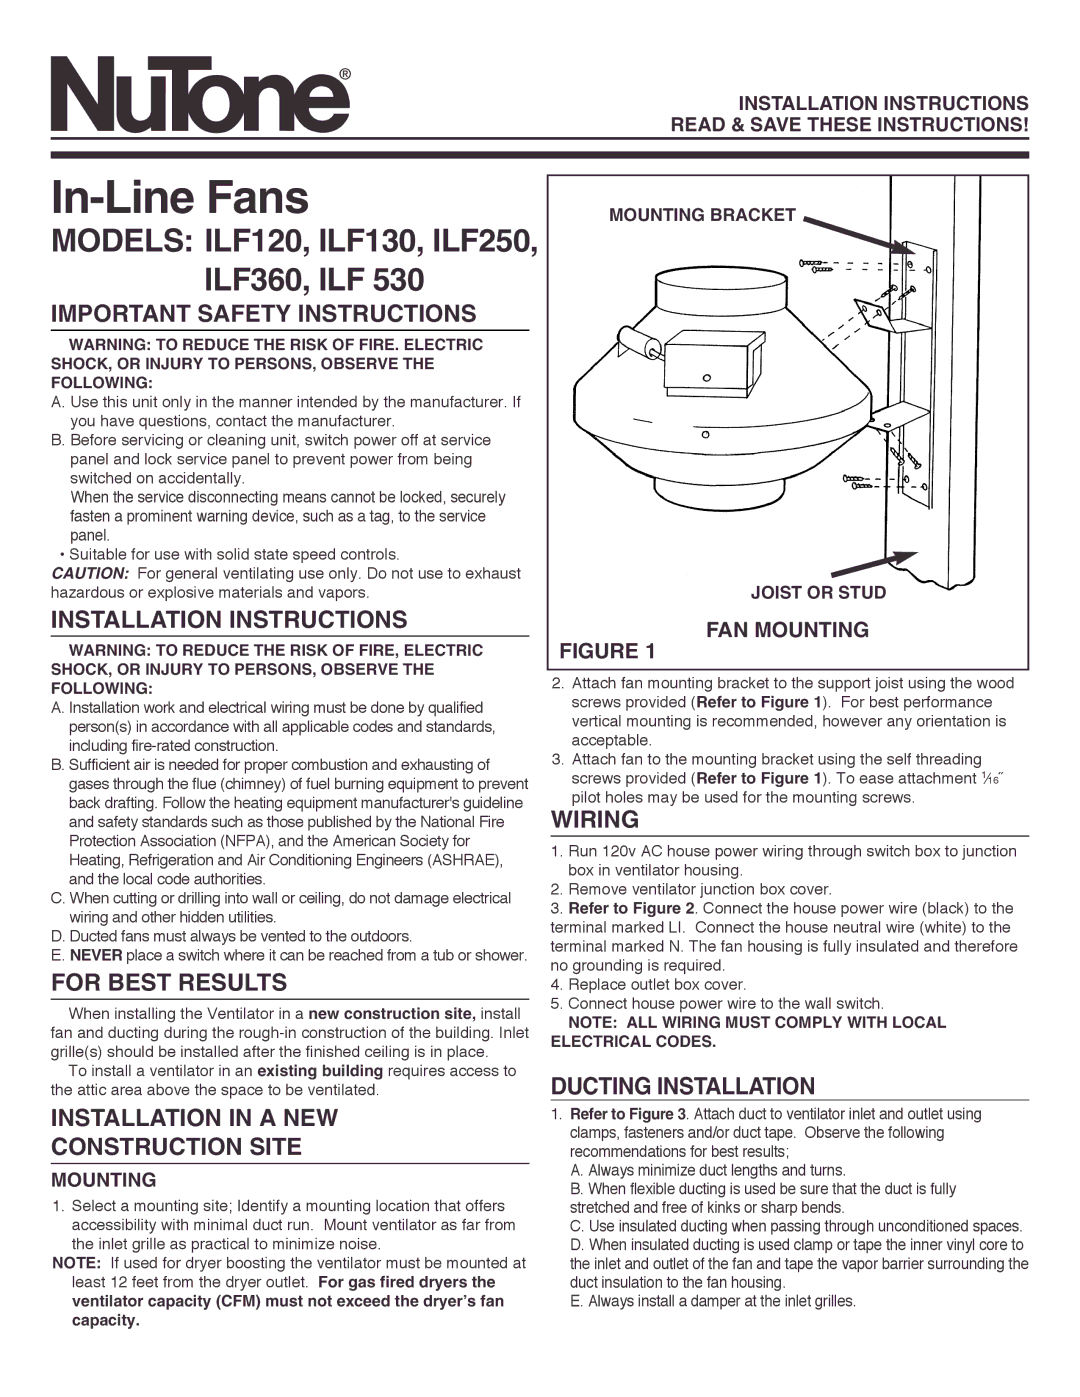
Installation of both units is straightforward, with clear guidelines and mounting systems that facilitate easy setup. Additionally, both fans can be integrated into existing HVAC systems, offering flexibility for homeowners looking to upgrade their ventilation without a complete overhaul.
In summary, the NuTone ILF530 and ILF360 represent cutting-edge solutions in the realm of home ventilation. Their combination of powerful airflow, whisper-quiet operation, energy efficiency, and versatile applications make them valuable assets for maintaining a fresh, comfortable, and healthy indoor environment. These fans highlight NuTone's commitment to quality and effectiveness in enhancing indoor air quality for homes and businesses alike.