QTXEN, QTXN, QTRN, QTREN specifications
The NuTone range of ventilation fans, including models QTXEN, QTREN, QTXN, and QTRN, showcases exceptional performance and efficiency for residential and commercial spaces. These models are widely recognized for their advanced features designed to enhance indoor air quality while minimizing noise levels.One of the standout characteristics of the NuTone QTXEN and QTREN models is their ultra-quiet operation. Engineered with powerful motors and sound-absorbing materials, these fans operate at an impressive noise level of just 0.3 sones. This feature makes them ideal for use in bathrooms, kitchens, and living spaces where tranquility is desired.
In terms of efficiency, the NuTone fans are equipped with Energy Star-certified motors that consume less energy without compromising on performance. This not only contributes to lower energy bills but also demonstrates a commitment to environmentally friendly designs. The models are designed to move a significant amount of air, delivering CFM (cubic feet per minute) ratings that efficiently mitigate moisture and odors.
The QTXN and QTRN fans incorporate innovative technologies such as the Adjustable Airflow System, which allows users to customize the air exchange rate based on personal preferences and room requirements. This adaptability is a significant plus for varied spaces, allowing for optimal ventilation.
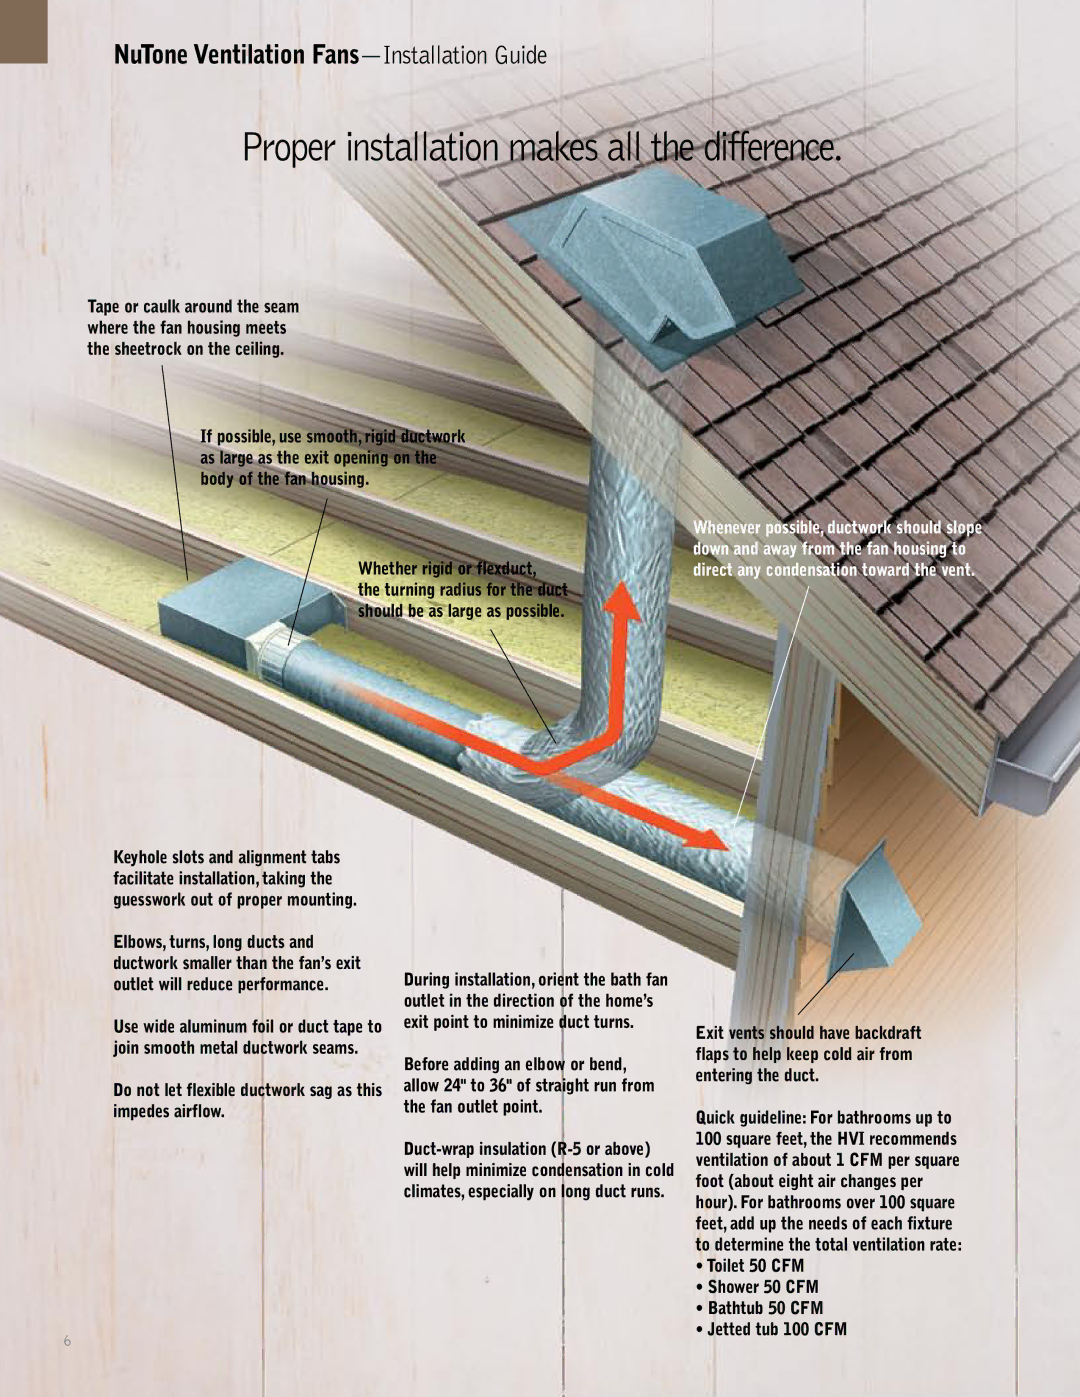
Installation is straightforward with the IntelliSense Mounting System provided in these models. This user-friendly mechanism accommodates different ceiling types and sizes, ensuring that even DIY novices can install the fans effortlessly.
In addition to their performance and efficiency, the NuTone QTXEN, QTREN, QTXN, and QTRN fans are designed with aesthetics in mind. The sleek, unobtrusive design allows them to blend seamlessly into any home decor while providing necessary ventilation.
Other notable features include integrated humidity sensors in some models, which automatically activate the fan when moisture levels rise, promoting a dryer and healthier environment. Additionally, installing these fans helps in reducing the likelihood of mold and mildew, which can pose serious health risks.
In summary, the NuTone QTXEN, QTREN, QTXN, and QTRN ventilation fans stand out for their quiet operation, energy efficiency, advanced airflow technology, easy installation, and modern design. They are a perfect choice for homeowners and businesses seeking effective indoor air quality solutions without the disruptive noise commonly associated with traditional ventilation systems.

