Manuals
/
NuTone
/
Household Appliance
/
Fan
NuTone
QTXEN150, QTXEN080, QTXEN050, QTXEN110
manual
Install Housing & Duct, Page
Models:
QTXEN150
QTXEN110
QTXEN050
QTXEN080
1
3
8
8
Download
8 pages
1.14 Kb
1
2
3
4
5
6
7
8
Install
Connect Wiring
Warranty
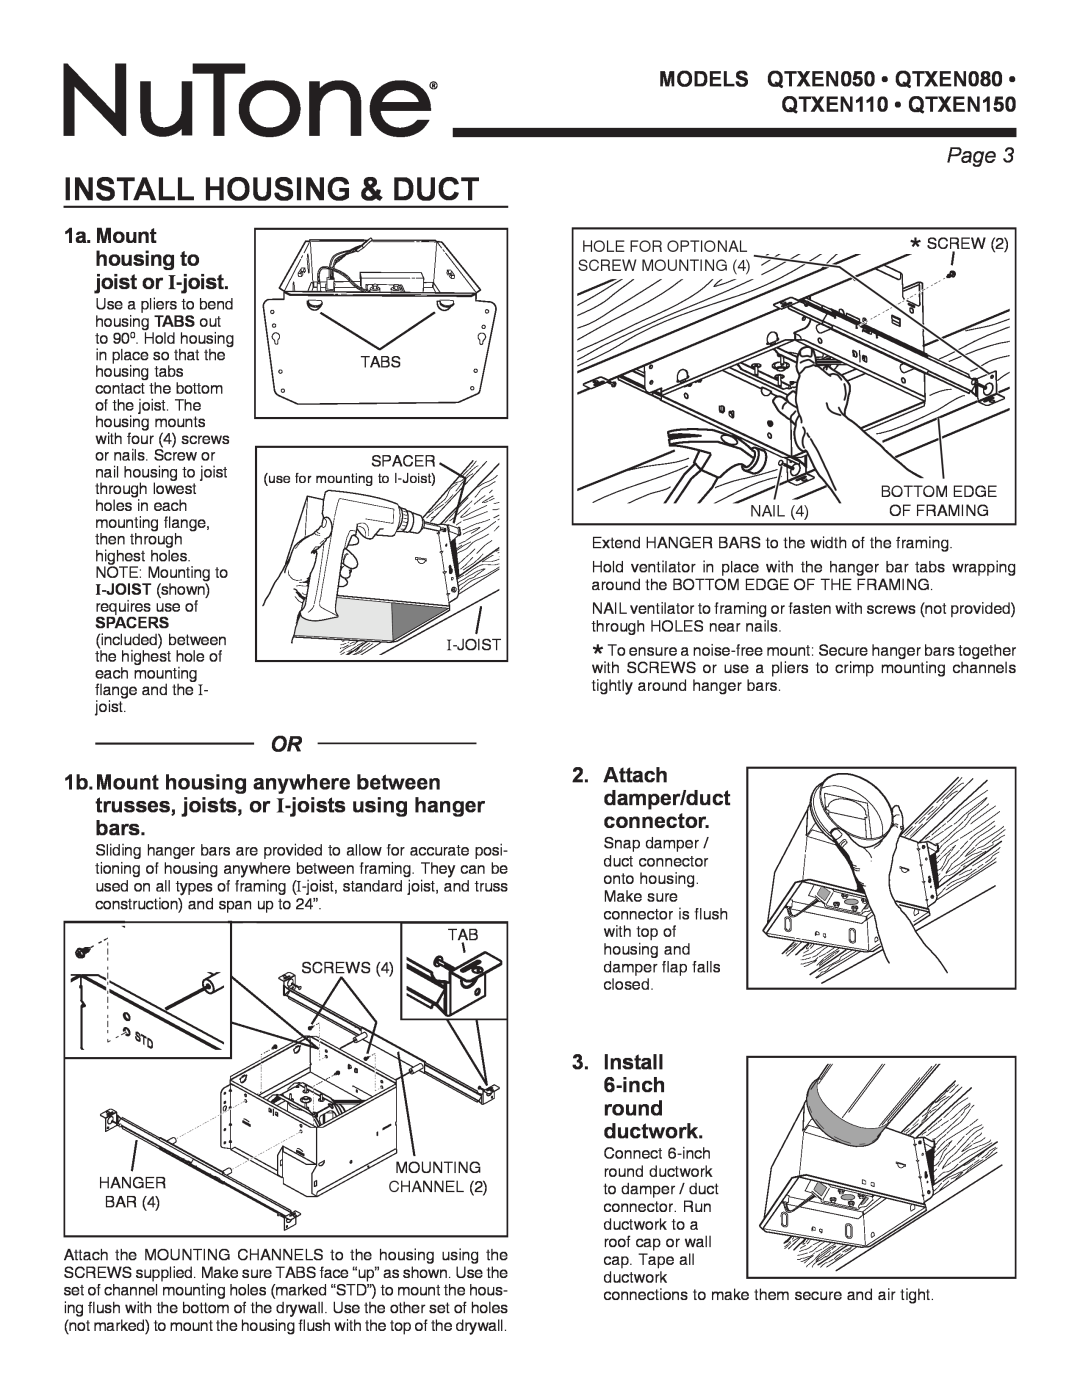
Install Housing & Duct
Page 3
Image 3
Page 2
Page 4
Page 3
Image 3
Page 2
Page 4
Contents
READ AND SAVE THESE INSTRUCTIONS
CLEANING & MAINTENANCE
WARRANTY
QTXEN SERIES VENTILATORS
TYPICAL INSTALLATIONS
PLAN THE INSTALLATION
Page
Page
INSTALL HOUSING & DUCT
Page
CONNECT WIRING
INSTALL GRILLE
SERVICE PARTS
PRECAUCIÓN
VENTILADORES SERIE QTXEN
LEA Y CONSERVE ESTAS INSTRUCCIONES
ADVERTENCIA
INSTALACIONES TÍPICAS
PLANIFICACIÓN DE LA INSTALACIÓN
Página
INSTALE LA CUBIERTA Y EL
CONDUCTO
Página
Página
CONEXIÓN ELÉCTRICA
INSTALE LA REJILLA
PIEZAS DE REPUESTO
Top
Page
Image
Contents