QTXEN110SFLT specifications
The NuTone QTXEN110SFLT is a versatile and highly efficient ventilation fan designed for residential use, particularly in bathrooms. This model combines modern aesthetics with advanced technology, making it a popular choice for homeowners seeking to enhance air quality while maintaining a peaceful environment.One of the main features of the QTXEN110SFLT is its powerful yet quiet operation. With a noise level rating of just 0.7 sones, this fan is one of the quietest on the market, allowing for discreet air circulation without disruptive sound. This is particularly beneficial in bathroom settings where tranquility is desired.
The fan boasts an impressive airflow rate of 110 cubic feet per minute (CFM), which efficiently removes moisture and odors from the air. Effective moisture control is crucial in preventing mold growth and maintaining a healthy indoor environment, especially in humid areas like bathrooms. The QTXEN110SFLT is designed to handle spaces of up to 105 square feet, making it suitable for a variety of bathroom sizes.
In addition to its superior performance, the QTXEN110SFLT features a sleek and modern design that seamlessly blends into any décor. The fan comes equipped with an energy-efficient integrated LED light, which not only illuminates the space but also helps reduce energy consumption. The light is dimmable, offering versatility in brightness levels to suit different moods and activities.
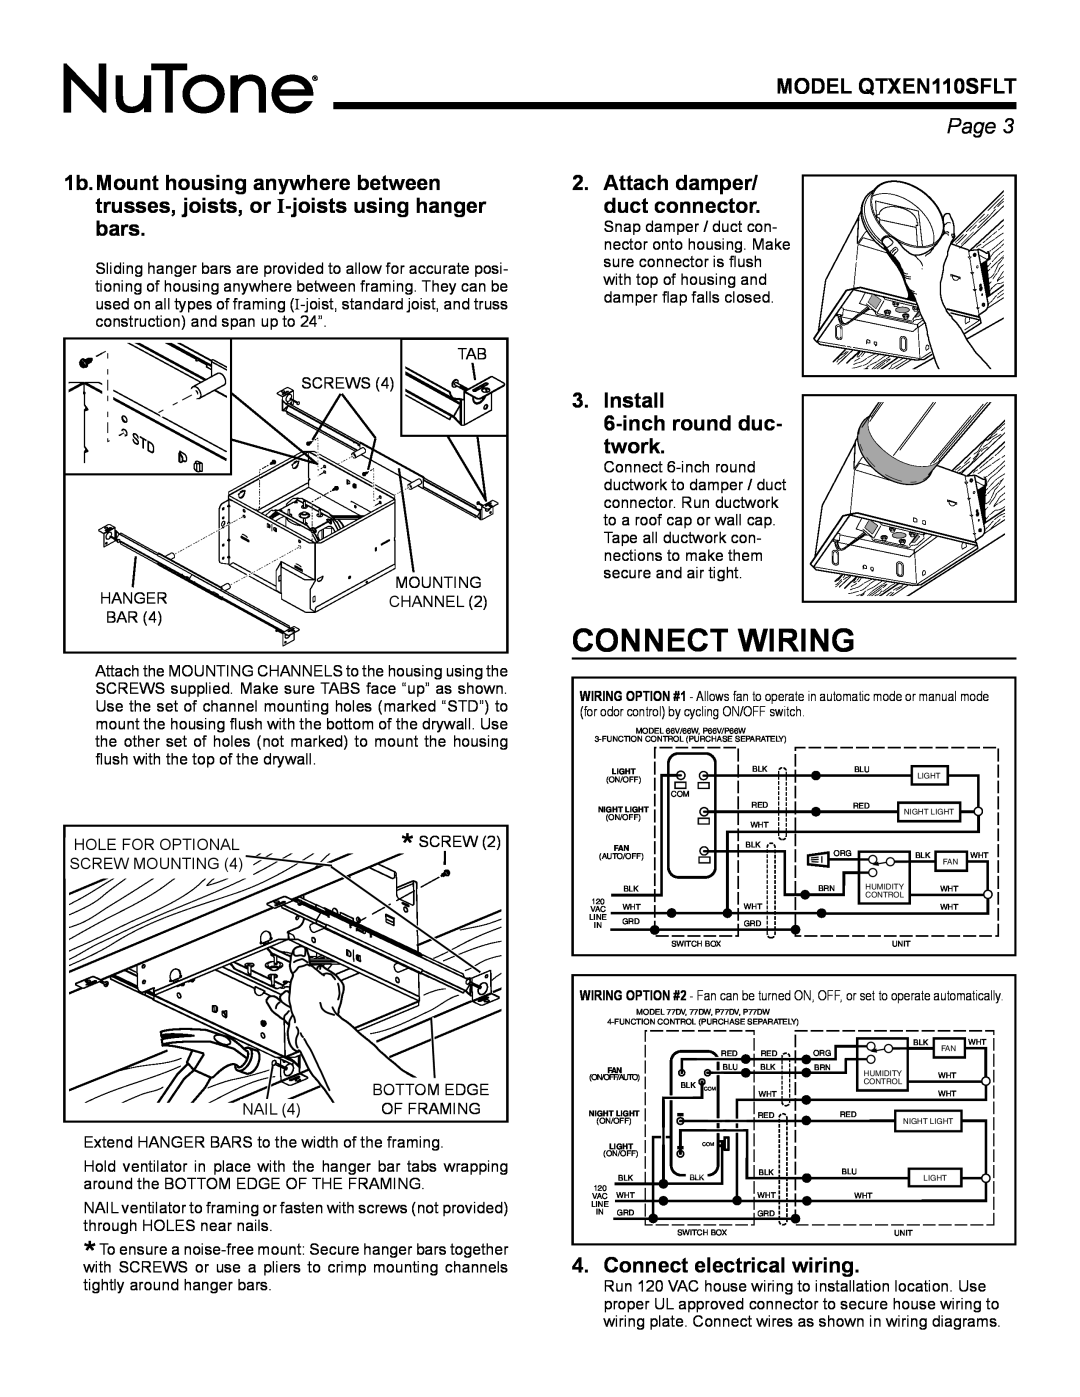
Installation is made easy with the fan's flexible duct options and included mounting hardware. The design allows for both new construction and remodel applications, giving homeowners flexibility in how they incorporate this fan into their spaces.
Another notable characteristic is the ENERGY STAR certification, which signifies the product's commitment to energy efficiency. This translates to lower utility bills and reduced environmental impact, appealing to eco-conscious consumers.
The NuTone QTXEN110SFLT also includes a four-function wall switch for convenient control. This switch allows users to operate the fan, light, and dimming features easily, promoting user-friendly interaction.
In conclusion, the NuTone QTXEN110SFLT stands out in the ventilation fan market due to its quiet operation, impressive airflow, energy efficiency, modern design, and ease of installation. It is an ideal choice for homeowners looking to improve air quality in their bathrooms while enjoying a stylish and functional fixture.
