Optional Handset Operation (VSA4S)
Lift handset and depress “Call Button” on handset.
• Monitor must have “Talk Button” activated for audio communication to be established between handset and monitor.
Camera Operation
Press “Call Button” on camera.
•Video turns on at monitor.
•“Talk Button” at monitor must be pressed to initiate audio between camera and monitor.
•If handset is lifted, audio communication between the camera and handset is established.
Ending the Door Call
Once audio and video communication is established between the camera and the monitor, press the “Monitor and Talk Buttons” so that each red LED turns off. Audio and video communications will be terminated.
Video Timeout
The video will deactivate the camera and turn off the display after 60 seconds, unless manually turned off by pressing the “Monitor Button”.
Resetting the Monitor
This is performed by turning the On / Off / Standby switch to the leftmost position to power down the product. Wait a minimum of 30 seconds prior to moving the On / Off switch to the “On” position to power the monitor.
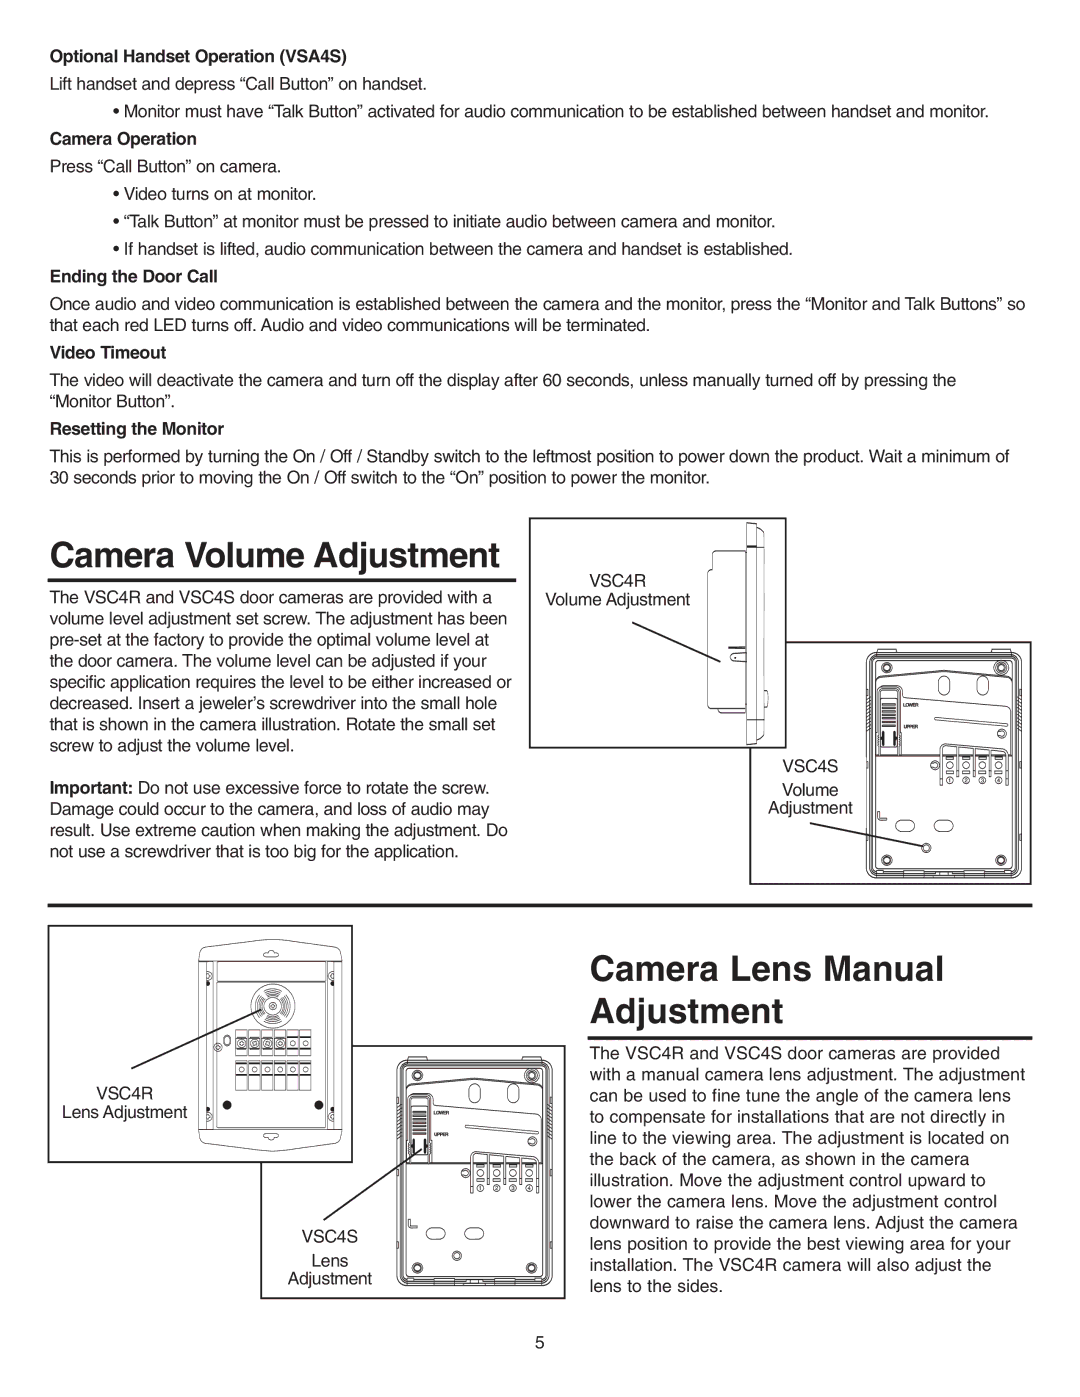
Camera Volume Adjustment
The VSC4R and VSC4S door cameras are provided with a volume level adjustment set screw. The adjustment has been
Important: Do not use excessive force to rotate the screw. Damage could occur to the camera, and loss of audio may result. Use extreme caution when making the adjustment. Do not use a screwdriver that is too big for the application.
VSC4R
Volume Adjustment
VSC4S |
Volume |
Adjustment |
VSC4R
Lens Adjustment
VSC4S
Lens
Adjustment
5
Camera Lens Manual Adjustment
The VSC4R and VSC4S door cameras are provided with a manual camera lens adjustment. The adjustment can be used to fine tune the angle of the camera lens to compensate for installations that are not directly in line to the viewing area. The adjustment is located on the back of the camera, as shown in the camera illustration. Move the adjustment control upward to lower the camera lens. Move the adjustment control downward to raise the camera lens. Adjust the camera lens position to provide the best viewing area for your installation. The VSC4R camera will also adjust the lens to the sides.