CHANGING THE LENSES
The lenses of O ROKR Pro can be easily changed. The instructions below show you how to remove the current lenses and install a different set.
WARNING: Follow these instructions carefully. Failure to do so may adversely affect optical performance. Improperly installed lenses may fail to stay in place, causing interference with your vision.
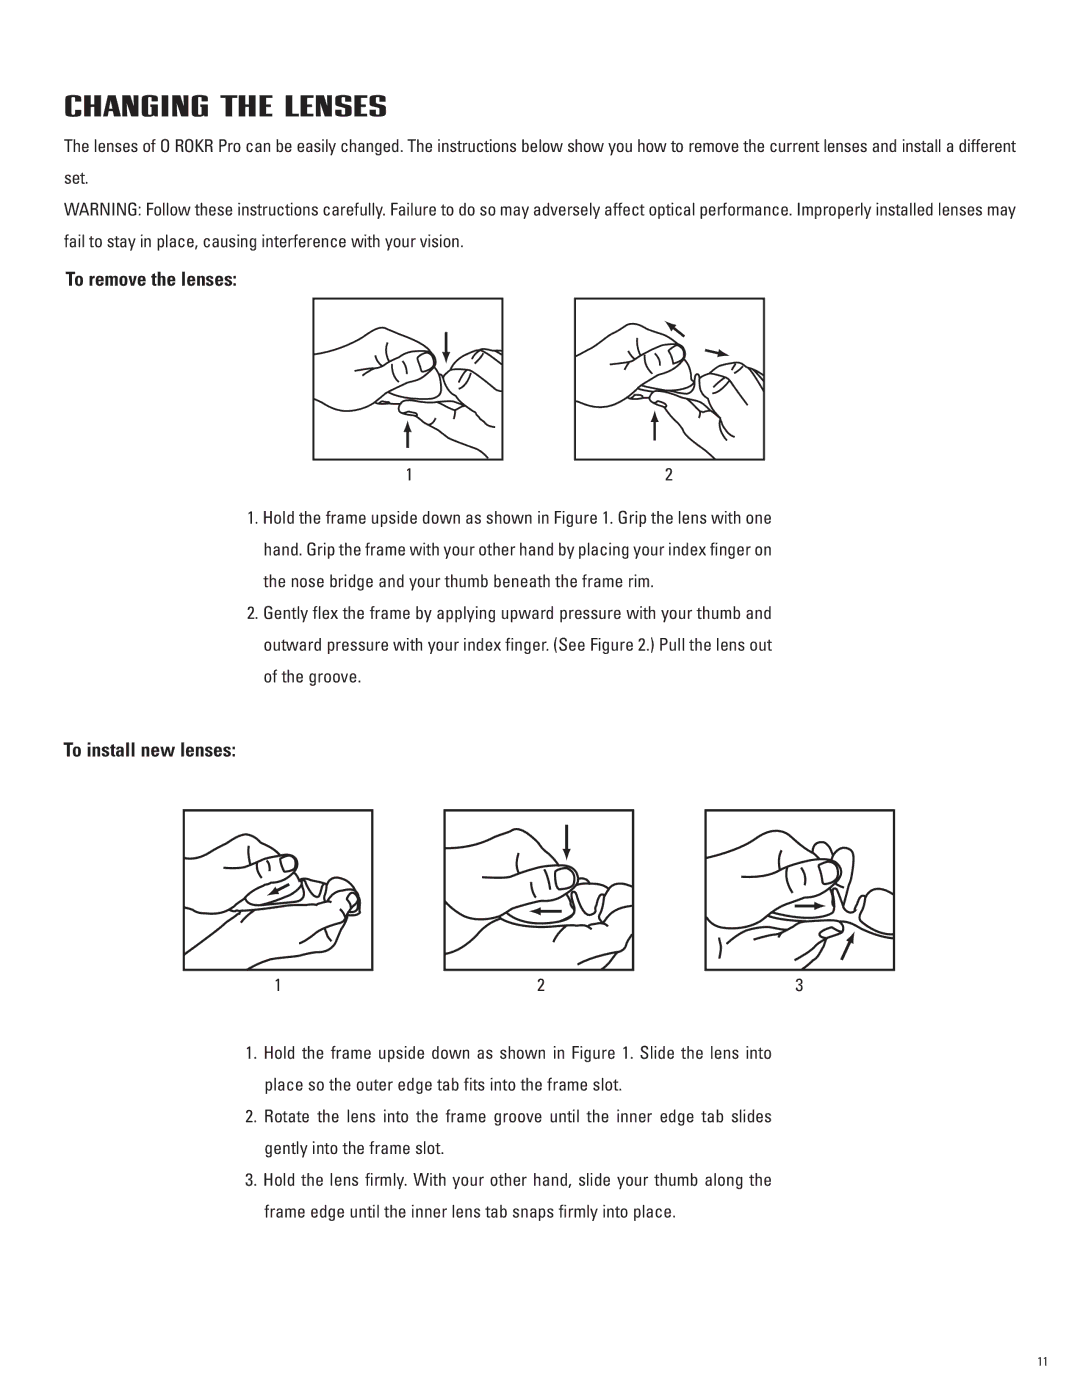
To remove the lenses:
1 | 2 |
1.Hold the frame upside down as shown in Figure 1. Grip the lens with one hand. Grip the frame with your other hand by placing your index finger on the nose bridge and your thumb beneath the frame rim.
2.Gently flex the frame by applying upward pressure with your thumb and outward pressure with your index finger. (See Figure 2.) Pull the lens out of the groove.
To install new lenses:
1 | 2 | 3 |
1.Hold the frame upside down as shown in Figure 1. Slide the lens into place so the outer edge tab fits into the frame slot.
2.Rotate the lens into the frame groove until the inner edge tab slides gently into the frame slot.
3.Hold the lens firmly. With your other hand, slide your thumb along the frame edge until the inner lens tab snaps firmly into place.
11
