Install Tubing

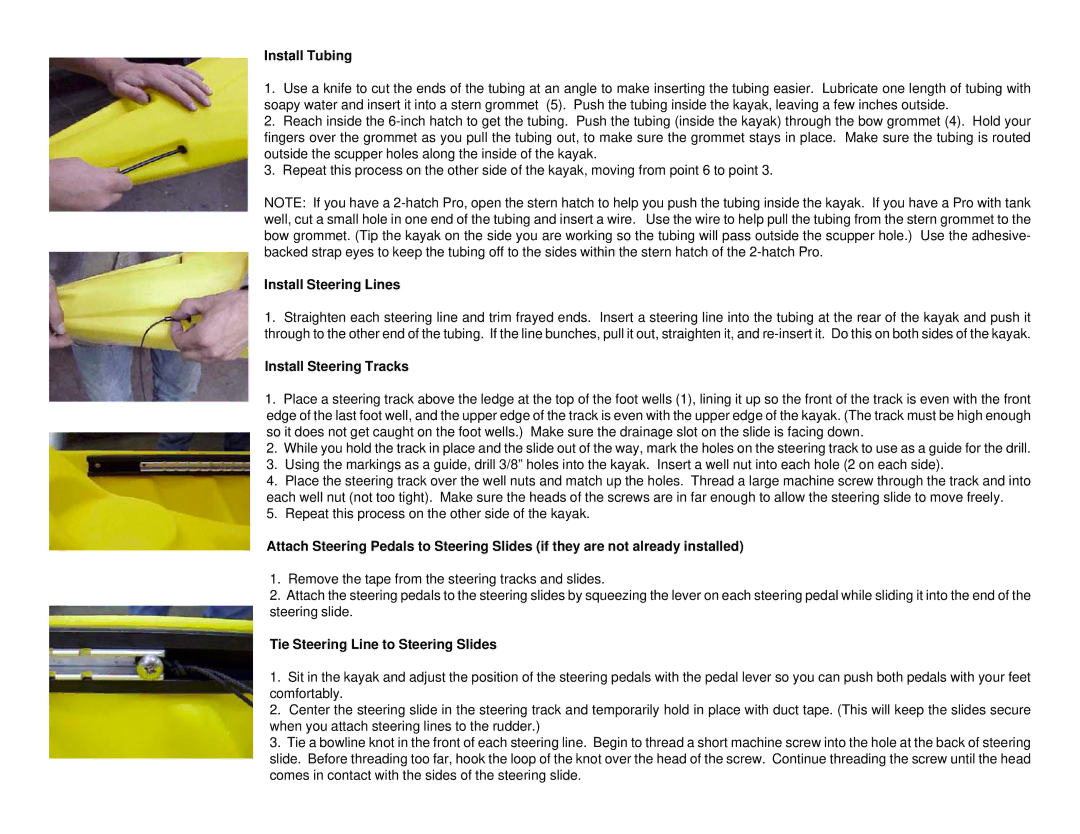
1.Use a knife to cut the ends of the tubing at an angle to make inserting the tubing easier. Lubricate one length of tubing with soapy water and insert it into a stern grommet (5). Push the tubing inside the kayak, leaving a few inches outside.

2.Reach inside the 6-inch hatch to get the tubing. Push the tubing (inside the kayak) through the bow grommet (4). Hold your fingers over the grommet as you pull the tubing out, to make sure the grommet stays in place. Make sure the tubing is routed outside the scupper holes along the inside of the kayak.

3.Repeat this process on the other side of the kayak, moving from point 6 to point 3.

NOTE: If you have a 2-hatch Pro, open the stern hatch to help you push the tubing inside the kayak. If you have a Pro with tank well, cut a small hole in one end of the tubing and insert a wire. Use the wire to help pull the tubing from the stern grommet to the bow grommet. (Tip the kayak on the side you are working so the tubing will pass outside the scupper hole.) Use the adhesive- backed strap eyes to keep the tubing off to the sides within the stern hatch of the 2-hatch Pro.

Install Steering Lines

1.Straighten each steering line and trim frayed ends. Insert a steering line into the tubing at the rear of the kayak and push it through to the other end of the tubing. If the line bunches, pull it out, straighten it, and re-insert it. Do this on both sides of the kayak.

Install Steering Tracks

1.Place a steering track above the ledge at the top of the foot wells (1), lining it up so the front of the track is even with the front edge of the last foot well, and the upper edge of the track is even with the upper edge of the kayak. (The track must be high enough so it does not get caught on the foot wells.) Make sure the drainage slot on the slide is facing down.

2.While you hold the track in place and the slide out of the way, mark the holes on the steering track to use as a guide for the drill.

3.Using the markings as a guide, drill 3/8” holes into the kayak. Insert a well nut into each hole (2 on each side).

4.Place the steering track over the well nuts and match up the holes. Thread a large machine screw through the track and into each well nut (not too tight). Make sure the heads of the screws are in far enough to allow the steering slide to move freely.

5.Repeat this process on the other side of the kayak.

Attach Steering Pedals to Steering Slides (if they are not already installed)

1.Remove the tape from the steering tracks and slides.

2.Attach the steering pedals to the steering slides by squeezing the lever on each steering pedal while sliding it into the end of the steering slide.

Tie Steering Line to Steering Slides

1.Sit in the kayak and adjust the position of the steering pedals with the pedal lever so you can push both pedals with your feet comfortably.

2.Center the steering slide in the steering track and temporarily hold in place with duct tape. (This will keep the slides secure when you attach steering lines to the rudder.)

3.Tie a bowline knot in the front of each steering line. Begin to thread a short machine screw into the hole at the back of steering slide. Before threading too far, hook the loop of the knot over the head of the screw. Continue threading the screw until the head comes in contact with the sides of the steering slide.

Page 2
Image 2
Ocean Kayak 14561 Install Tubing, Install Steering Lines, Install Steering Tracks, Tie Steering Line to Steering Slides

14561 specifications

The Ocean Kayak 14561 is a versatile and robust sit-on-top kayak designed for recreational paddlers who seek an enjoyable experience on the water. This kayak is an embodiment of innovation, merging comfort, stability, and performance in a captivating design.

One of the defining features of the Ocean Kayak 14561 is its spacious design, providing ample room for both the paddler and gear. With a length of 14 feet and a width of approximately 30 inches, this kayak offers impressive stability, making it suitable for various water conditions, from tranquil lakes to mild ocean waves. The kayak's generous hull design enhances its tracking efficiency, allowing smooth navigation even in choppy waters.

The Ocean Kayak 14561 is equipped with several key technologies aimed at improving the paddler's experience. The Comfort Plus seat back is designed for extended paddling sessions, offering customizable support and enhanced comfort. Additionally, the kayak features adjustable footrests, allowing paddlers of different heights to find their ideal position, which aids in efficient paddling.

Storage is crucial for any kayak, and the Ocean Kayak 14561 does not disappoint. It includes both a rear tank well and a forward storage hatch, allowing users to secure items safely while enjoying their time on the water. This makes it a great choice for day trips, fishing expeditions, or leisurely paddling adventures.

Another notable characteristic of this kayak is its polyethylene construction, which is both lightweight and durable. This material choice not only adds to the kayak's longevity but also makes it relatively easy to transport and maneuver, whether you’re loading it onto a vehicle or launching it from the beach.

The kayak features built-in grab handles, making it easier to carry and stabilize during transport. This attention to detail reflects Ocean Kayak’s commitment to user-friendly design.

Overall, the Ocean Kayak 14561 stands out as a high-quality choice for paddlers seeking stability, comfort, and versatility. Its combination of practical features and thoughtful technologies ensures an enjoyable and hassle-free paddling experience, making it ideal for enthusiasts looking to explore a variety of aquatic environments. Whether you are a novice just starting or a seasoned paddler, the Ocean Kayak 14561 caters to all skill levels, ensuring that everyone can experience the joys of kayaking.