5 CONNECTING THE UNIT

CAUTION: A 5-micron filter TSD800-6, not included, must be installed with the unit to ensure proper air filtration.

3

1

2

B

4

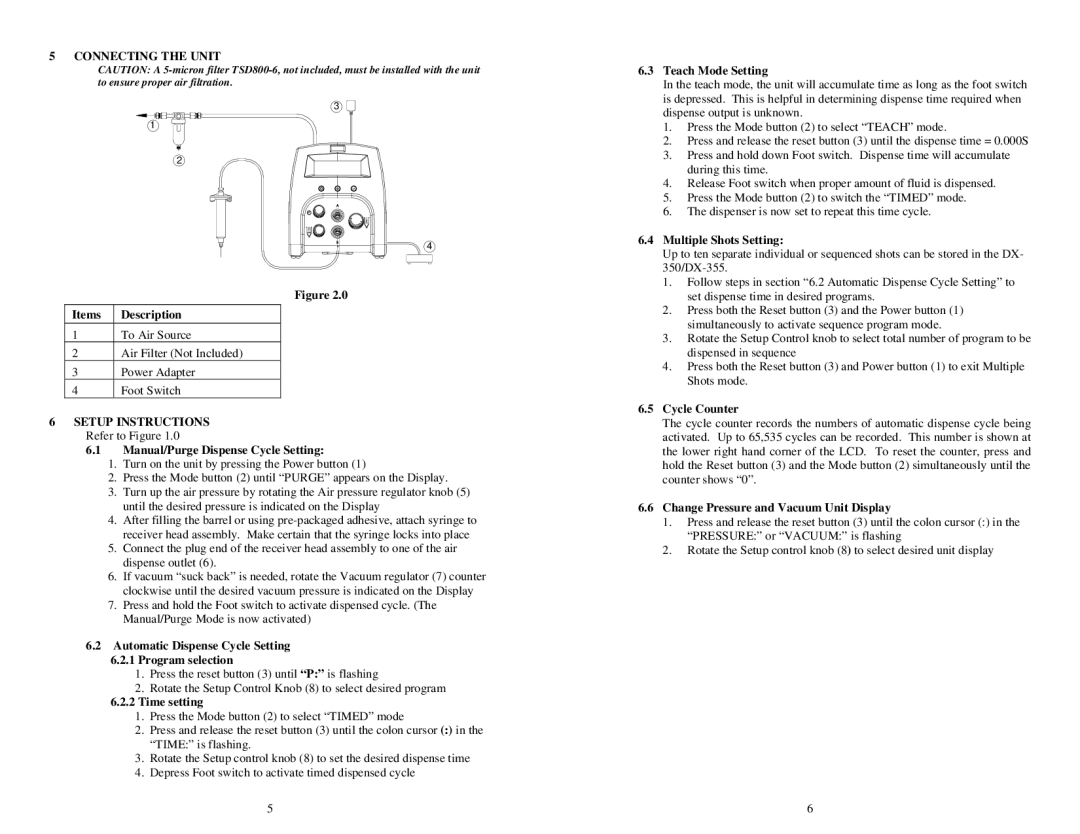
Figure 2.0

Items

Description

1

To Air Source

2

Air Filter (Not Included)

3

Power Adapter

4

Foot Switch

6SETUP INSTRUCTIONS Refer to Figure 1.0

6.1Manual/Purge Dispense Cycle Setting:

1.Turn on the unit by pressing the Power button (1)

2.Press the Mode button (2) until “PURGE” appears on the Display.

3.Turn up the air pressure by rotating the Air pressure regulator knob (5) until the desired pressure is indicated on the Display

4.After filling the barrel or using pre-packaged adhesive, attach syringe to receiver head assembly. Make certain that the syringe locks into place

5.Connect the plug end of the receiver head assembly to one of the air dispense outlet (6).

6.If vacuum “suck back” is needed, rotate the Vacuum regulator (7) counter clockwise until the desired vacuum pressure is indicated on the Display

7.Press and hold the Foot switch to activate dispensed cycle. (The Manual/Purge Mode is now activated)

6.2Automatic Dispense Cycle Setting

6.2.1Program selection

1.Press the reset button (3) until “P:” is flashing

2.Rotate the Setup Control Knob (8) to select desired program

6.2.2Time setting

1.Press the Mode button (2) to select “TIMED” mode

2.Press and release the reset button (3) until the colon cursor (:) in the “TIME:” is flashing.

3.Rotate the Setup control knob (8) to set the desired dispense time

4.Depress Foot switch to activate timed dispensed cycle

5

6.3Teach Mode Setting

In the teach mode, the unit will accumulate time as long as the foot switch is depressed. This is helpful in determining dispense time required when dispense output is unknown.

1.Press the Mode button (2) to select “TEACH” mode.

2.Press and release the reset button (3) until the dispense time = 0.000S

3.Press and hold down Foot switch. Dispense time will accumulate during this time.

4.Release Foot switch when proper amount of fluid is dispensed.

5.Press the Mode button (2) to switch the “TIMED” mode.

6.The dispenser is now set to repeat this time cycle.

6.4Multiple Shots Setting:

Up to ten separate individual or sequenced shots can be stored in the DX- 350/DX-355.

1.Follow steps in section “6.2 Automatic Dispense Cycle Setting” to set dispense time in desired programs.

2.Press both the Reset button (3) and the Power button (1) simultaneously to activate sequence program mode.

3.Rotate the Setup Control knob to select total number of program to be dispensed in sequence

4.Press both the Reset button (3) and Power button (1) to exit Multiple Shots mode.

6.5Cycle Counter

The cycle counter records the numbers of automatic dispense cycle being activated. Up to 65,535 cycles can be recorded. This number is shown at the lower right hand corner of the LCD. To reset the counter, press and hold the Reset button (3) and the Mode button (2) simultaneously until the counter shows “0”.

6.6Change Pressure and Vacuum Unit Display

1.Press and release the reset button (3) until the colon cursor (:) in the “PRESSURE:” or “VACUUM:” is flashing

2.Rotate the Setup control knob (8) to select desired unit display

6

Page 3
Image 3
OK International DX-350 / 355 specifications Connecting the Unit, Automatic Dispense Cycle Setting Program selection

DX-350 / 355 specifications

The OK International DX-350 and DX-355 are state-of-the-art soldering and desoldering systems designed for modern electronic assembly and repair. These devices are ideal for both professional technicians and hobbyists, offering a blend of precision, efficiency, and user-friendly features.

One of the standout characteristics of the DX-350 and DX-355 is their advanced temperature control technology. These systems utilize precise microprocessor control to maintain a consistent temperature, ensuring optimal soldering conditions while preventing damage to sensitive electronic components. The adjustable temperature ranges from 200°C to 450°C, providing the versatility needed for various soldering applications.

Another significant feature is the rapid heat-up time. Both models are designed to reach operational temperatures in a matter of seconds, allowing users to start their work without lengthy delays. This fast performance is coupled with excellent temperature recovery, ensuring that the soldering tip remains at the desired temperature even during extensive use.

The DX-350 and DX-355 are equipped with ergonomic soldering tools that prioritize user comfort. The lightweight design of the soldering iron reduces strain during extended use, while the soft grip handle provides a stable hold. Additionally, interchangeable tips with various shapes and sizes accommodate different soldering tasks, further enhancing the flexibility of these systems.

In terms of safety, both models feature an intelligent sleep mode that automatically reduces the temperature of the soldering iron after a period of inactivity. This not only conserves energy but also prolongs the lifespan of the soldering tips. Furthermore, the systems have built-in over-temperature protection to prevent overheating and potential damage to the equipment.

For added convenience, the DX-355 model includes a digital LCD display that provides real-time information about temperature settings and usage time. This feature allows users to track their work and make quick adjustments as necessary, ensuring optimal performance throughout the soldering process.

In summary, the OK International DX-350 and DX-355 are excellent choices for anyone seeking reliable, efficient, and user-friendly soldering solutions. Their advanced features, including precise temperature control, rapid heat-up, ergonomic design, safety measures, and additional digital functionalities, make them suitable for a wide range of electronic assembly and repair tasks. Whether you are a professional technician or an enthusiastic hobbyist, these systems will meet and exceed your soldering needs.