OKILAN 310e+ Installation Guide
1 | Warning: Disconnect the printer from a.c. | Insert the OKILAN 310e+ into the |
power before installing board. | printer making sure that the board | |
| 4 locates in the guide rails. Push the | |
|
| board firmly into place. Tighten the |
|
| screws (if fitted) on the option |
|
| board. If the screws do not locate, |
|
| the board may not be properly |
|
| seated. |
| Turn the printer around so that the rear is facing you. |
|
2 | 5 | After you have installed the Network Print Server: |
Confirm that your printer recognizes the new components, including | ||
|
| any additional RAM memory, by printing the menu. Refer to your |
|
| printer's User's Guide for this procedure. Refer to your OKILAN 310e+ |
|
| Network Administrator's Guide for additional information regarding |
|
| configuring and cabling details. |
Use a screwdriver to remove serial interface board from back panel of printer.
If a SIMM module is present on the serial interface board, you will need to migrate it to the SIMM 1 slot on the OKILAN 310e+ card (see Installing SIMM Options, step 1, below).
Installing SIMM Options
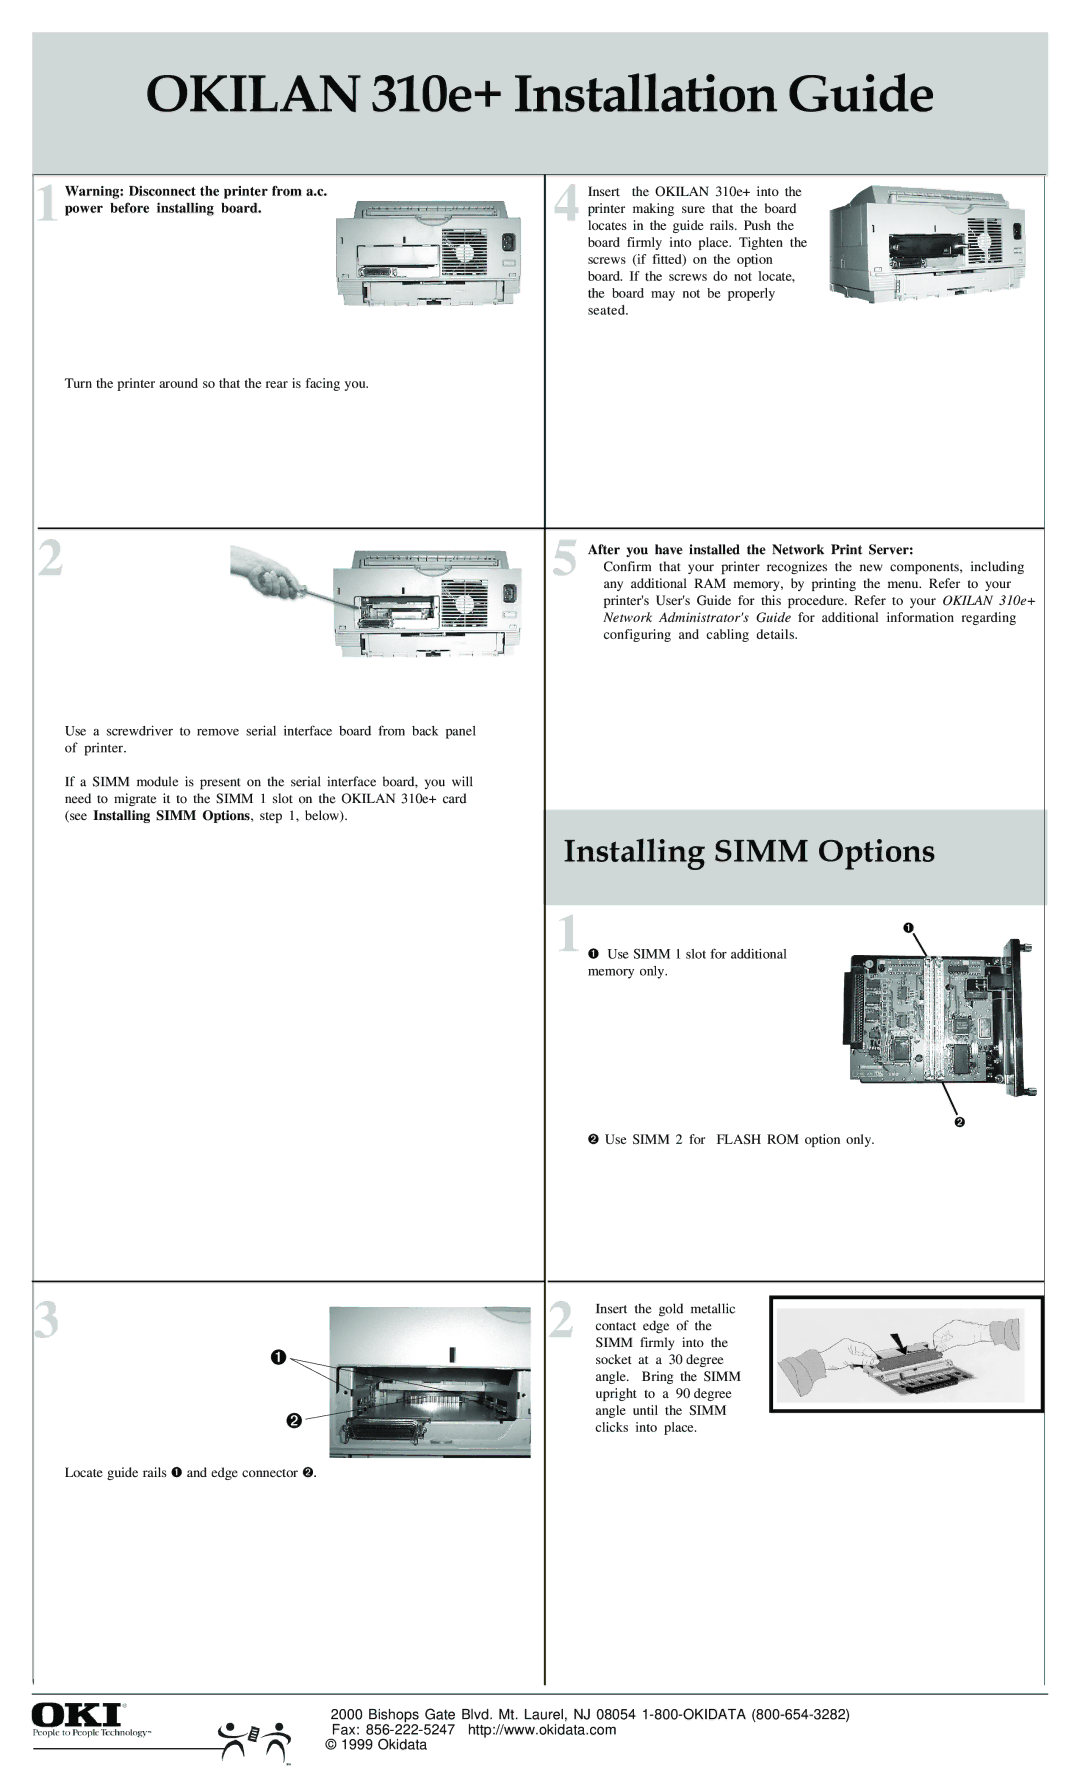
1 | ➊ |
➊ Use SIMM 1 slot for additional |
memory only.
➋
➋ Use SIMM 2 for FLASH ROM option only.
3 | 2 | Insert the gold | metallic |
contact edge of | the | ||
SIMM firmly into the | |||
➊ |
| socket at a 30 degree | |
|
| angle. Bring the SIMM | |
|
| upright to a 90 degree | |
➋ |
| angle until the SIMM | |
| clicks into place. | ||
Locate guide rails ➊ and edge connector ➋. |
|
|
|
| 2000 Bishops Gate Blvd. Mt. Laurel, NJ 08054 | |
© 1998, Okidata | Fax: | |
© 1999 Okidata | ||
|