13
•
English
Walk-up Operation
Scan
Scanning Options
• Scan and E-mail
• Scan to File Server
Note
These instructions assume that all
needed basic data (e.g., e-mail
addresses) is already programmed
in the system.
Scan and E-mail
1.
Load the document (see page
11).
2. Press the S
END
key.
3. Enter the e-mail address in the
“To” field in one of these ways.
• Press the A
DDRESS
B
OOK
key and
use the arrow keys to navigate
to the address. Press the OK
key.
• Type the initial letter of the
address using the numeric
keypad. Press the OK key.
4. To send to additional
addresses, add a comma and
repeat the previous step.
5. Press the R
ETURN
() key to
go back to the main e-mail
display.
6. Enter the e-mail Subject. Press
the OK key.
7. Enter any cc and bcc
addresses. Press the OK key.
8. To make additional settings*:
• Press S
END
.
• Press A
DDITIONAL
S
ETTINGS
.
• Use the arrow keys and the OK
key to make your choices.
• Press the R
ETURN
() key.
9. Press the M
ONO
key or the
C
OLOR
key.
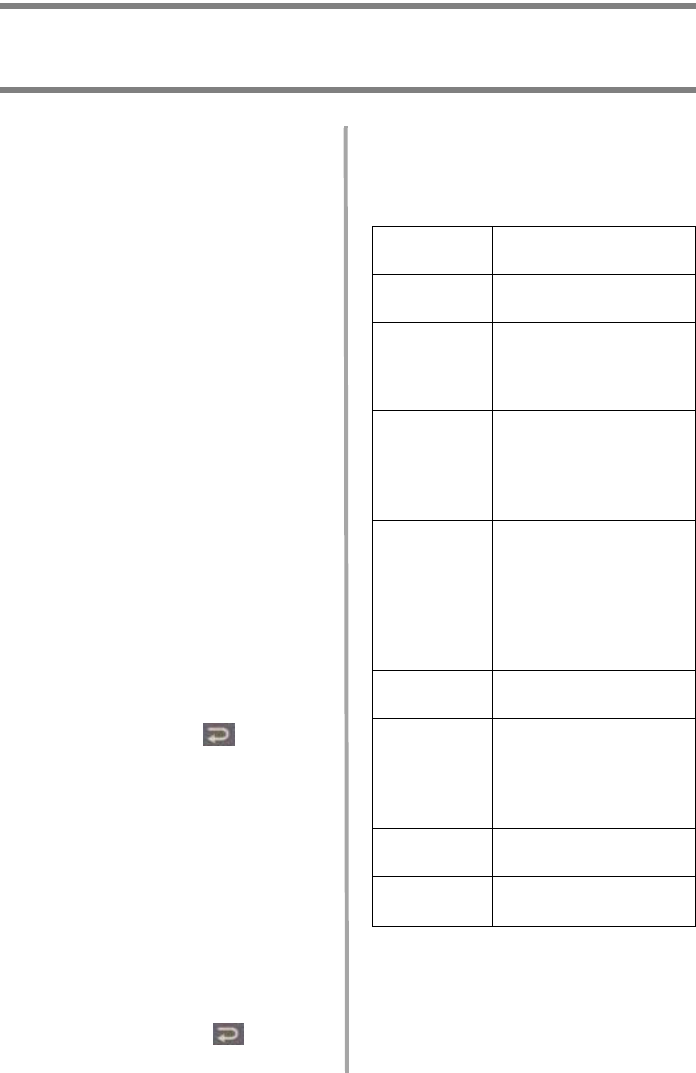
Additional Settings for Scanning
The defaut setting is in
bold italic
.
Attachment
File name of scanned
document.
From
Set what appears under
“From” on the email.
Reply to
Address
(up to 64
cvharacters)
Set the address to which
the recipient should
reply, if different from the
“From” address.
Color Output
format
Select:
•output format: PDF,
TIF, JPG, or MTIF,
• compression rate: Low,
Medium, High.
B&W output
format
Set:
• Multilevel Gray: On,
Off.
•Output format: PDF,
TIF, MTIF
• Compression rate: Low,
Medium, High.
Resolution
75, 100, 150, 200, 300,
400, 600 dpi.
Manual Feed
Disable
, Enable.
Change to Enable to
concatenate multiple
scanned documents into
one e-mail.
Document
Size
A4,
Letter
, Legal.
Density
-2, -1,
0
, 1, 2
Set the print density.