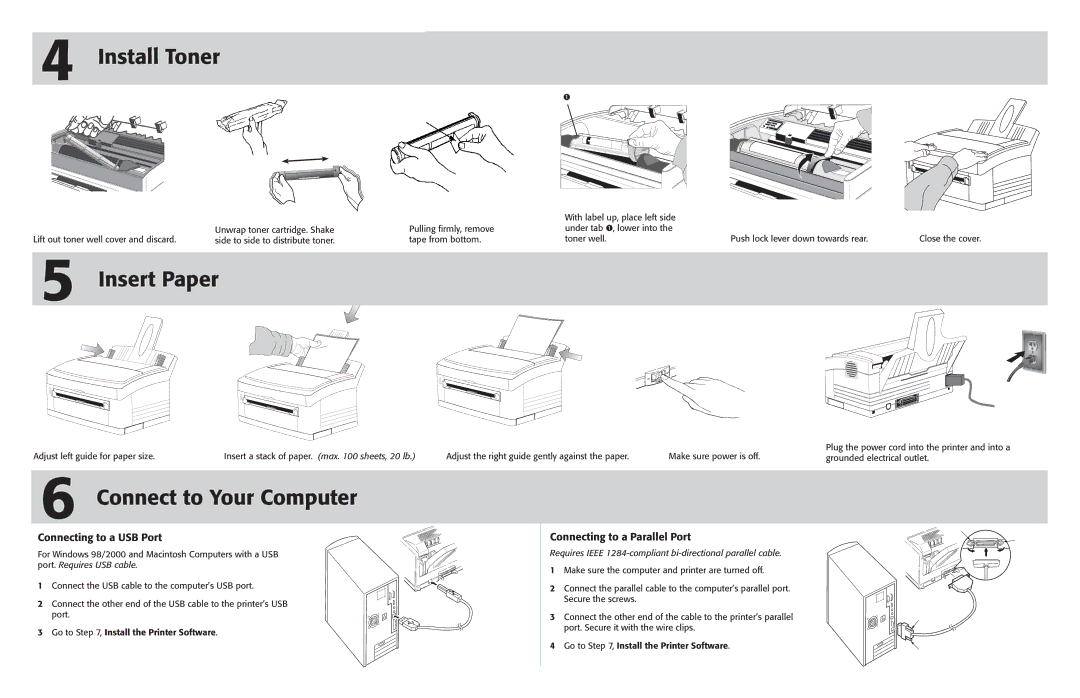
4 Install Toner
➊
|
|
| With label up, place left side |
| Unwrap toner cartridge. Shake | Pulling firmly, remove | under tab ➊, lower into the |
Lift out toner well cover and discard. | side to side to distribute toner. | tape from bottom. | toner well. |
Push lock lever down towards rear. | Close the cover. |
5 Insert Paper
Adjust left guide for paper size. | Insert a stack of paper. (max. 100 sheets, 20 lb.) | Adjust the right guide gently against the paper. | Make sure power is off. |
Plug the power cord into the printer and into a grounded electrical outlet.
6 Connect to Your Computer
Connecting to a USB Port
For Windows 98/2000 and Macintosh Computers with a USB port. Requires USB cable.
1Connect the USB cable to the computer’s USB port.
2Connect the other end of the USB cable to the printer’s USB
port.
3 Go to Step 7, Install the Printer Software.
Connecting to a Parallel Port
Requires IEEE 1284-compliant bi-directional parallel cable.
1Make sure the computer and printer are turned off.
2Connect the parallel cable to the computer’s parallel port. Secure the screws.
3Connect the other end of the cable to the printer’s parallel port. Secure it with the wire clips.
4Go to Step 7, Install the Printer Software.