390 150
390 150
For customers in Canada
For customers in Europe
Trademarks
Page
Contents
Advanced shooting
Useful functions
Names of parts
Getting started
Lens Video OUT jack ~P DC-IN jack ~P
USB
Quick View
Monitor indications
+2.0 1600x1200 Items Indications
Playback mode
Items Indications Ref.
Battery check
Getting
Started
How to use this manual
Indications used in this manual
Attaching the strap
Thread the short end of the strap through
CR-V3 lithium battery packs cannot be re-charged
Loading batteries
Make sure that
Loading batteries
CR-V3 lithium battery packs Not rechargeable
Selecting batteries or the optional AC adapter
NiMH batteries Rechargeable
AA R6 alkaline batteries
Getting started
Inserting/Removing a card
Card basics
Compatible cards
Index area
Inserting a card Make sure that
Close the card cover
Removing the card Make sure that
Hold the card straight and pull it out Close the card cover
Power on/off
When shooting pictures Power on Open the lens barrier
Power off Close the lens barrier
Power on Power off
Power off Press
If the card is not recognized card check
Corrective action
Mode Menu
Mode Reset
ALL Reset on
Selecting a language
English Francais Deutsch Español
Setting the date and time
Press Ññ to select the Setup tab, then
Reset
Press í
2003
Taking pictures using the monitor
Taking pictures using the viewfinder
Holding the camera
Using the menus Shortcut Menus
Menu items
SHQ 1600 x SQ1 1024 x SQ2 640 x
Panorama
How to use the mode menu
Usingthe menus Arrow pad ÑñÉí
Using the menus
Press Again to
Shooting mode
Shortcut menus
Menus
Photo
Info Mode Menu Erase
Info
Erase
Mode menus
Panorama
REC View
BLACK&WHITE
Shooting modes
Shooting basics
Top menu, press í to select Mode
Selecting shooting modes
Self Portrait shooting
Menu
Press again to exit the menu
Taking still pictures using the viewfinder
Press the shutter button gently halfway to adjust the focus
Taking still pictures
Press the shutter button all the way fully
Taking still pictures using the monitor
It is difficult to focus on the subject
Green lamp blinks
Orange lamp blinks
Monitor turns off automatically
Monitor is hard to see
Comparison of the viewfinder & monitor
How to lock the focus
If correct focus cannot be obtained
Press the shutter button halfway
Subjects that are difficult to focus on
Green Lamp lights But Subject cannot Be brought Into focus
Recording movies
Press Ñ to select
Press the shutter button fully to start recording
Press the shutter button again to stop recording
Recording movies
Zoom Digital zoom
Press Ñ
Press Ññ while looking at the image on the monitor
Take the picture
Using the flash
Shooting
Basics
Auto
Auto-flash No indication
Red-eye reduction flash
Fill-in flash
Flash off
Macro mode shooting
Open the lens barrier fully Shooting mode top menu, select
Mode Menu T Camera T T on
Advanced shooting
Self-timer shooting
Press É again to set the self-timer mode
Open the lens barrier fully Press É
Selecting the metering area Spot metering
OFF
Panorama Panorama shooting
Press to finish panorama shooting
1 Taking two-in-one pictures
Take the second shot
1 Taking two-in-one pictures
Changing the record mode
SHQ
Still picture record modes
Movie record modes
Press Ññ to select the desired record mode
SHQ 1600 x
HQ 320 x SQ 160 x
Resolution
Resolution and picture size on a computer screen
Pixels
Varying the image brightness Exposure compensation
Press Ññ to select the exposure compensation value
Varying the image brightness Exposure compensation
Adjusting the White balance
Mode Menu T Picture T WB T
AUTO, , , or
Adjusting the White balance
Press to cancel playback
Viewing still pictures
Playback
Press With the lens barrier closed
While in the shooting mode
Press Twice quickly double-click
Close-up playback
Use the arrow pad Éí to display
Still picture you want to enlarge
Playback Index display
Selecting the number of pictures
Video OUT
Slideshow
Playback
You are recommended to use the optional AC adapter when
Picture Rotation
Turn the TV on and switch to the video input mode Press
Playback on a TV
Movie Play Viewing movies
Use the arrow pad to display the picture with
Press Ñ to select Movie Play
Movie Play
When Frame by Frame is selected
Press Ññ to select PLAYBACK, then
Movie Play Playback Frame by Frame Exit
Top menu, select Mode Menu T Play T , and press í
Protecting pictures
Press Ññ to select ON, then press
Erasing pictures
Single-frame erase
Use the arrow pad to display the picture you want to erase
Press Ññ to select YES, then press
Card Setup ALL Erase Format
All-frame erase
Press Ññ to select ALL ERASE, then
ALL Erase YES
Editing still pictures
Creating black and white pictures
Cancel
Playback Creating sepia-toned pictures
Resizing pictures
Sepia
Resizing is not possible in the following cases
Top menu, select Mode Menu T Edit T INDEX, then press í
Index Creating an index
Press ÑñÉí to select the first frame
Index
Index Reset Cancel
Press Ññ to select OK, then press
ALL Reset Saving the settings
Useful functions
Card Setup Formatting cards
Card T Card SETUP, and press í
Format YES
Displaying shooting information
Adjusting the monitor brightness
Mode Menu T Setup T REC View T
Top menu, select Mode Menu T Setup T , and press í
Setup T T OFF or ON, and press
Turning the beep sound off
Reset
Mode Menu T Setup T File Name T
Reset or AUTO. Press
Auto
Mode Menu T Setup T Pixel
Functions
MAPPING, and press í
TV video signal types & main regions
Video OUT Video output selection
How to print pictures
Print settings
What is DPOF?
Jpeg Joint Photographic Experts Group
Picture size and printing
Print
All-frame reservation
Print Order
Date Time
Single-frame reservation
Press ÑñÉí to select the following
END More
10Press É repeatedly until the Mode Menu appears
END
Resetting print reservation data
Print Order Setting Print Ordered Reset Keep
Press ñ to select Cancel
Error codes
Miscellaneous
Troubleshooting
Miscellaneous 100
101
Possible cause Corrective action Ref.
102
Monitor is hard to see
Miscellaneous 103
Picture is too bright
104
Picture has obscured edges
Shooting mode menus P
Menu list
Miscellaneous 105
Shooting mode menus
Miscellaneous 106
Playback mode menus Still picture
Playback mode menus
107
Factory default settings
Shooting mode
Playback mode
108
List of functions by shooting mode
109
Camera maintenance
110
Monitor and viewfinder
Lens
Specifications
Miscellaneous 111
Miscellaneous 112
Index
Miscellaneous 113
114
No. of pictures in an
Technical Support USA
European Technical Customer Support
Digital Camera
Introduction
Index
Flowchart
Flowchart
Identifying the OS
Mac OS Macintosh
Windows
Windows
Windows
Connecting the camera to the computer
Computer recognizes the camera as a new device
Confirming the computer recognizes the camera
Confirming the USB driver is installed
Downloading images to your computer
My Documents window is displayed
Disconnecting the camera from your computer
Windows Me/2000/XP
Click the Unplug or Eject Hardware icon on the task bar
Macintosh
Connecting the camera to the computer
Camera setup/connection
Mac OS
Double-click the Macintosh HD icon on the desktop
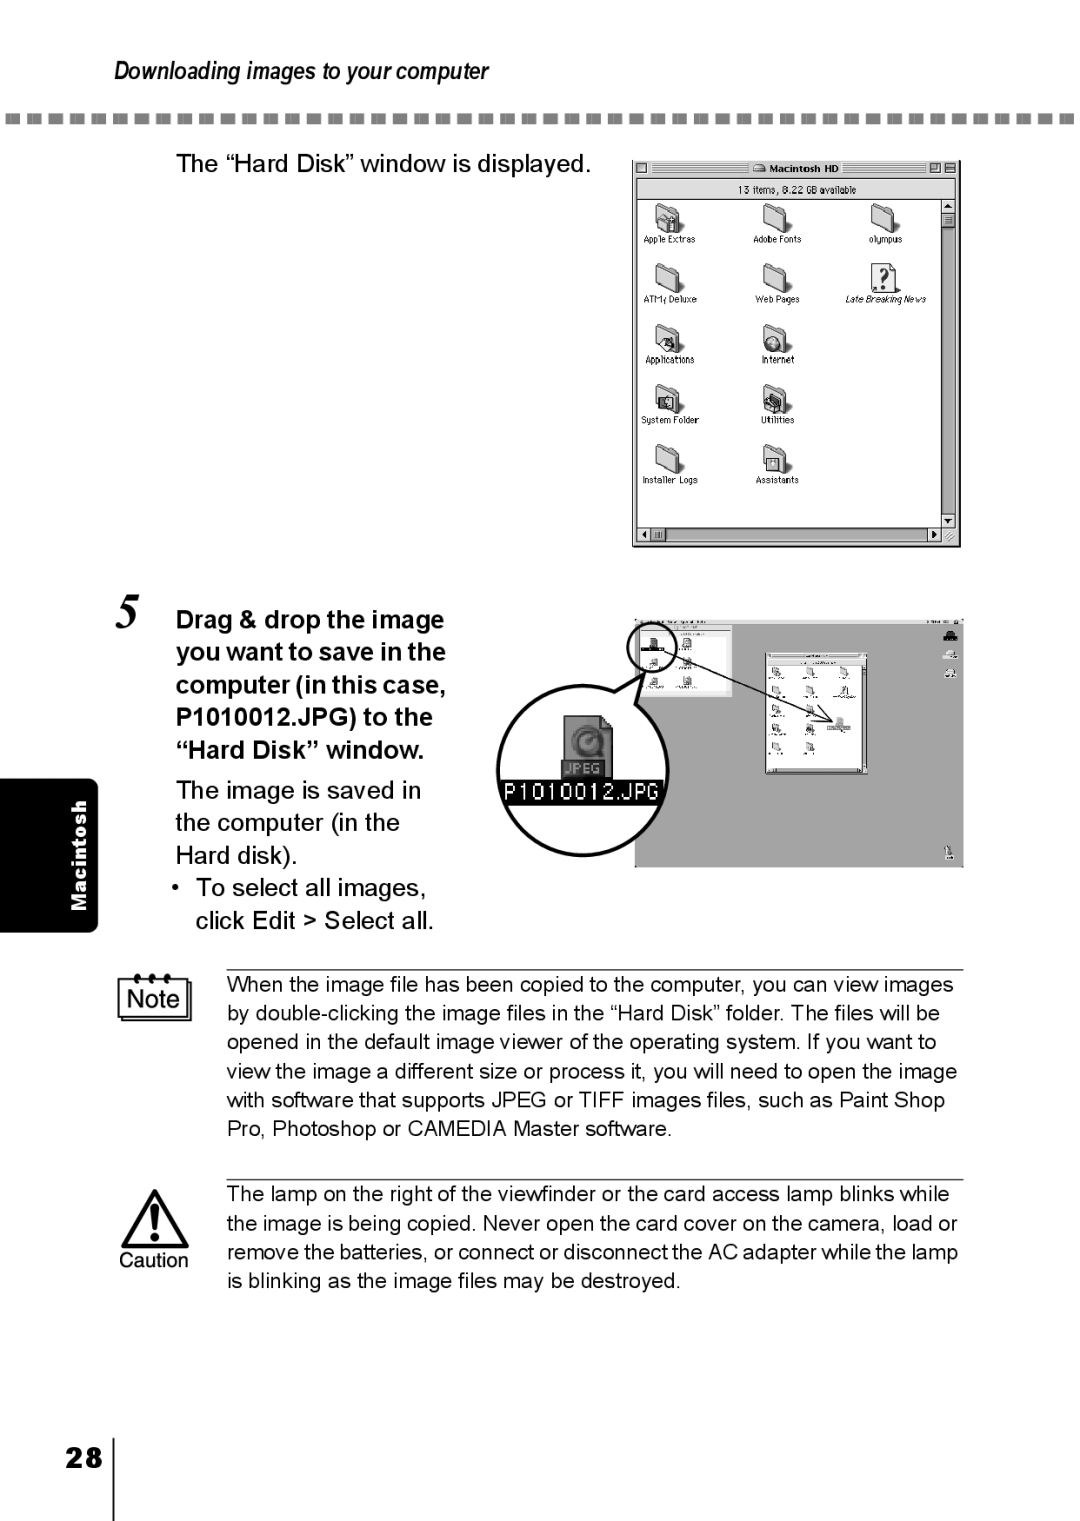
Hard Disk window is displayed
Images are transferred from the camera to your computer
Disconnecting the camera from your computer
Downloading image files using other OS
Technical Support USA