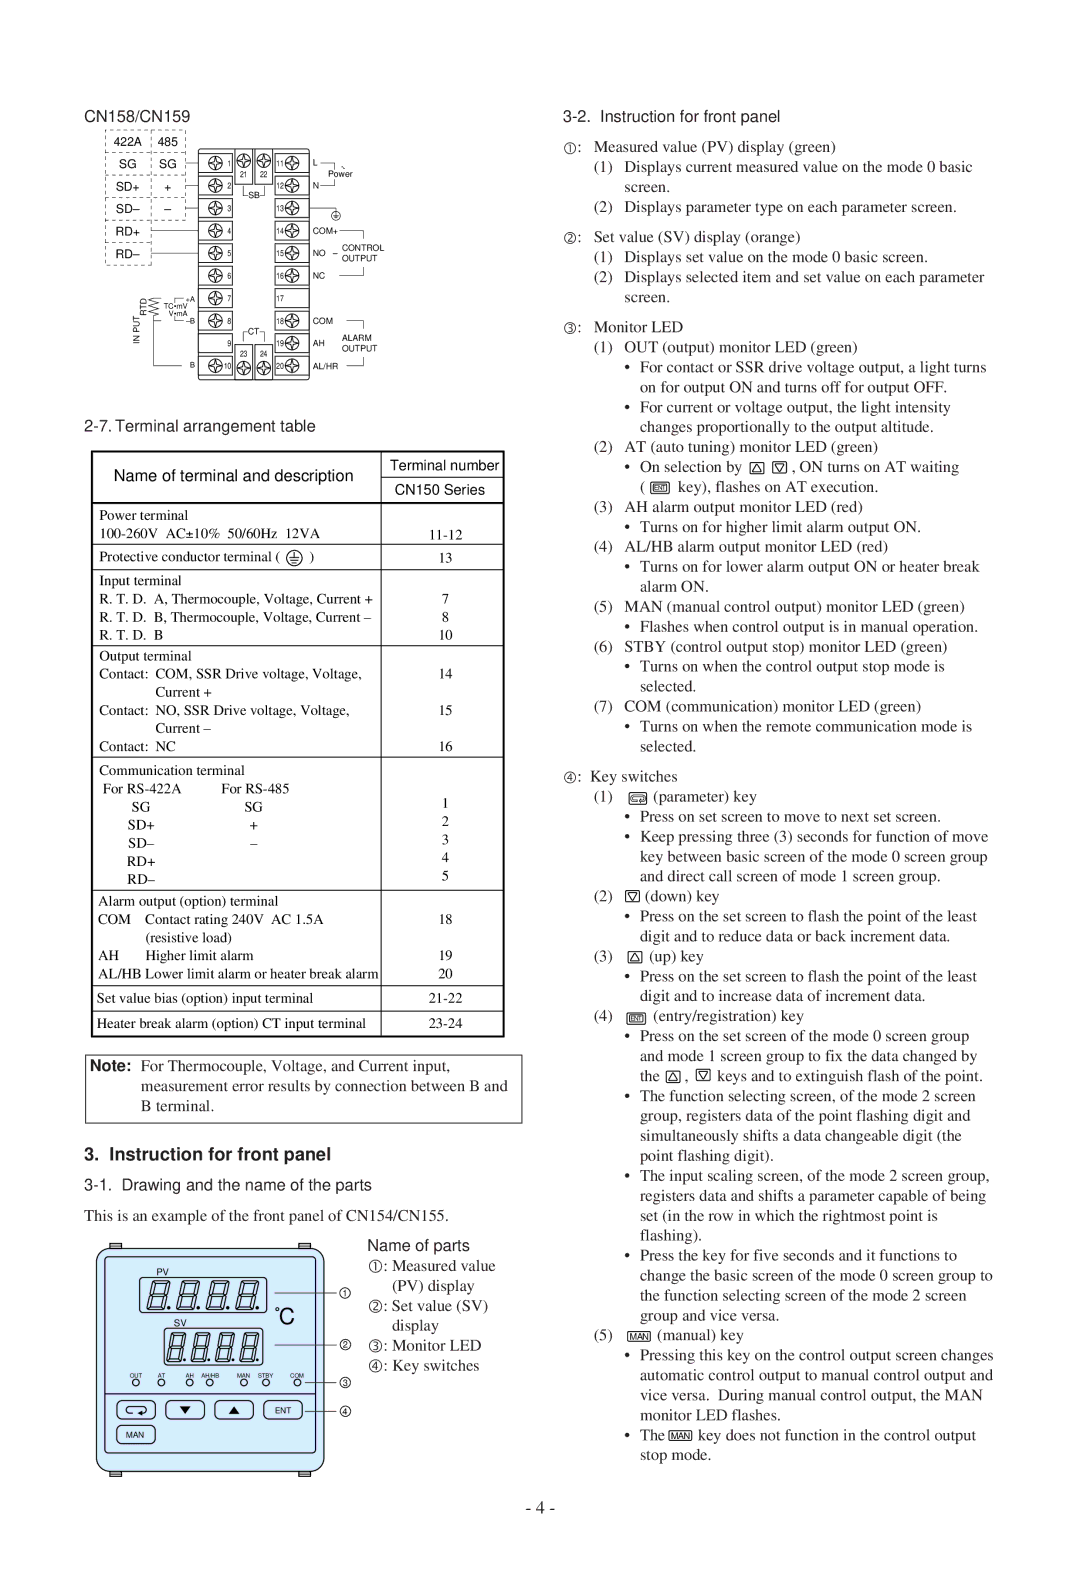
CN159, CN155, CN158, CN154 specifications
Omega watches have long been celebrated for their precision, durability, and innovative features, and models such as the CN154, CN158, CN155, and CN159 exemplify these qualities. Each of these timepieces showcases Omega's commitment to craftsmanship and cutting-edge technology.The Omega CN154 model is notable for its sleek design, combining elegance with robust functionality. Its stainless-steel case ensures durability while maintaining a lightweight feel. The watch features a mesmerizing sapphire crystal that provides scratch resistance and enhances visibility, allowing wearers to appreciate the intricate dial details. Equipped with Omega's Co-Axial escapement technology, the CN154 offers exceptional accuracy and reduced friction, resulting in a longer service life.
Similarly, the Omega CN158 stands out with its distinctive aesthetic and advanced technical features. This model incorporates the brand's renowned chronometer certification, guaranteeing its precision. The CN158 utilizes a helium escape valve, an essential feature for professional divers, enabling it to withstand high pressures during underwater activities. The luminous hands and markers ensure visibility in low-light environments, making it ideal for both diving adventures and everyday wear.
The CN155 model focuses on functionality without compromising style. Its tachymetric scale on the bezel allows for precise speed calculations, catering to motorsport enthusiasts. The chronograph feature provides accurate timing capabilities, while the stainless-steel bracelet offers comfort and security. The watch's water resistance up to 300 meters enhances its versatility, making it a reliable companion for any occasion, be it a business meeting or an ocean dive.
Lastly, the Omega CN159 encapsulates luxury and performance. With a striking ceramic bezel and an intricately designed dial, this timepiece makes a bold statement. The CN159 is equipped with Omega's Master Chronometer technology, which ensures precision while also being resistant to magnetic interference. This allows it to maintain accuracy even in environments with strong magnetic fields. The watch also features a transparent case back, showcasing the exquisite craftsmanship of the automatic movement within.
In summary, the Omega CN154, CN158, CN155, and CN159 models represent the pinnacle of watchmaking innovation. They combine style, precision, and advanced technologies, making them excellent choices for discerning watch enthusiasts. Whether for professional use or personal style, these timepieces offer something for everyone, ensuring Omega remains a leader in the luxury watch industry.