Special Instructions For Vacuum Ranges

On vacuum ranges, the C-NO circuit is closed at sea level conditions. Therefore, increasing vacuum will cause the C- NC circuit to close while decreasing vacuum will cause the C-NO circuit to close. Please make a note of this and wire/adjust the unit accordingly.

Part II - Adjustments

Tools Needed

Screwdriver

NOTE: For set point adjustments and re-calibration, con- nect control to a calibrated pressure gauge.

PSW-852, PSW-853

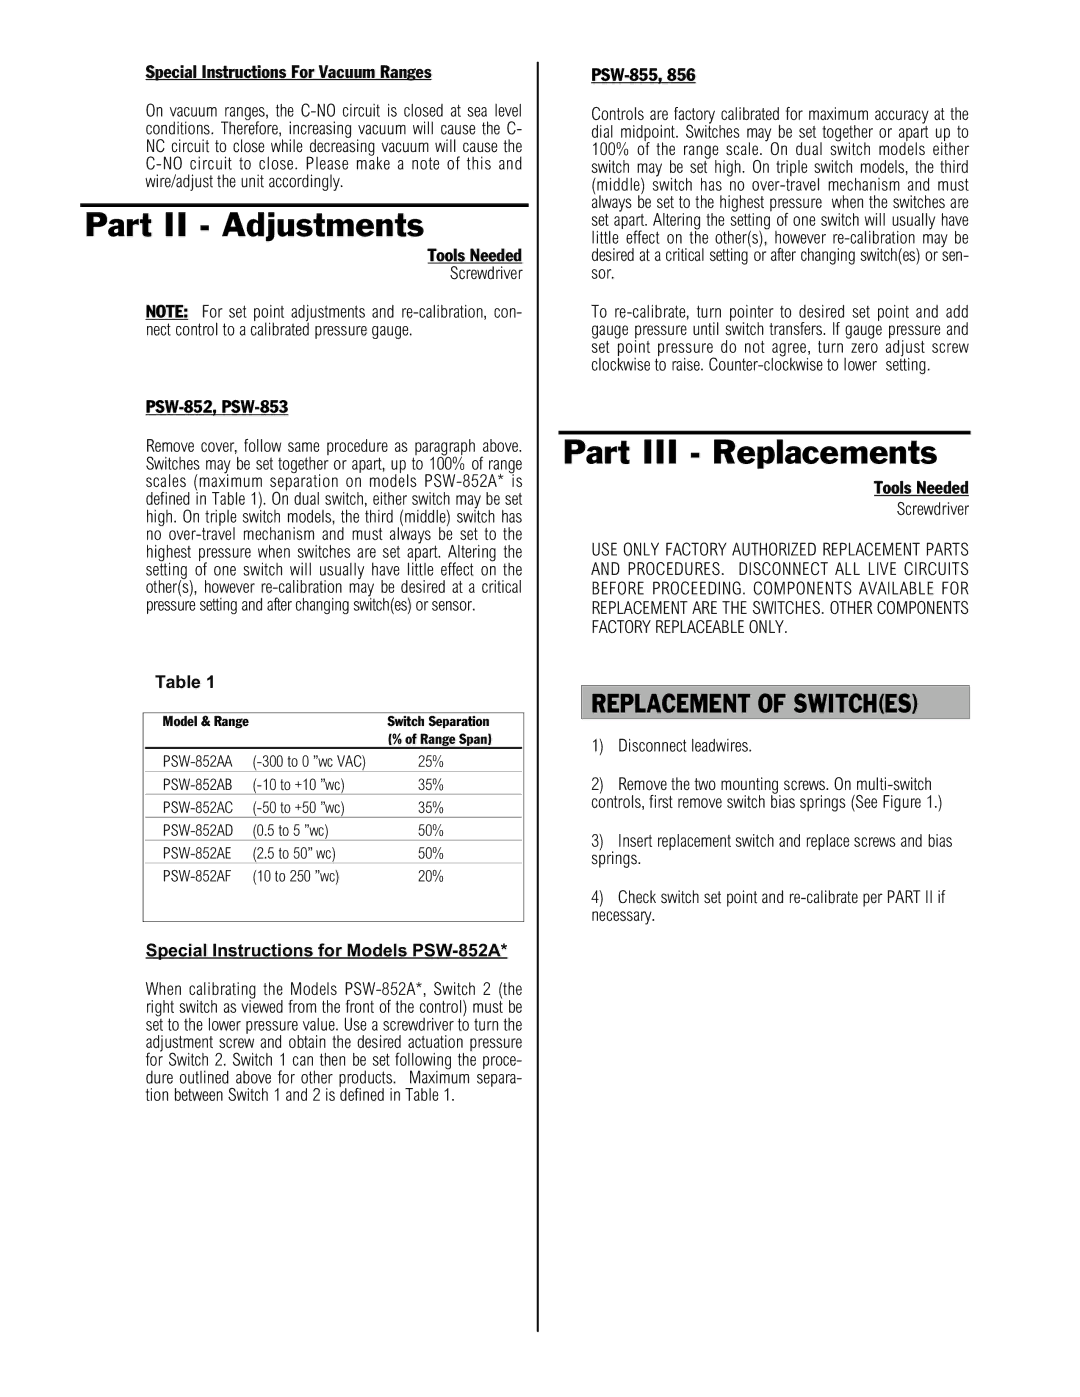
Remove cover, follow same procedure as paragraph above. Switches may be set together or apart, up to 100% of range scales (maximum separation on models PSW-852A* is defined in Table 1). On dual switch, either switch may be set high. On triple switch models, the third (middle) switch has no over-travel mechanism and must always be set to the highest pressure when switches are set apart. Altering the setting of one switch will usually have little effect on the other(s), however re-calibration may be desired at a critical pressure setting and after changing switch(es) or sensor.

Table 1

Model & Range


Switch Separation


(% of Range Span)

PSW-852AA (-300 to 0 ”wc VAC)

25%

PSW-852AB (-10 to +10 ”wc)

35%

PSW-852AC

(-50 to +50 ”wc)

35%

PSW-852AD

(0.5 to 5 ”wc)

50%

PSW-852AE

(2.5 to 50” wc)

50%

PSW-852AF

(10 to 250 ”wc)

20%


Special Instructions for Models PSW-852A*

When calibrating the Models PSW-852A*, Switch 2 (the right switch as viewed from the front of the control) must be set to the lower pressure value. Use a screwdriver to turn the adjustment screw and obtain the desired actuation pressure for Switch 2. Switch 1 can then be set following the proce- dure outlined above for other products. Maximum separa- tion between Switch 1 and 2 is defined in Table 1.

PSW-855, 856

Controls are factory calibrated for maximum accuracy at the dial midpoint. Switches may be set together or apart up to 100% of the range scale. On dual switch models either switch may be set high. On triple switch models, the third (middle) switch has no over-travel mechanism and must always be set to the highest pressure when the switches are set apart. Altering the setting of one switch will usually have little effect on the other(s), however re-calibration may be desired at a critical setting or after changing switch(es) or sen- sor.

To re-calibrate, turn pointer to desired set point and add gauge pressure until switch transfers. If gauge pressure and set point pressure do not agree, turn zero adjust screw clockwise to raise. Counter-clockwise to lower setting.

Part III - Replacements

Tools Needed

Screwdriver

USE ONLY FACTORY AUTHORIZED REPLACEMENT PARTS AND PROCEDURES. DISCONNECT ALL LIVE CIRCUITS BEFORE PROCEEDING. COMPONENTS AVAILABLE FOR REPLACEMENT ARE THE SWITCHES. OTHER COMPONENTS FACTORY REPLACEABLE ONLY.

REPLACEMENT OF SWITCH(ES)

1)Disconnect leadwires.

2)Remove the two mounting screws. On multi-switch controls, first remove switch bias springs (See Figure 1.)

3)Insert replacement switch and replace screws and bias springs.

4)Check switch set point and re-calibrate per PART II if necessary.

Page 4
Image 4
Omega PSW-850 manual Part II Adjustments, Part III Replacements, Replacement of Switches

PSW-850 specifications

The Omega PSW-850 is a premier power supply unit designed for high-performance computing and intricate electronic applications. Known for its rich feature set and robust engineering, the PSW-850 provides an ideal solution for users seeking reliability coupled with performance.

A standout characteristic of the Omega PSW-850 is its impressive output power of 850 Watts, making it suitable for powering high-end gaming rigs, workstations, and servers. The unit is designed with a fully modular cable system, allowing users to connect only the cables they need. This modularity not only simplifies installation but also promotes better airflow within the chassis by reducing cable clutter.

One of the primary technologies integrated into the PSW-850 is the use of high-quality capacitors. These capacitors are designed to provide superior stability and efficiency, resulting in enhanced longevity for connected devices. Additionally, the power supply complies with 80 PLUS Gold certification, indicating that it operates with at least 90% energy efficiency at typical loads. This efficiency helps lower electricity bills and minimizes heat generation, which is crucial for maintaining optimal operating temperatures.

The PSU incorporates advanced protective features such as over-voltage, under-voltage, over-current, and short-circuit protection. Such safeguards ensure peace of mind for users, protecting sensitive components from potential damage caused by electrical anomalies. The integrated fan technology further enhances cooling capabilities, utilizing a 140mm fan that operates quietly while efficiently dissipating heat.

In terms of design, the Omega PSW-850 features a sleek, modern look that complements contemporary computer builds. With a compact form factor, it fits into a variety of cases while maintaining a strong build quality. The power supply also supports a variety of connections, including multiple PCIe connectors for high-performance graphics cards, SATA, and Molex connectors for other peripherals.

Overall, the Omega PSW-850 is built to satisfy the demands of technology enthusiasts, gamers, and professional users alike. Its combination of advanced features, energy efficiency, and superior reliability make it a top choice in the competitive power supply market. For anyone in need of an efficient and powerful power supply solution, the PSW-850 stands out as an exceptional choice. Its thoughtful engineering and user-friendly design are set to bring performance and stability to any high-powered computer setup.