Manual and Auto Calibration Instructions
For Models: Advance 205 T20 T30 T40 2.0T 3.0T 4.0T 5.0T Free Spirit 200 Free Spirit 300 Free Spirit 400 1.1T 2.1T 3.1T 4.1T 5.1T
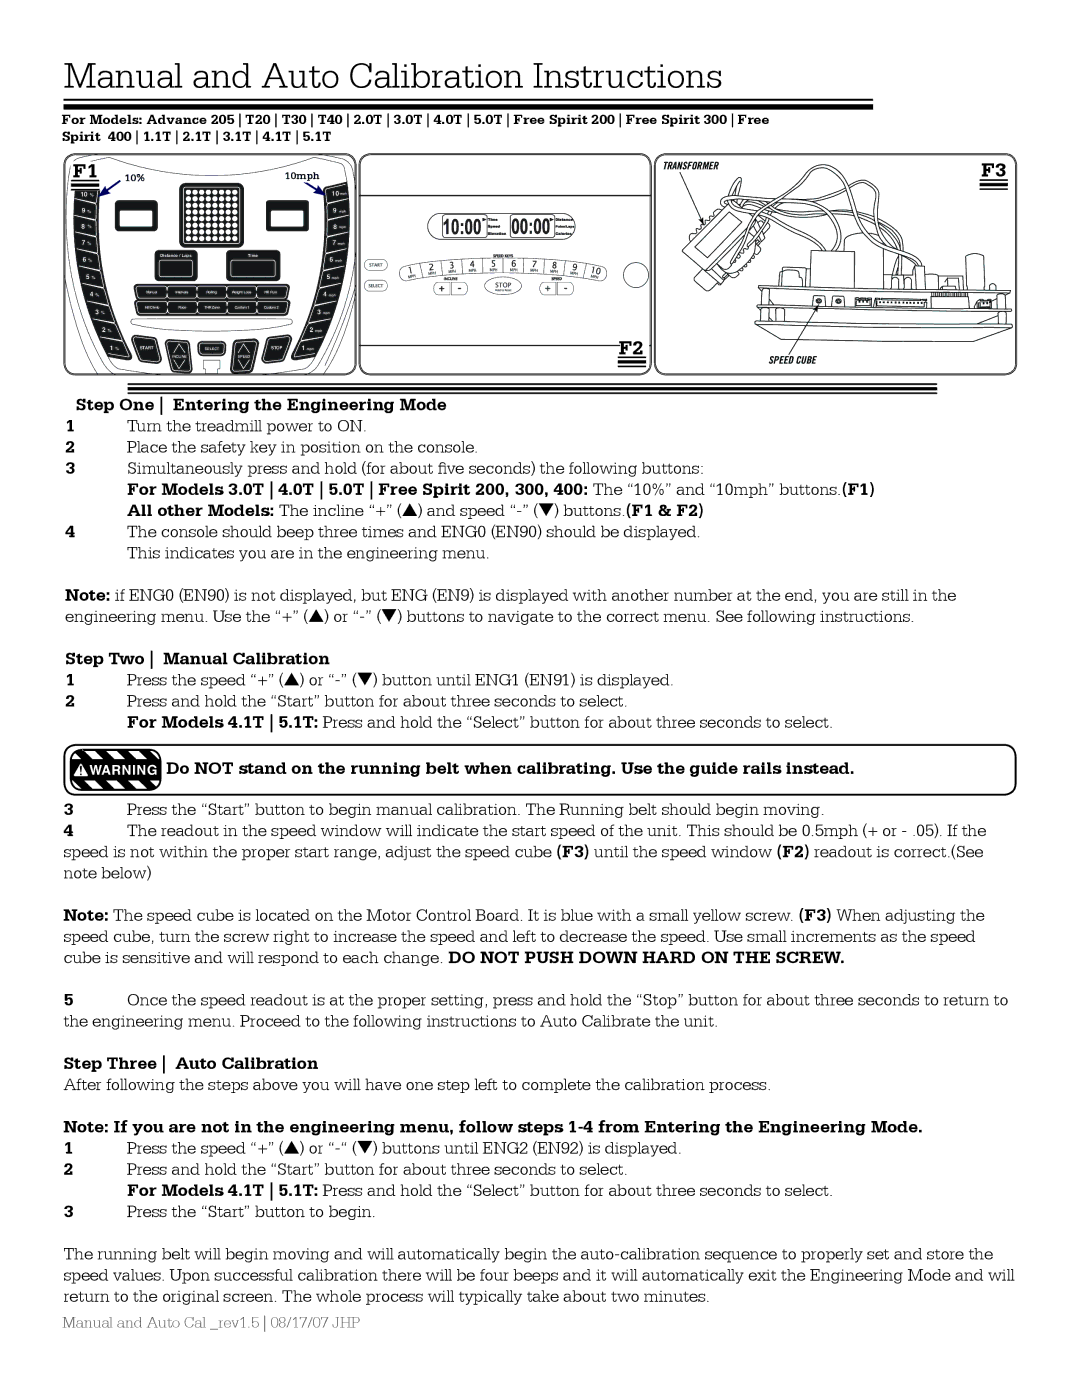
F1 | 10% |
|
|
|
| 10mph |
|
10 % |
|
|
|
|
| 10 | mph |
9 % |
|
|
|
|
| 9 mph | |
8 % |
|
|
|
|
| 8 mph | |
7 % |
|
|
|
|
| 7 mph | |
6 % |
| Distance / Laps |
| Time |
| 6 mph | |
|
|
|
|
| |||
5 % |
|
|
|
|
| 5 mph |
|
4 % | Manual | Intervals | Rolling | Weight Loss | Hill Run | 4 mph |
|
|
|
|
|
|
| ||
3 % | Hill Climb | Race | THR Zone | Custom 1 | Custom 2 | 3 mph |
|
|
|
|
|
|
| ||
2 % |
|
|
|
|
| 2 mph |
|
1 % | START |
| SELECT |
| STOP | 1 mph |
|
|
| INCLINE |
| SPEED |
|
|
|
F2![]()
![]()
TRANSFORMER | F3 |
| |
| SPEED CUBE |
Step One Entering the Engineering Mode
1Turn the treadmill power to ON.
2Place the safety key in position on the console.
3Simultaneously press and hold (for about five seconds) the following buttons:
For Models 3.0T 4.0T 5.0T Free Spirit 200, 300, 400: The “10%” and “10mph” buttons.(F1)
All other Models: The incline “+” (s) and speed
4The console should beep three times and ENG0 (EN90) should be displayed. This indicates you are in the engineering menu.
Note: if ENG0 (EN90) is not displayed, but ENG (EN9) is displayed with another number at the end, you are still in the engineering menu. Use the “+” (s) or
Step Two Manual Calibration
1Press the speed “+” (s) or
2Press and hold the “Start” button for about three seconds to select.
For Models 4.1T 5.1T: Press and hold the “Select” button for about three seconds to select.
![]() WARNING
WARNING
Do NOT stand on the running belt when calibrating. Use the guide rails instead.
3Press the “Start” button to begin manual calibration. The Running belt should begin moving.
4The readout in the speed window will indicate the start speed of the unit. This should be 0.5mph (+ or
Note: The speed cube is located on the Motor Control Board. It is blue with a small yellow screw. (F3) When adjusting the speed cube, turn the screw right to increase the speed and left to decrease the speed. Use small increments as the speed cube is sensitive and will respond to each change. DO NOT PUSH DOWN HARD ON THE SCREW.
5Once the speed readout is at the proper setting, press and hold the “Stop” button for about three seconds to return to the engineering menu. Proceed to the following instructions to Auto Calibrate the unit.
Step Three Auto Calibration
After following the steps above you will have one step left to complete the calibration process.
Note: If you are not in the engineering menu, follow steps
1Press the speed “+” (s) or
2Press and hold the “Start” button for about three seconds to select.
For Models 4.1T 5.1T: Press and hold the “Select” button for about three seconds to select.
3Press the “Start” button to begin.
The running belt will begin moving and will automatically begin the
Manual and Auto Cal _rev1.5 08/17/07 JHP