Assembly
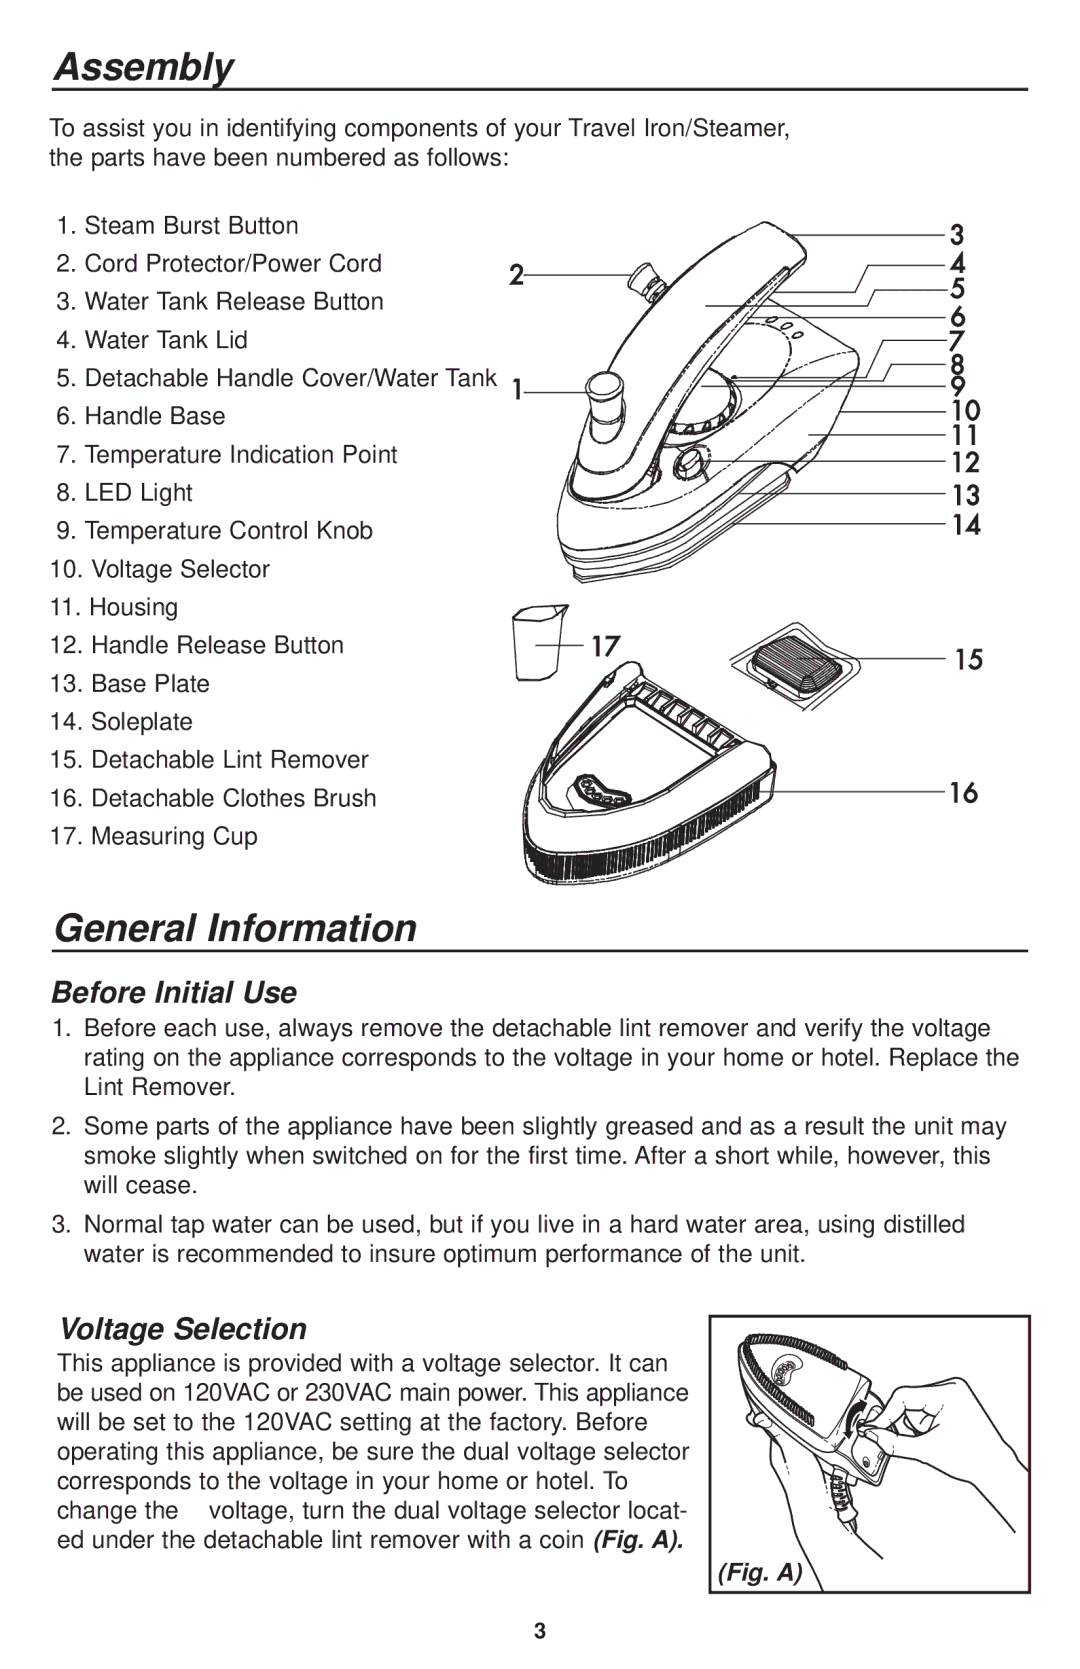
To assist you in identifying components of your Travel Iron/Steamer, the parts have been numbered as follows:
1. | Steam Burst Button |
|
|
|
|
|
|
|
|
|
|
|
|
2. | Cord Protector/Power Cord | 2 |
|
|
|
|
|
|
|
|
|
|
|
3. | Water Tank Release Button |
|
|
|
|
|
|
|
|
|
|
| |
|
|
|
|
|
|
|
|
|
|
|
| ||
4. | Water Tank Lid |
|
|
|
|
|
|
|
|
|
|
|
|
5. | Detachable Handle Cover/Water Tank 1 |
|
|
|
|
|
|
|
|
|
|
| |
6. | Handle Base |
|
|
|
|
|
|
|
|
|
|
|
|
|
|
|
|
|
|
|
|
|
|
|
| ||
7. | Temperature Indication Point |
|
|
|
|
|
|
|
|
|
|
|
|
|
|
|
|
|
|
|
|
|
|
|
| ||
8. | LED Light |
|
|
|
|
|
|
|
|
|
|
|
|
|
|
|
|
|
|
|
|
|
|
|
| ||
|
|
|
|
|
|
|
|
|
|
|
| ||
9. | Temperature Control Knob |
|
|
|
|
|
|
|
|
|
|
|
|
|
|
|
|
|
|
|
|
|
|
|
| ||
|
|
|
|
|
|
|
|
|
|
|
| ||
|
|
|
|
|
|
|
|
|
|
|
| ||
|
|
|
|
|
|
|
|
|
|
|
|
|
|
10. | Voltage Selector |
|
11. Housing |
| |
12. | Handle Release Button | 17 |
13. | Base Plate |
|
14. | Soleplate |
|
15. | Detachable Lint Remover |
|
16. | Detachable Clothes Brush |
|
17. | Measuring Cup |
|
3
4
5
6
7
8
9
10
11
12
13
14
15
16
General Information
Before Initial Use
1.Before each use, always remove the detachable lint remover and verify the voltage rating on the appliance corresponds to the voltage in your home or hotel. Replace the Lint Remover.
2.Some parts of the appliance have been slightly greased and as a result the unit may smoke slightly when switched on for the first time. After a short while, however, this will cease.
3.Normal tap water can be used, but if you live in a hard water area, using distilled water is recommended to insure optimum performance of the unit.
Voltage Selection
This appliance is provided with a voltage selector. It can be used on 120VAC or 230VAC main power. This appliance will be set to the 120VAC setting at the factory. Before operating this appliance, be sure the dual voltage selector corresponds to the voltage in your home or hotel. To change the voltage, turn the dual voltage selector locat- ed under the detachable lint remover with a coin (Fig. A).
(Fig. A)
3
