|
|
| OREGON® Cordless Tool System |
|
| MAINTENANCE AND CLEANING | |
|
| ||
|
| TRIMMER/EDGER MODEL ST250 | |
|
|
| |
|
|
|
|
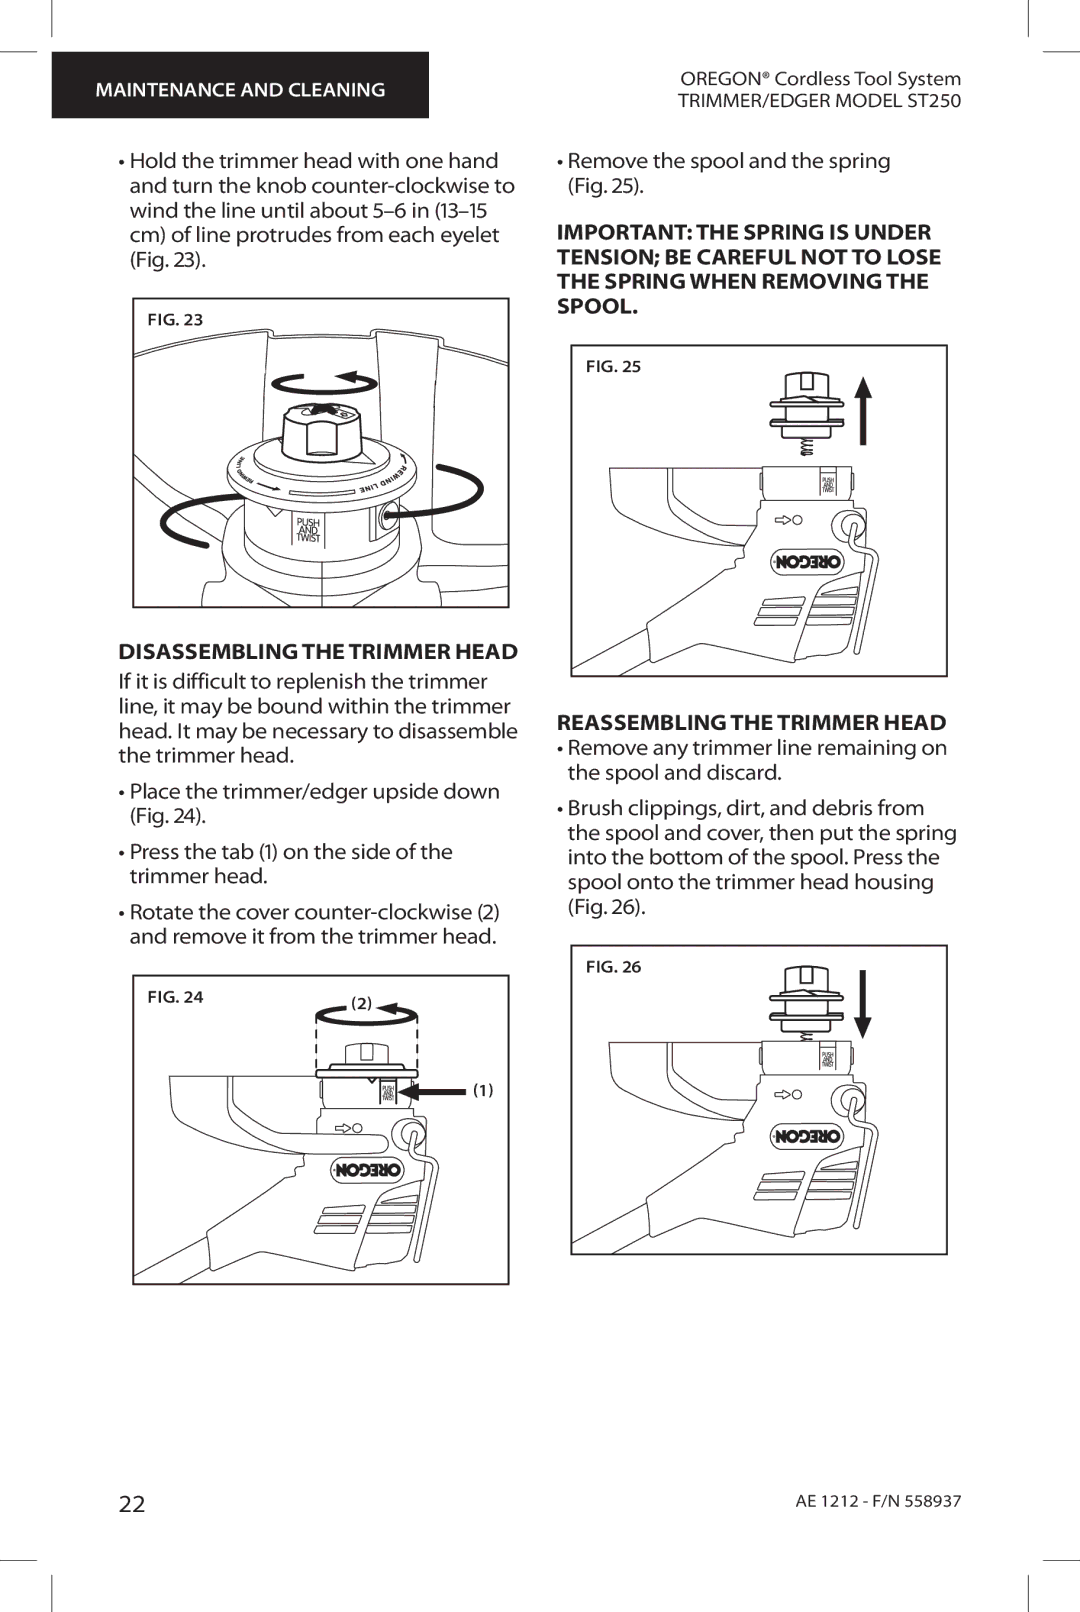
•Hold the trimmer head with one hand and turn the knob
Fig. 23 |
Disassembling the trimmer head
If it is difficult to replenish the trimmer line, it may be bound within the trimmer head. It may be necessary to disassemble the trimmer head.
•Place the trimmer/edger upside down (Fig. 24).
•Press the tab (1) on the side of the trimmer head.
•Rotate the cover
Fig. 24 | (2) |
|
![]()
![]()
![]()
![]()
![]() (1)
(1)
•Remove the spool and the spring (Fig. 25).
Important: The spring is under tension; be careful not to lose the spring when removing the spool.
Fig. 25 |
Reassembling the trimmer head
•Remove any trimmer line remaining on the spool and discard.
•Brush clippings, dirt, and debris from the spool and cover, then put the spring into the bottom of the spool. Press the spool onto the trimmer head housing (Fig. 26).
Fig. 26
22 | AE 1212 - F/N 558937 |