PEDOMETER with
DIGITAL CLOCK (Model #: PE320)
INTRODUCTION
Thank you for selecting the Oregon Scientific Digital Pedometer with
In this box, you will find:
•Pedometer with
•1 x LR43 size 1.5 V battery
Keep this manual handy as you use your new product. It contains practical
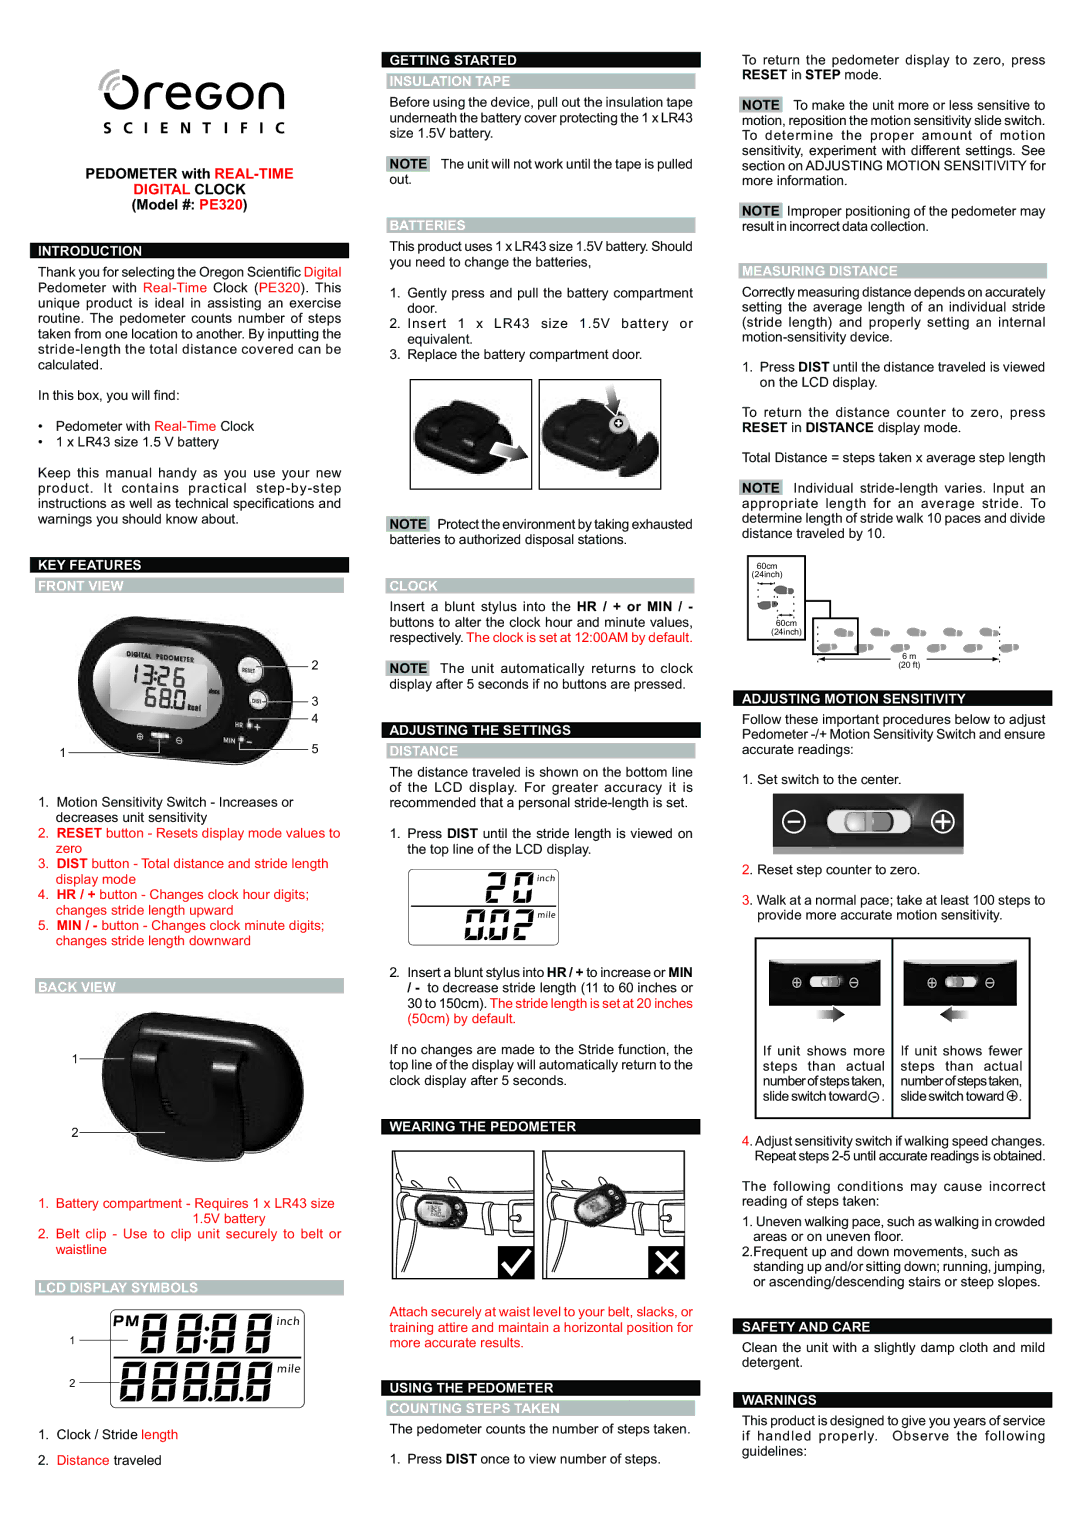
KEY FEATURES
FRONT VIEW
2
3
![]() 4
4
1 | 5 |
1.Motion Sensitivity Switch - Increases or decreases unit sensitivity
2.RESET button - Resets display mode values to zero
3.DIST button - Total distance and stride length display mode
4.HR / + button - Changes clock hour digits; changes stride length upward
5.MIN / - button - Changes clock minute digits; changes stride length downward
BACK VIEW
1
2
1.Battery compartment - Requires 1 x LR43 size 1.5V battery
2.Belt clip - Use to clip unit securely to belt or waistline
LCD DISPLAY SYMBOLS
i n c h
1
m i l e
2
1.Clock / Stride length
2.Distance traveled
GETTING STARTED
INSULATION TAPE
Before using the device, pull out the insulation tape underneath the battery cover protecting the 1 x LR43 size 1.5V battery.
NOTE The unit will not work until the tape is pulled out.
BATTERIES
This product uses 1 x LR43 size 1.5V battery. Should you need to change the batteries,
1.Gently press and pull the battery compartment door.
2.Insert 1 x LR43 size 1.5V battery or equivalent.
3.Replace the battery compartment door.
NOTE Protect the environment by taking exhausted batteries to authorized disposal stations.
CLOCK
Insert a blunt stylus into the HR / + or MIN / - buttons to alter the clock hour and minute values, respectively. The clock is set at 12:00AM by default.
NOTE The unit automatically returns to clock display after 5 seconds if no buttons are pressed.
ADJUSTING THE SETTINGS
DISTANCE
The distance traveled is shown on the bottom line of the LCD display. For greater accuracy it is recommended that a personal
1.Press DIST until the stride length is viewed on the top line of the LCD display.
![]()
![]() i nc h
i nc h
![]() mile
mile
2.Insert a blunt stylus into HR / + to increase or MIN / - to decrease stride length (11 to 60 inches or 30 to 150cm). The stride length is set at 20 inches (50cm) by default.
If no changes are made to the Stride function, the top line of the display will automatically return to the clock display after 5 seconds.
WEARING THE PEDOMETER
Attach securely at waist level to your belt, slacks, or training attire and maintain a horizontal position for more accurate results.
USING THE PEDOMETER
COUNTING STEPS TAKEN
The pedometer counts the number of steps taken.
1. Press DIST once to view number of steps.
To return the pedometer display to zero, press RESET in STEP mode.
NOTE To make the unit more or less sensitive to motion, reposition the motion sensitivity slide switch. To determine the proper amount of motion sensitivity, experiment with different settings. See section on ADJUSTING MOTION SENSITIVITY for more information.
NOTE Improper positioning of the pedometer may result in incorrect data collection.
MEASURING DISTANCE
Correctly measuring distance depends on accurately setting the average length of an individual stride (stride length) and properly setting an internal
1.Press DIST until the distance traveled is viewed on the LCD display.
To return the distance counter to zero, press RESET in DISTANCE display mode.
Total Distance = steps taken x average step length
NOTE Individual
60cm
(24inch)
60cm
(24inch)
6 m
(20 ft)
ADJUSTING MOTION SENSITIVITY
Follow these important procedures below to adjust Pedometer
1. Set switch to the center.
2. Reset step counter to zero.
3. Walk at a normal pace; take at least 100 steps to provide more accurate motion sensitivity.
|
|
|
|
|
|
|
|
|
|
If unit shows more | If unit shows fewer | ||||||||
steps than actual | steps than actual | ||||||||
number of steps taken, | number of steps taken, | ||||||||
slide switch toward | slide switch toward + . | ||||||||
|
|
|
|
|
|
|
|
|
|
4. Adjust sensitivity switch if walking speed changes. Repeat steps
The following conditions may cause incorrect reading of steps taken:
1.Uneven walking pace, such as walking in crowded areas or on uneven floor.
2.Frequent up and down movements, such as standing up and/or sitting down; running, jumping, or ascending/descending stairs or steep slopes.
SAFETY AND CARE
Clean the unit with a slightly damp cloth and mild detergent.
WARNINGS
This product is designed to give you years of service if handled properly. Observe the following guidelines: