9.RESET: Press to return all values to the default settings
10.![]() : Switch radio on or off
: Switch radio on or off
11.![]() : Toggle through preset radio stations
: Toggle through preset radio stations
12.![]()
![]()
![]()
![]()
![]() : Increase or decrease volume
: Increase or decrease volume
13.FM radio antenna wire
LCD DISPLAY
� | � |
� | � |
| |
| � |
� | � |
�� | |
� |
|
� |
|
| �� |
1.Time
2.24 / 12 hr format
3.Calendar / alarm display
4.Alarm on / off
5.Radio alarm on / off
6.Offset time zone
7.
8.Battery status
9.Adapter is disconnected
10.FM radio display / sleep / volume level / radio frequency
11.Radio station
GETTING STARTED
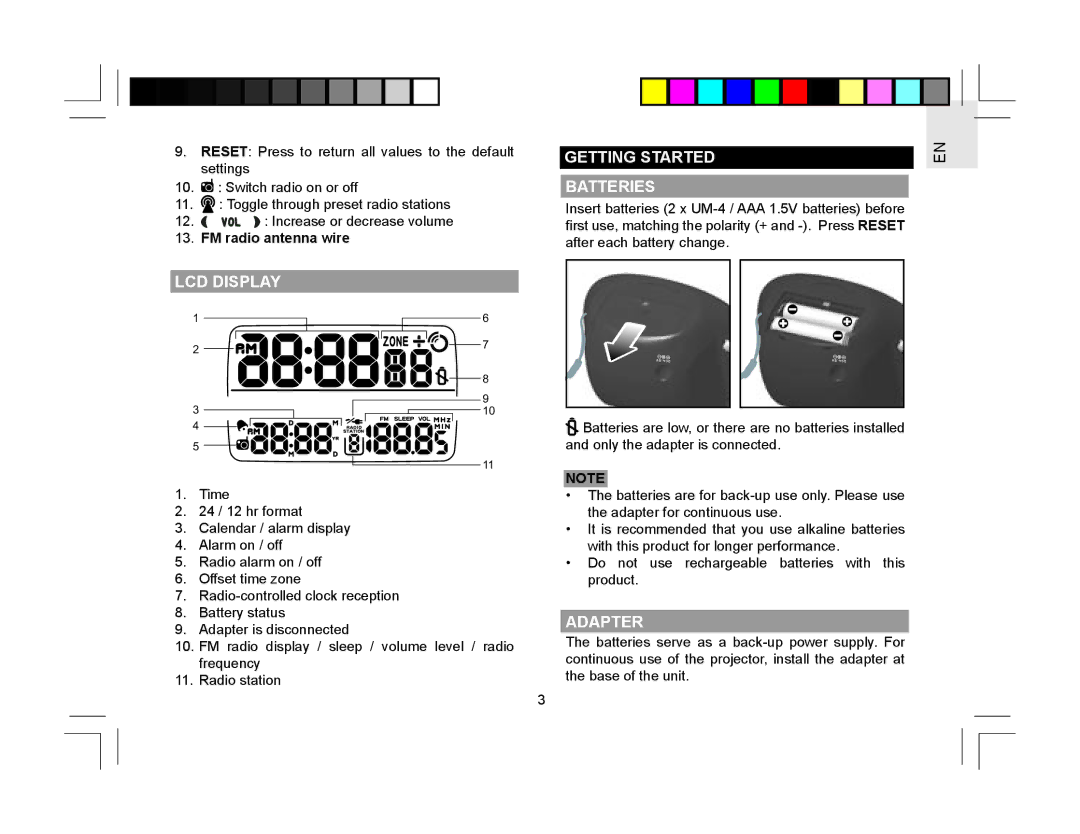
BATTERIES
Insert batteries (2 x
![]() Batteries are low, or there are no batteries installed and only the adapter is connected.
Batteries are low, or there are no batteries installed and only the adapter is connected.
NOTE
•The batteries are for
•It is recommended that you use alkaline batteries with this product for longer performance.
•Do not use rechargeable batteries with this product.
ADAPTER
The batteries serve as a
EN
3