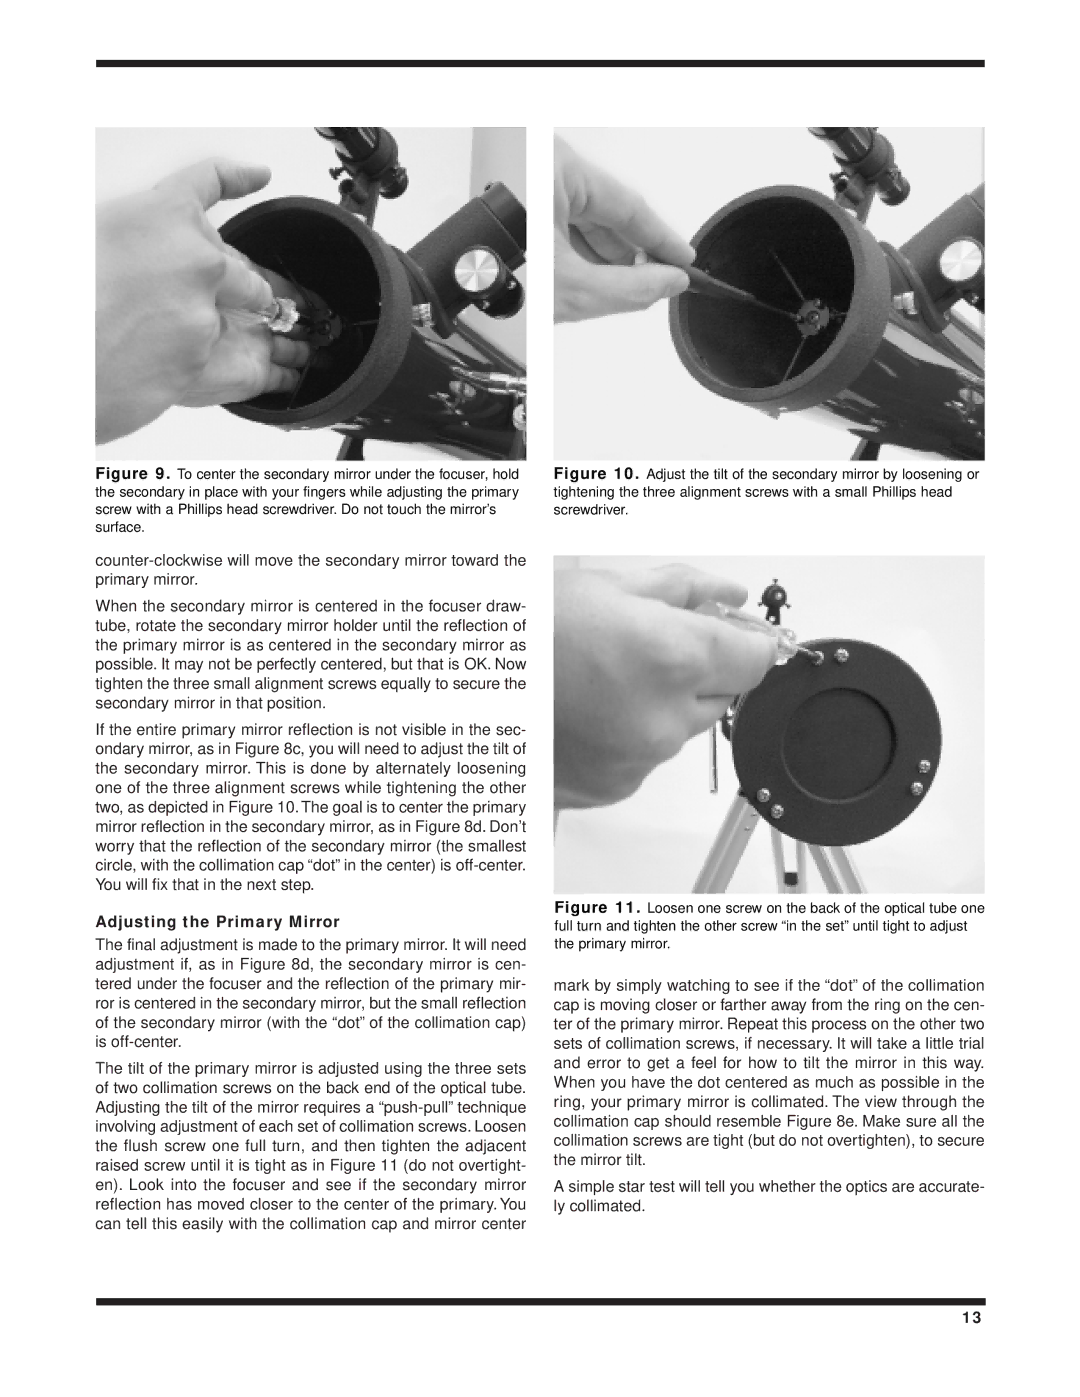
Figure 9. To center the secondary mirror under the focuser, hold the secondary in place with your fingers while adjusting the primary screw with a Phillips head screwdriver. Do not touch the mirror’s surface.

counter-clockwise will move the secondary mirror toward the primary mirror.

When the secondary mirror is centered in the focuser draw- tube, rotate the secondary mirror holder until the reflection of the primary mirror is as centered in the secondary mirror as possible. It may not be perfectly centered, but that is OK. Now tighten the three small alignment screws equally to secure the secondary mirror in that position.

If the entire primary mirror reflection is not visible in the sec- ondary mirror, as in Figure 8c, you will need to adjust the tilt of the secondary mirror. This is done by alternately loosening one of the three alignment screws while tightening the other two, as depicted in Figure 10. The goal is to center the primary mirror reflection in the secondary mirror, as in Figure 8d. Don’t worry that the reflection of the secondary mirror (the smallest circle, with the collimation cap “dot” in the center) is off-center. You will fix that in the next step.

Adjusting the Primary Mirror

The final adjustment is made to the primary mirror. It will need adjustment if, as in Figure 8d, the secondary mirror is cen- tered under the focuser and the reflection of the primary mir- ror is centered in the secondary mirror, but the small reflection of the secondary mirror (with the “dot” of the collimation cap) is off-center.

The tilt of the primary mirror is adjusted using the three sets of two collimation screws on the back end of the optical tube. Adjusting the tilt of the mirror requires a “push-pull” technique involving adjustment of each set of collimation screws. Loosen the flush screw one full turn, and then tighten the adjacent raised screw until it is tight as in Figure 11 (do not overtight- en). Look into the focuser and see if the secondary mirror reflection has moved closer to the center of the primary. You can tell this easily with the collimation cap and mirror center

Figure 10. Adjust the tilt of the secondary mirror by loosening or tightening the three alignment screws with a small Phillips head screwdriver.

Figure 11. Loosen one screw on the back of the optical tube one full turn and tighten the other screw “in the set” until tight to adjust the primary mirror.

mark by simply watching to see if the “dot” of the collimation cap is moving closer or farther away from the ring on the cen- ter of the primary mirror. Repeat this process on the other two sets of collimation screws, if necessary. It will take a little trial and error to get a feel for how to tilt the mirror in this way. When you have the dot centered as much as possible in the ring, your primary mirror is collimated. The view through the collimation cap should resemble Figure 8e. Make sure all the collimation screws are tight (but do not overtighten), to secure the mirror tilt.

A simple star test will tell you whether the optics are accurate- ly collimated.

13

Page 13
Image 13
Orion 3 EQ instruction manual Adjusting the Primary Mirror

3 EQ specifications

The Orion 3 EQ is a state-of-the-art telescope mount that caters to both amateur and professional astronomers. Renowned for its precision and user-friendly design, the Orion 3 EQ is engineered to deliver an enhanced observational experience. This equatorial mount is specifically crafted to support a variety of optical telescopes, making it a versatile choice for stargazers eager to explore the heavens.

One of the standout features of the Orion 3 EQ is its robust construction. The mount is built with high-quality materials, ensuring stability and durability during usage. A notable characteristic of the Orion 3 EQ is its smooth, adjustable movements, allowing users to easily track celestial objects as they move across the night sky. This is especially beneficial for long-exposure astrophotography, where precise tracking is essential for capturing the details of distant galaxies and nebulae.

The mount is equipped with a sophisticated setting circle and latitude adjustment knobs, facilitating accurate alignment with celestial coordinates. This capability simplifies the process of locating objects in the sky, making it an excellent choice for both beginners and experienced astronomers. Additionally, the Orion 3 EQ features slow-motion controls, providing fine adjustments that enable users to center objects with ease.

Modern technology is showcased in the Orion 3 EQ’s optional GoTo system. This innovative technology allows users to input specific celestial coordinates and automatically track objects of interest. The integrated computer system can store thousands of celestial objects, offering a guided experience that enhances the observational journey.

Furthermore, the Orion 3 EQ supports a variety of telescope tubes, accommodating accessories like finderscopes, eyepieces, and cameras for a comprehensive viewing experience. Its compatibility with different mounts means users can customize their setup to suit their particular needs, whether they are engaging in visual astronomy or astrophotography.

In summary, the Orion 3 EQ stands out in the realm of telescope mounts thanks to its robust construction, precision tracking mechanisms, user-friendly features, and optional advanced technologies. Ideal for enthusiasts eager to delve into the cosmic wonders beyond our planet, the Orion 3 EQ represents a blend of tradition and modern innovation that is essential for any serious astronomer.