Take some time to use the camera and Orion AmCap software during the day to become familiar and comfortable with their basic operation. For best results, you can optimize your images with the camera controls.
Camera Controls
For best images, you can adjust the camera controls though Orion AmCap to fine tune the image. You can see how the camera controls affect an image in the Live Video Window.
From the Options menu choose Video Capture Filter and you can access the camera controls under Stream property tab. Here you will find the Brightness, Contrast, Gamma, Hue, Saturation (level of color), Sharpness (keep this low as it can add noise), and Exposure controls. The Exposure control is a gain adjustment that allows additional flexibility in adjusting image brightness. You can either manually adjust this by unselecting the Auto box and manually mov- ing the slider, or have automatic adjustment by leaving the Auto box selected. Out Door should be checked for night viewing. Other options such as B/W mode, Flip, Mirror and White Balance will aid in tuning the live view however it is recommended to only modify exposure and brightness if images are to be software processed later. To return the camera controls to their default set- tings, click the Reset button.
The other camera controls are available by selecting Video Capture Pin from the Options menu. This accesses the Stream Format property sheet, which allows you to set additional parameters. The Frame Rate, while generally should be left at 15 frames/second for the sharpest planetary images, can be toggled down to 7.5 frames/second for brightest exposures. This value may be overridden If the use Frame Rate box Is checked in the Capture
the camera’s field of view, and typically does not require stacking of multiple exposures as planetary images do.
Imaging the Moon
Imaging the Moon is much like imaging terrestrial objects during the day. Since the exposure is very short, it is not criti- cal that the telescope be precisely polar aligned.
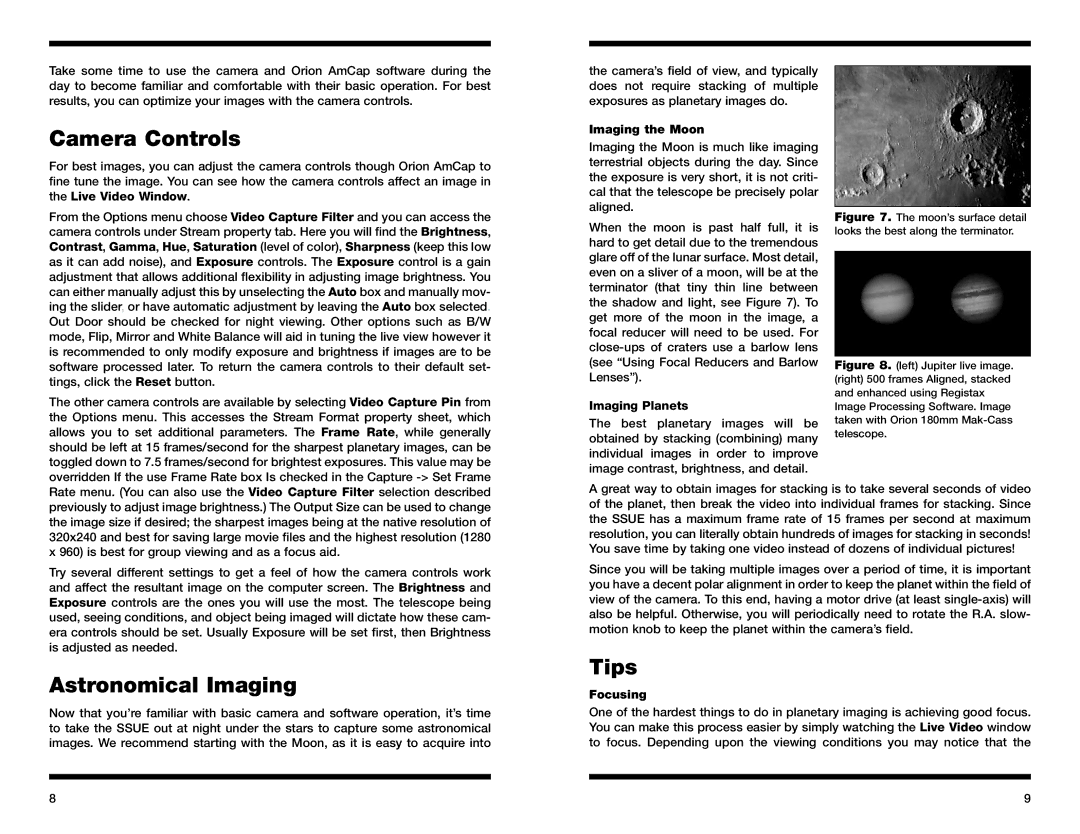
When the moon is past half full, it is hard to get detail due to the tremendous glare off of the lunar surface. Most detail, even on a sliver of a moon, will be at the terminator (that tiny thin line between the shadow and light, see Figure 7). To get more of the moon in the image, a focal reducer will need to be used. For
Imaging Planets
The best planetary images will be obtained by stacking (combining) many individual images in order to improve image contrast, brightness, and detail.
Figure 7. The moon’s surface detail looks the best along the terminator.
Figure 8. (left) Jupiter live image. (right) 500 frames Aligned, stacked and enhanced using Registax Image Processing Software. Image taken with Orion 180mm Mak-Cass telescope.
Rate menu. (You can also use the Video Capture Filter selection described previously to adjust image brightness.) The Output Size can be used to change the image size if desired; the sharpest images being at the native resolution of 320x240 and best for saving large movie files and the highest resolution (1280 x 960) is best for group viewing and as a focus aid.
Try several different settings to get a feel of how the camera controls work and affect the resultant image on the computer screen. The Brightness and Exposure controls are the ones you will use the most. The telescope being used, seeing conditions, and object being imaged will dictate how these cam- era controls should be set. Usually Exposure will be set first, then Brightness is adjusted as needed.
Astronomical Imaging
Now that you’re familiar with basic camera and software operation, it’s time to take the SSUE out at night under the stars to capture some astronomical images. We recommend starting with the Moon, as it is easy to acquire into
A great way to obtain images for stacking is to take several seconds of video of the planet, then break the video into individual frames for stacking. Since the SSUE has a maximum frame rate of 15 frames per second at maximum resolution, you can literally obtain hundreds of images for stacking in seconds! You save time by taking one video instead of dozens of individual pictures!
Since you will be taking multiple images over a period of time, it is important you have a decent polar alignment in order to keep the planet within the field of view of the camera. To this end, having a motor drive (at least
Tips
Focusing
One of the hardest things to do in planetary imaging is achieving good focus. You can make this process easier by simply watching the Live Video window to focus. Depending upon the viewing conditions you may notice that the
8 | 9 |