Congratulations on your purchase of a quality Orion product. Your VersaGo Altazimuth Mount is a sturdy, yet highly portable observing platform for small telescopes. The simple design makes setting up and using the mount very easy. Teflon bearing surfaces for both axes of motion insure smooth telescope pointing, even when making very small, precise positional adjustments. Great for daytime terrestrial or nighttime astronomical applications, you’ll find yourself observing more and fussing with equipment less when using the VersaGo.
These instructions will help you
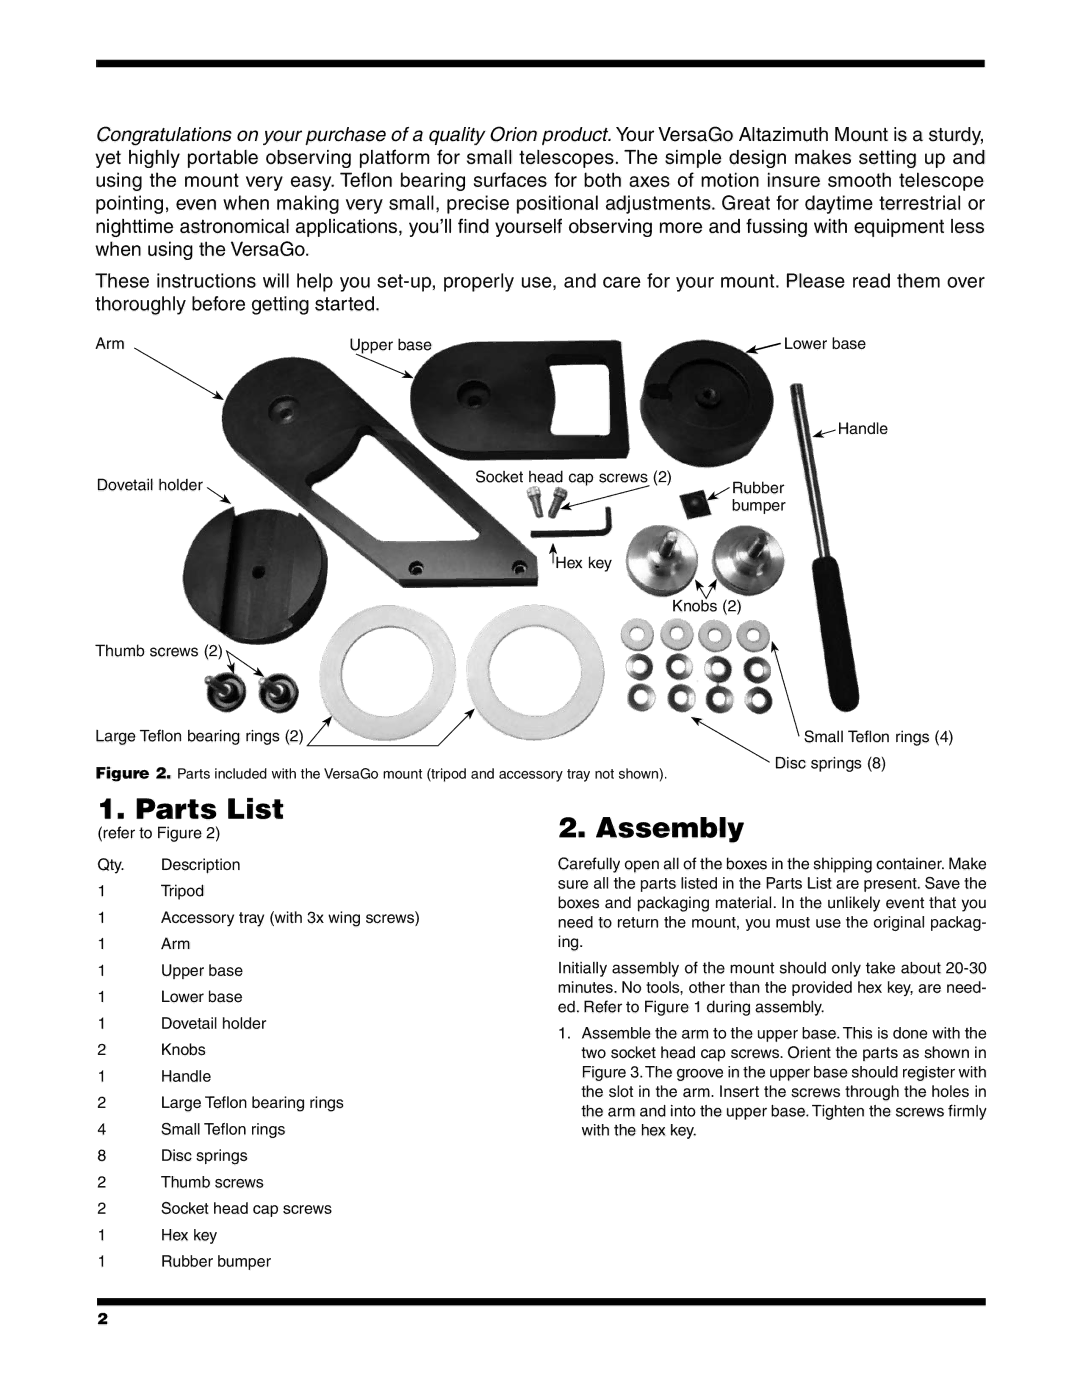
Arm | Upper base |
Dovetail holder | Socket head cap screws (2) | |
|
| |
|
| Hex key |
|
| |
|
| |
Thumb screws (2)
Large Teflon bearing rings (2)![]()
Figure 2. Parts included with the VersaGo mount (tripod and accessory tray not shown).
![]() Lower base
Lower base
![]() Handle
Handle
![]() Rubber bumper
Rubber bumper
Knobs (2)
Small Teflon rings (4)
Disc springs (8)
1. Parts List
(refer to Figure 2)
Qty. | Description |
1 | Tripod |
1 | Accessory tray (with 3x wing screws) |
1 | Arm |
1Upper base
1Lower base
1Dovetail holder
2Knobs
1Handle
2Large Teflon bearing rings
4Small Teflon rings
8Disc springs
2Thumb screws
2Socket head cap screws
1 | Hex key |
1 | Rubber bumper |
2. Assembly
Carefully open all of the boxes in the shipping container. Make sure all the parts listed in the Parts List are present. Save the boxes and packaging material. In the unlikely event that you need to return the mount, you must use the original packag- ing.
Initially assembly of the mount should only take about
1.Assemble the arm to the upper base. This is done with the two socket head cap screws. Orient the parts as shown in Figure 3. The groove in the upper base should register with the slot in the arm. Insert the screws through the holes in the arm and into the upper base. Tighten the screws firmly with the hex key.
2