sure to loosen the R.A. and Dec. lock knobs before doing this. Retighten the R.A. and Dec. lock knobs once the equatorial mount is properly oriented.
7.Slide the counterweight onto the counterweight shaft. Make sure the counterweight lock knob is adequately loosened to allow the counterweight shaft to pass through the hole in the counterweight.
8.With the counterweight lock knob still loose, grip the coun- terweight with one hand and thread the shaft into the equatorial mount (at the base of the declination axis) with the other hand. When it is threaded as far in as it will go, position the counterweight about halfway up the shaft and tighten the counterweight lock knob. The retaining screw and washer on the bottom of the shaft prevent the coun- terweight from falling off (and onto your foot!) if the counterweight lock knob becomes loose.
9.Attach the
10.Connect the optical tube assembly to the
11.Attach the two
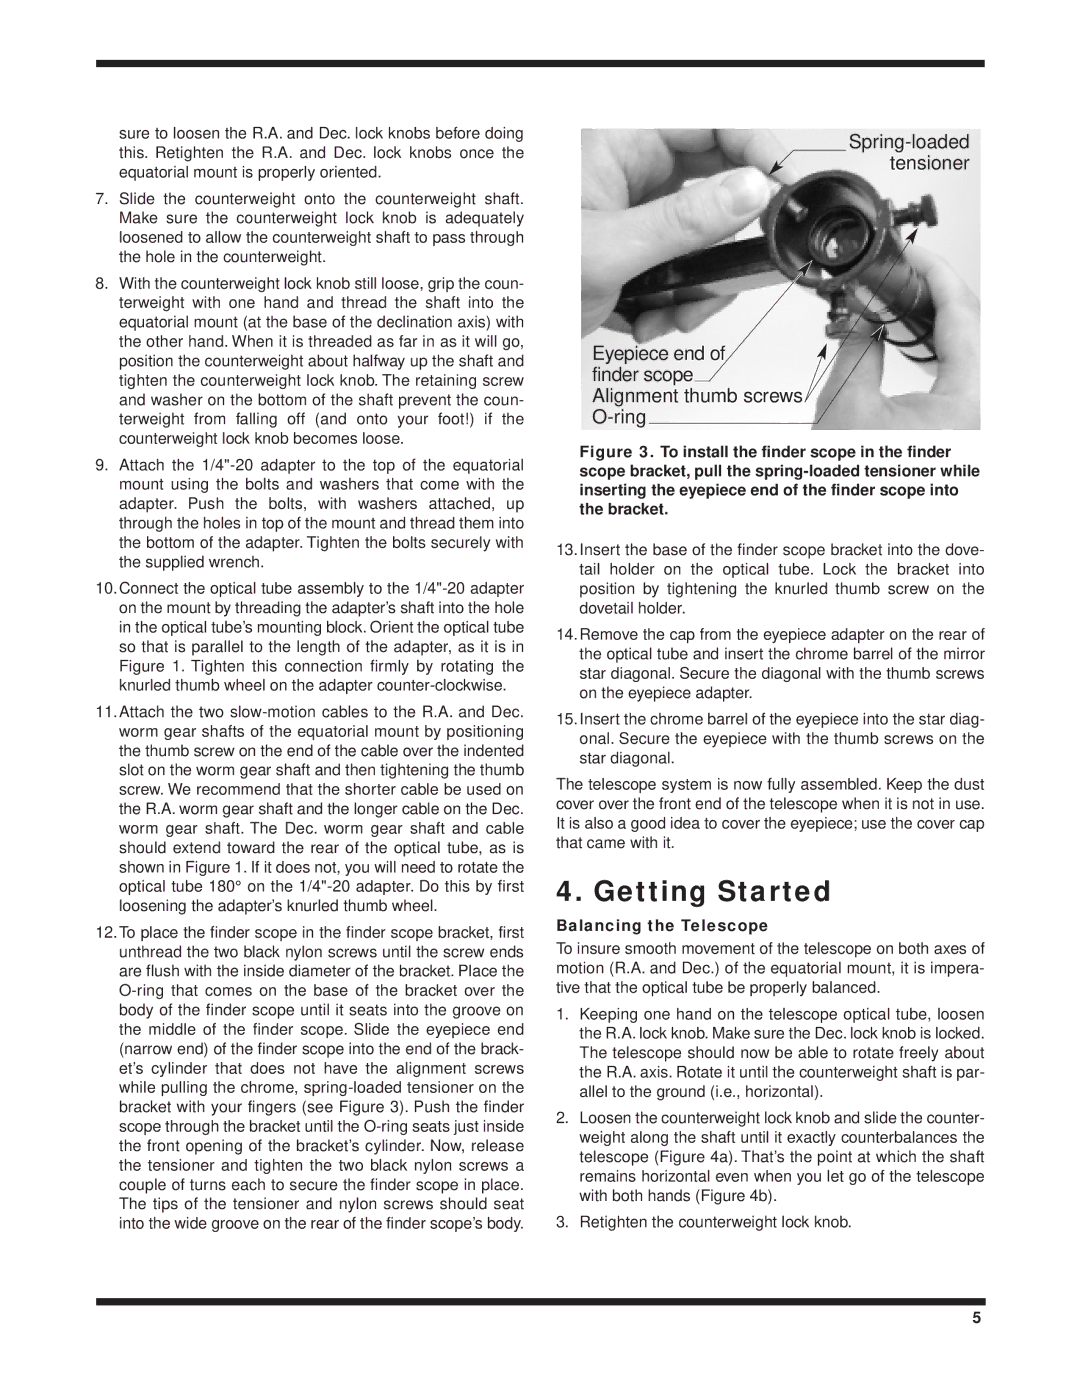
12.To place the finder scope in the finder scope bracket, first unthread the two black nylon screws until the screw ends are flush with the inside diameter of the bracket. Place the
Eyepiece end of finder scope Alignment thumb screws
Figure 3. To install the finder scope in the finder scope bracket, pull the spring-loaded tensioner while inserting the eyepiece end of the finder scope into the bracket.
13.Insert the base of the finder scope bracket into the dove- tail holder on the optical tube. Lock the bracket into position by tightening the knurled thumb screw on the dovetail holder.
14.Remove the cap from the eyepiece adapter on the rear of the optical tube and insert the chrome barrel of the mirror star diagonal. Secure the diagonal with the thumb screws on the eyepiece adapter.
15.Insert the chrome barrel of the eyepiece into the star diag- onal. Secure the eyepiece with the thumb screws on the star diagonal.
The telescope system is now fully assembled. Keep the dust cover over the front end of the telescope when it is not in use. It is also a good idea to cover the eyepiece; use the cover cap that came with it.
4. Getting Started
Balancing the Telescope
To insure smooth movement of the telescope on both axes of motion (R.A. and Dec.) of the equatorial mount, it is impera- tive that the optical tube be properly balanced.
1.Keeping one hand on the telescope optical tube, loosen the R.A. lock knob. Make sure the Dec. lock knob is locked. The telescope should now be able to rotate freely about the R.A. axis. Rotate it until the counterweight shaft is par- allel to the ground (i.e., horizontal).
2.Loosen the counterweight lock knob and slide the counter- weight along the shaft until it exactly counterbalances the telescope (Figure 4a). That’s the point at which the shaft remains horizontal even when you let go of the telescope with both hands (Figure 4b).
3.Retighten the counterweight lock knob.
5