have warm air currents rising from them which distort the image seen in the eyepiece. Similarly, you should not observe through an open or closed window from indoors. Better yet, choose a site
Seeing and Transparency
Atmospheric conditions play a huge part in quality of view- ing. In conditions of good “seeing”, star twinkling is minimal and objects appear steady in the eyepiece. Seeing is best overhead, worst at the horizon. Also, seeing generally gets better after midnight, when much of the heat absorbed by the Earth during the day has radiated off into space. Typically, seeing conditions will be better at sites that have an altitude over about 3000 feet. Altitude helps because it decreases the amount of distortion causing atmosphere you are looking through.
A good way to judge if the seeing is good or not is to look at bright stars about 40° above the horizon. If the stars appear to “twinkle”, the atmosphere is significantly distorting the incom- ing light, and views at high magnifications will not appear sharp. If the stars appear steady and do not twinkle, seeing conditions are probably good and higher magnifications will be possible. Also, seeing conditions are typically poor during the day. This is because the heat from the Sun warms the air and causes turbulence.
Good “transparency” is especially important for observ- ing faint objects. It simply means the air is free of moisture, smoke, and dust. All tend to scatter light, which reduces an object’s brightness.
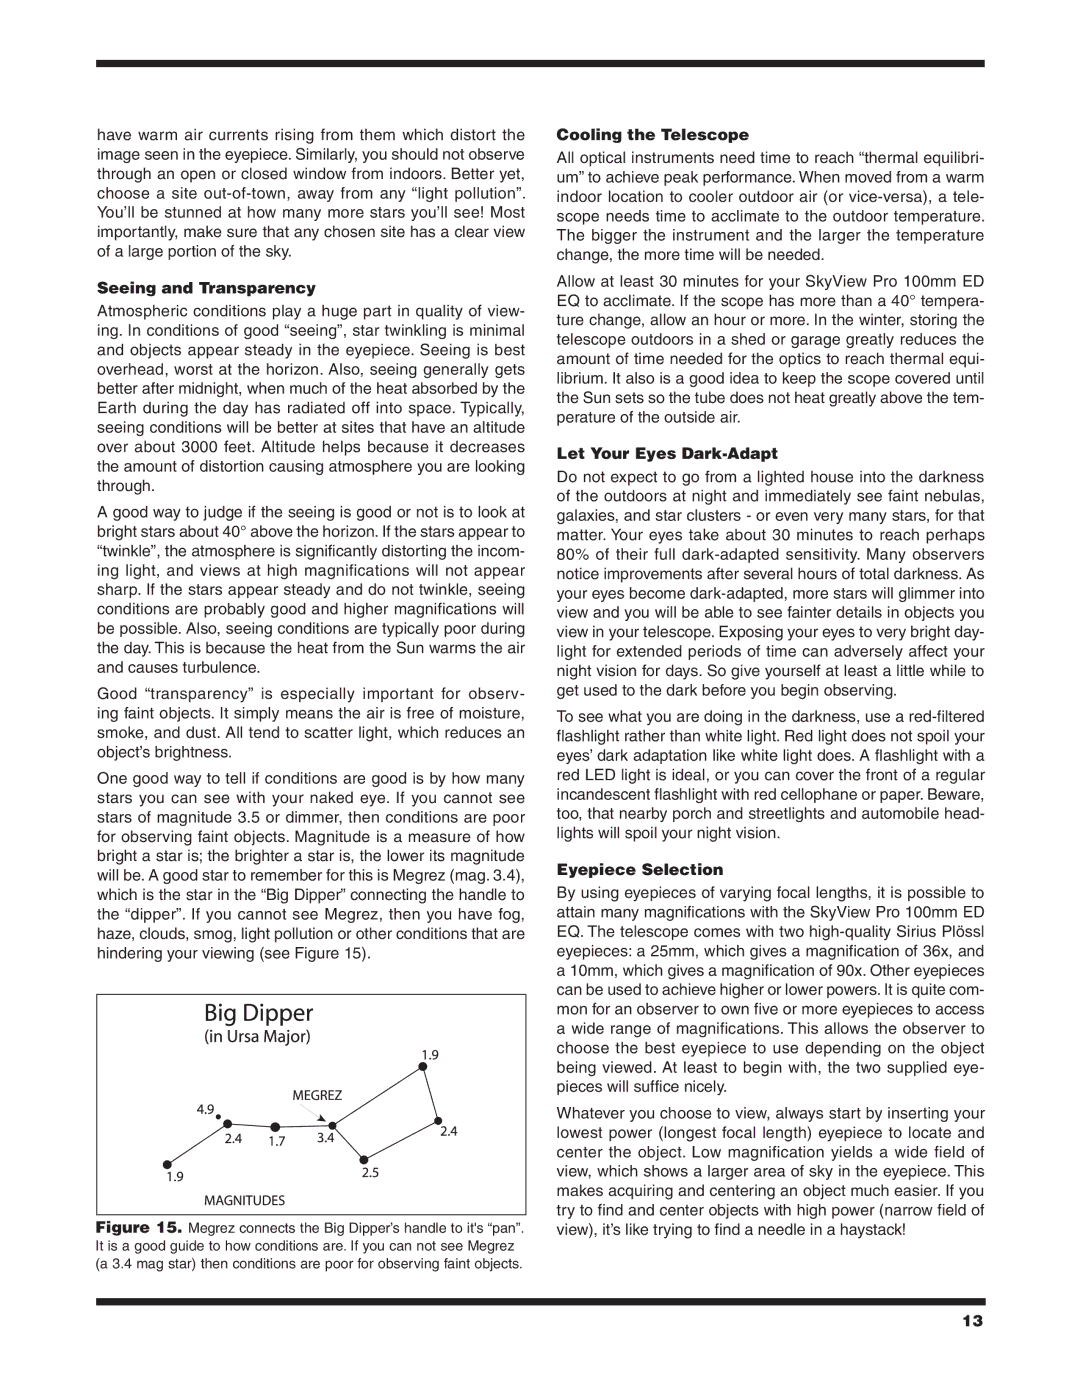
One good way to tell if conditions are good is by how many stars you can see with your naked eye. If you cannot see stars of magnitude 3.5 or dimmer, then conditions are poor for observing faint objects. Magnitude is a measure of how bright a star is; the brighter a star is, the lower its magnitude will be. A good star to remember for this is Megrez (mag. 3.4), which is the star in the “Big Dipper” connecting the handle to the “dipper”. If you cannot see Megrez, then you have fog, haze, clouds, smog, light pollution or other conditions that are hindering your viewing (see Figure 15).
Figure 15. Megrez connects the Big Dipper’s handle to it's “pan”. It is a good guide to how conditions are. If you can not see Megrez (a 3.4 mag star) then conditions are poor for observing faint objects.
Cooling the Telescope
All optical instruments need time to reach “thermal equilibri- um” to achieve peak performance. When moved from a warm indoor location to cooler outdoor air (or
Allow at least 30 minutes for your SkyView Pro 100mm ED EQ to acclimate. If the scope has more than a 40° tempera- ture change, allow an hour or more. In the winter, storing the telescope outdoors in a shed or garage greatly reduces the amount of time needed for the optics to reach thermal equi- librium. It also is a good idea to keep the scope covered until the Sun sets so the tube does not heat greatly above the tem- perature of the outside air.
Let Your Eyes Dark-Adapt
Do not expect to go from a lighted house into the darkness of the outdoors at night and immediately see faint nebulas, galaxies, and star clusters - or even very many stars, for that matter. Your eyes take about 30 minutes to reach perhaps 80% of their full
To see what you are doing in the darkness, use a
Eyepiece Selection
By using eyepieces of varying focal lengths, it is possible to attain many magnifications with the SkyView Pro 100mm ED EQ. The telescope comes with two
Whatever you choose to view, always start by inserting your lowest power (longest focal length) eyepiece to locate and center the object. Low magnification yields a wide field of view, which shows a larger area of sky in the eyepiece. This makes acquiring and centering an object much easier. If you try to find and center objects with high power (narrow field of view), it’s like trying to find a needle in a haystack!
13