| Little Dipper | |||
| (in Ursa Minor) | |||
Big Dipper | N.C.P. | |||
|
|
|
| |
(in Ursa Major) |
|
|
| Polaris |
|
|
| ||
|
|
|
| |
Pointer |
|
|
| Cassiopeia |
Stars |
|
|
| |
|
|
|
| |
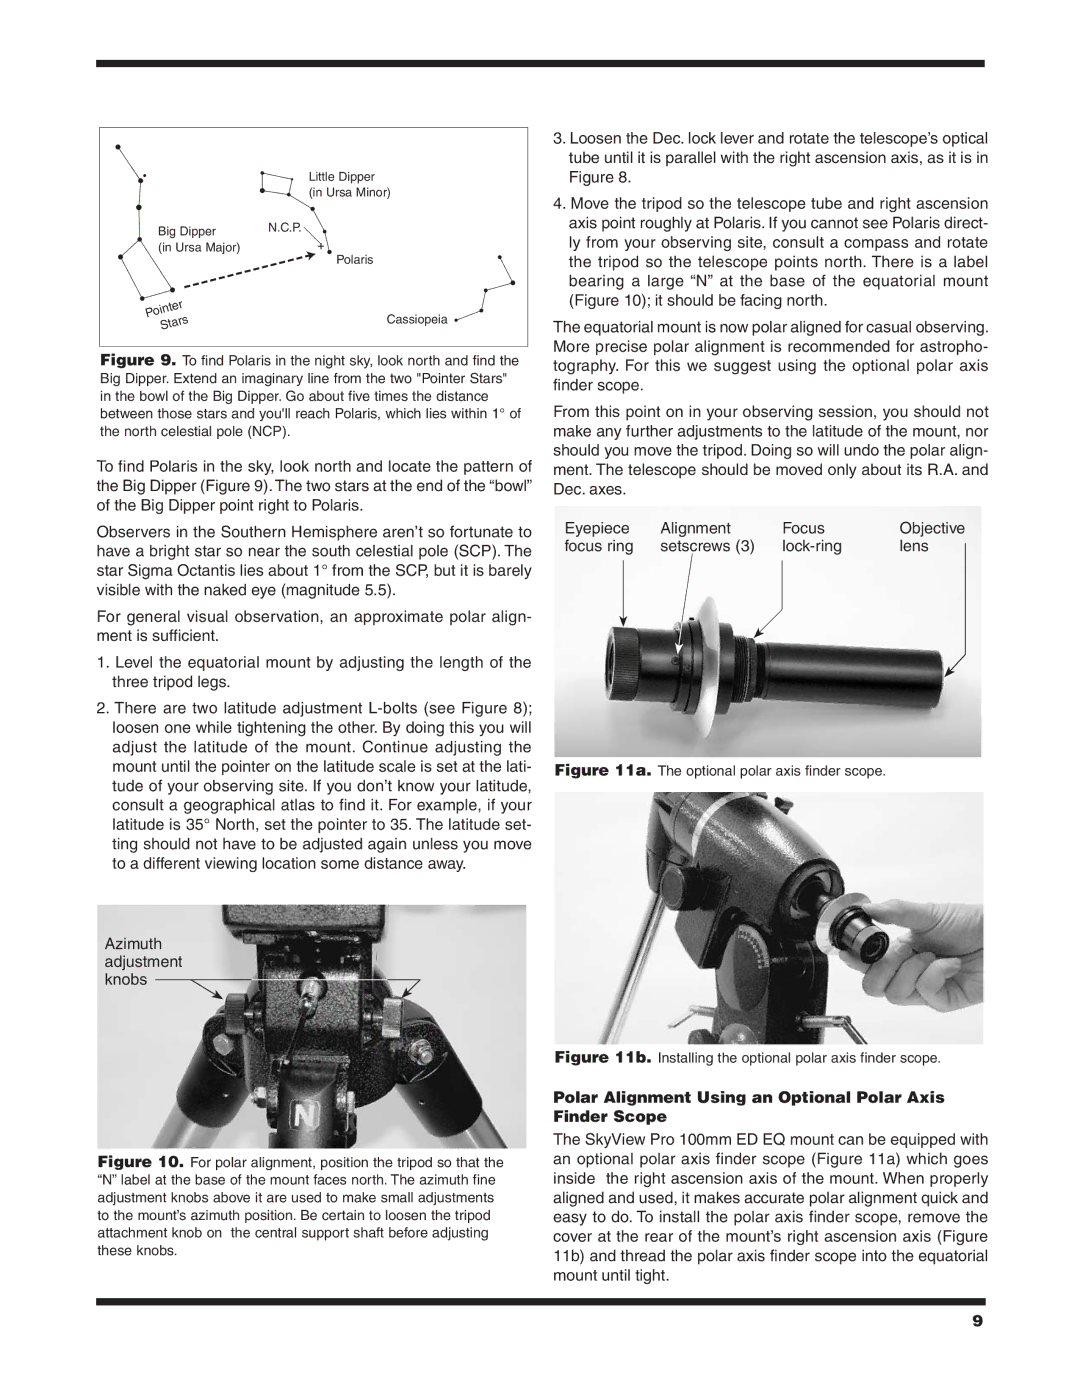
Figure 9. To find Polaris in the night sky, look north and find the Big Dipper. Extend an imaginary line from the two "Pointer Stars" in the bowl of the Big Dipper. Go about five times the distance between those stars and you'll reach Polaris, which lies within 1° of the north celestial pole (NCP).
To find Polaris in the sky, look north and locate the pattern of the Big Dipper (Figure 9). The two stars at the end of the “bowl” of the Big Dipper point right to Polaris.
Observers in the Southern Hemisphere aren’t so fortunate to have a bright star so near the south celestial pole (SCP). The star Sigma Octantis lies about 1° from the SCP, but it is barely visible with the naked eye (magnitude 5.5).
For general visual observation, an approximate polar align- ment is sufficient.
1.Level the equatorial mount by adjusting the length of the three tripod legs.
2.There are two latitude adjustment
Azimuth adjustment knobs
Figure 10. For polar alignment, position the tripod so that the “N” label at the base of the mount faces north. The azimuth fine adjustment knobs above it are used to make small adjustments to the mount’s azimuth position. Be certain to loosen the tripod attachment knob on the central support shaft before adjusting these knobs.
3.Loosen the Dec. lock lever and rotate the telescope’s optical tube until it is parallel with the right ascension axis, as it is in Figure 8.
4.Move the tripod so the telescope tube and right ascension axis point roughly at Polaris. If you cannot see Polaris direct- ly from your observing site, consult a compass and rotate the tripod so the telescope points north. There is a label bearing a large “N” at the base of the equatorial mount (Figure 10); it should be facing north.
The equatorial mount is now polar aligned for casual observing. More precise polar alignment is recommended for astropho- tography. For this we suggest using the optional polar axis finder scope.
From this point on in your observing session, you should not make any further adjustments to the latitude of the mount, nor should you move the tripod. Doing so will undo the polar align- ment. The telescope should be moved only about its R.A. and Dec. axes.
Eyepiece | Alignment | Focus | Objective | |||
focus ring | setscrews (3) | lock‑ring | lens |
|
| |
| ||||||
|
|
|
|
|
|
|
|
|
|
|
|
|
|
|
|
|
|
|
|
|
|
|
|
|
|
|
|
|
|
|
|
|
|
|
Figure 11a. The optional polar axis finder scope.
Figure 11b. Installing the optional polar axis finder scope.
Polar Alignment Using an Optional Polar Axis Finder Scope
The SkyView Pro 100mm ED EQ mount can be equipped with an optional polar axis finder scope (Figure 11a) which goes inside the right ascension axis of the mount. When properly aligned and used, it makes accurate polar alignment quick and easy to do. To install the polar axis finder scope, remove the cover at the rear of the mount’s right ascension axis (Figure 11b) and thread the polar axis finder scope into the equatorial mount until tight.
9