special about seeing an astronomical object in real time, with your own eyes — “live,” if not in living color.
How to Find Deep-sky Objects: Starhopping
Starhopping, as it is called by astronomers, is perhaps the simplest way to hunt down objects to view in the night sky. It entails first pointing the telescope at a star close to the object you wish to observe, and then progressing to other stars closer and closer to the object until it is in the field of view of the eyepiece. It is a very intuitive technique that has been employed for hundreds of years by professional and amateur astronomers alike. Keep in mind, as with any new task, that starhopping may seem challenging at first, but will become easier over time and with practice.
To starhop, only a minimal amount of additional equipment is necessary. A star chart or atlas that shows stars to at least magnitude 5 is required. Select one that shows the positions of many
Start by choosing bright objects to view. The brightness of an object is measured by its visual magnitude; the brighter an object, the lower its magnitude. Choose an object with a visual magnitude of 9 or lower. Many beginners start with the Messier objects, which represent some of the best and bright-
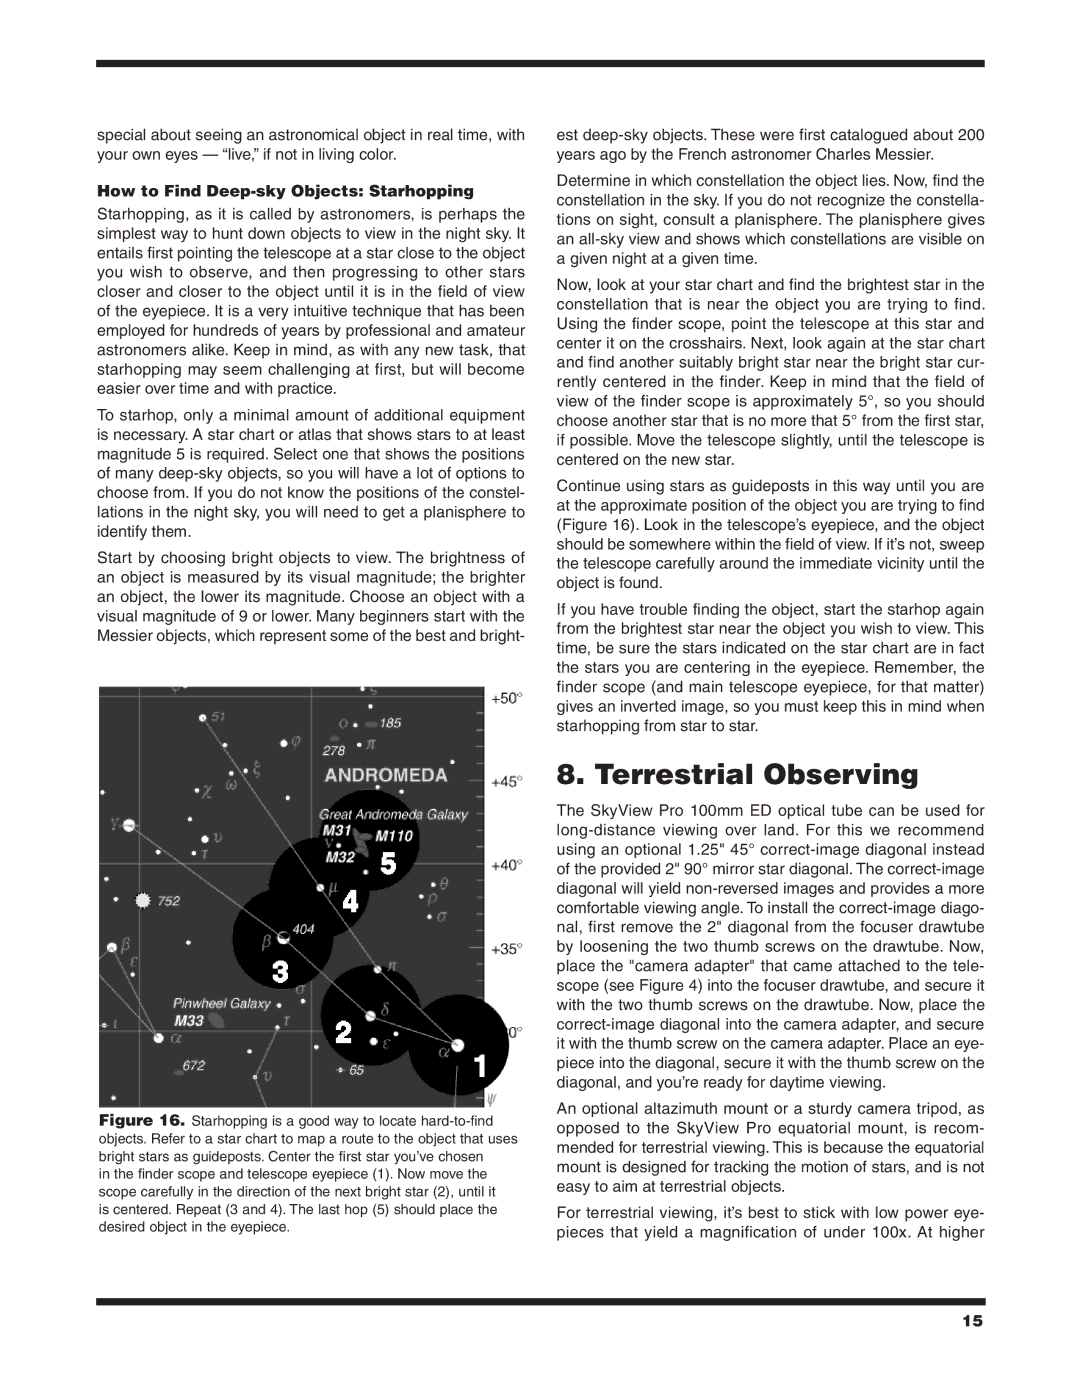
Figure 16. Starhopping is a good way to locate hard-to-find objects. Refer to a star chart to map a route to the object that uses bright stars as guideposts. Center the first star you’ve chosen
in the finder scope and telescope eyepiece (1). Now move the scope carefully in the direction of the next bright star (2), until it is centered. Repeat (3 and 4). The last hop (5) should place the desired object in the eyepiece.
est
Determine in which constellation the object lies. Now, find the constellation in the sky. If you do not recognize the constella- tions on sight, consult a planisphere. The planisphere gives an
Now, look at your star chart and find the brightest star in the constellation that is near the object you are trying to find. Using the finder scope, point the telescope at this star and center it on the crosshairs. Next, look again at the star chart and find another suitably bright star near the bright star cur- rently centered in the finder. Keep in mind that the field of view of the finder scope is approximately 5°, so you should choose another star that is no more that 5° from the first star, if possible. Move the telescope slightly, until the telescope is centered on the new star.
Continue using stars as guideposts in this way until you are at the approximate position of the object you are trying to find (Figure 16). Look in the telescope’s eyepiece, and the object should be somewhere within the field of view. If it’s not, sweep the telescope carefully around the immediate vicinity until the object is found.
If you have trouble finding the object, start the starhop again from the brightest star near the object you wish to view. This time, be sure the stars indicated on the star chart are in fact the stars you are centering in the eyepiece. Remember, the finder scope (and main telescope eyepiece, for that matter) gives an inverted image, so you must keep this in mind when starhopping from star to star.
8. Terrestrial Observing
The SkyView Pro 100mm ED optical tube can be used for
An optional altazimuth mount or a sturdy camera tripod, as opposed to the SkyView Pro equatorial mount, is recom- mended for terrestrial viewing. This is because the equatorial mount is designed for tracking the motion of stars, and is not easy to aim at terrestrial objects.
For terrestrial viewing, it’s best to stick with low power eye- pieces that yield a magnification of under 100x. At higher
15