3a3b
3c3d
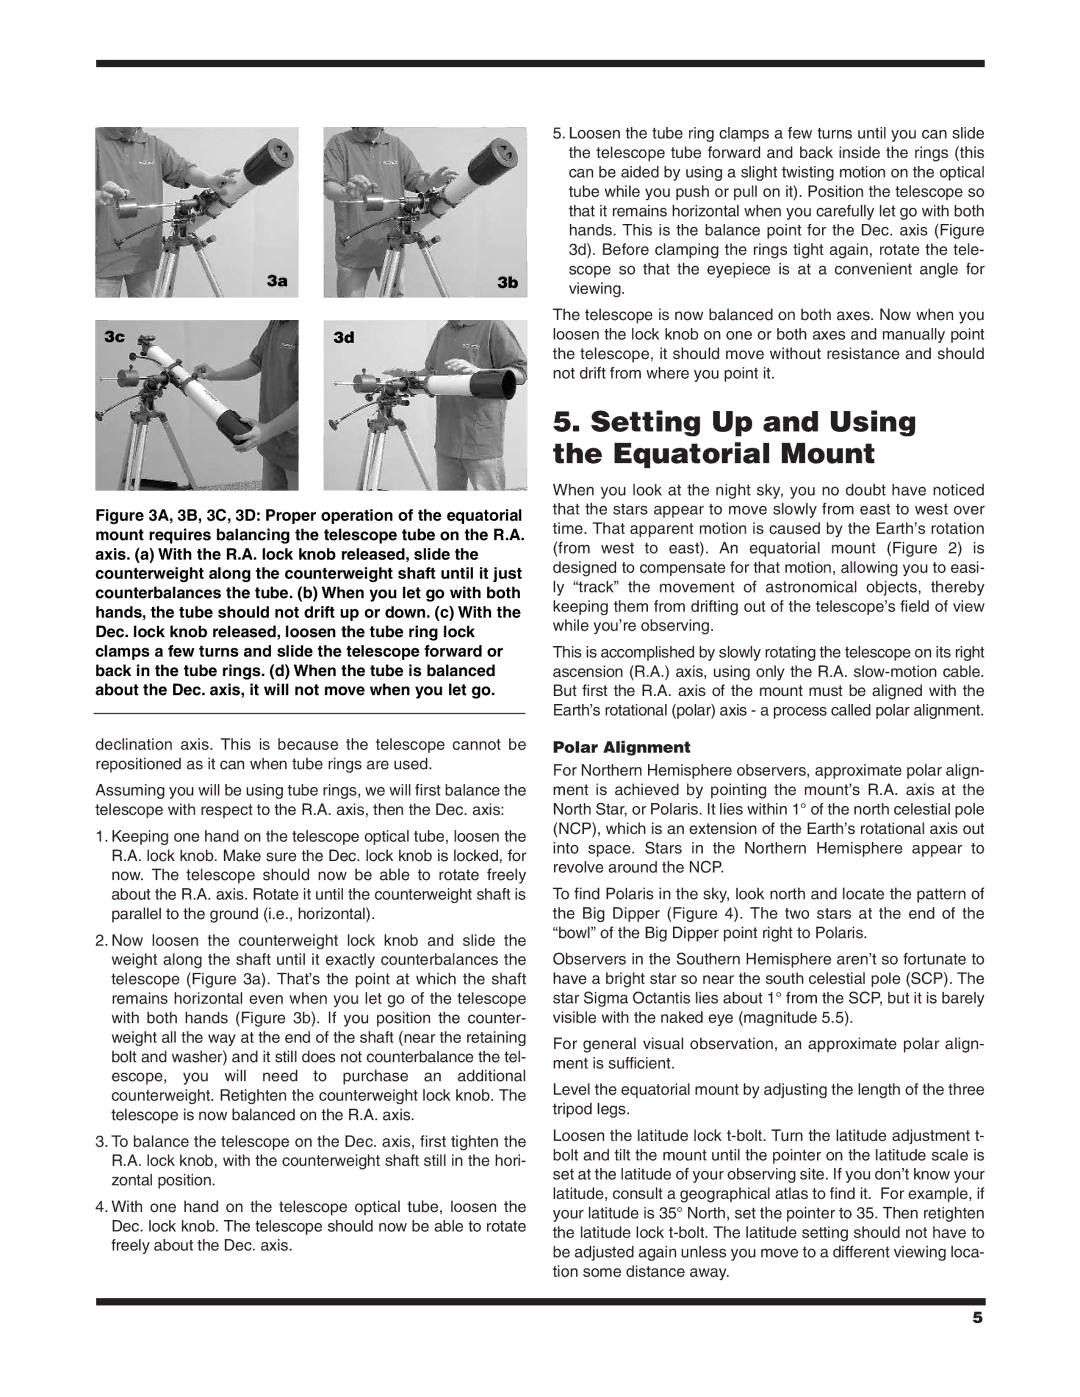
Figure 3A, 3B, 3C, 3D: Proper operation of the equatorial mount requires balancing the telescope tube on the R.A. axis. (a) With the R.A. lock knob released, slide the counterweight along the counterweight shaft until it just counterbalances the tube. (b) When you let go with both hands, the tube should not drift up or down. (c) With the Dec. lock knob released, loosen the tube ring lock clamps a few turns and slide the telescope forward or back in the tube rings. (d) When the tube is balanced about the Dec. axis, it will not move when you let go.
declination axis. This is because the telescope cannot be repositioned as it can when tube rings are used.
Assuming you will be using tube rings, we will first balance the telescope with respect to the R.A. axis, then the Dec. axis:
1.Keeping one hand on the telescope optical tube, loosen the R.A. lock knob. Make sure the Dec. lock knob is locked, for now. The telescope should now be able to rotate freely about the R.A. axis. Rotate it until the counterweight shaft is parallel to the ground (i.e., horizontal).
2.Now loosen the counterweight lock knob and slide the weight along the shaft until it exactly counterbalances the telescope (Figure 3a). That’s the point at which the shaft remains horizontal even when you let go of the telescope with both hands (Figure 3b). If you position the counter- weight all the way at the end of the shaft (near the retaining bolt and washer) and it still does not counterbalance the tel- escope, you will need to purchase an additional counterweight. Retighten the counterweight lock knob. The telescope is now balanced on the R.A. axis.
3.To balance the telescope on the Dec. axis, first tighten the R.A. lock knob, with the counterweight shaft still in the hori- zontal position.
4.With one hand on the telescope optical tube, loosen the Dec. lock knob. The telescope should now be able to rotate freely about the Dec. axis.
5.Loosen the tube ring clamps a few turns until you can slide the telescope tube forward and back inside the rings (this can be aided by using a slight twisting motion on the optical tube while you push or pull on it). Position the telescope so that it remains horizontal when you carefully let go with both hands. This is the balance point for the Dec. axis (Figure 3d). Before clamping the rings tight again, rotate the tele- scope so that the eyepiece is at a convenient angle for viewing.
The telescope is now balanced on both axes. Now when you loosen the lock knob on one or both axes and manually point the telescope, it should move without resistance and should not drift from where you point it.
5.Setting Up and Using the Equatorial Mount
When you look at the night sky, you no doubt have noticed that the stars appear to move slowly from east to west over time. That apparent motion is caused by the Earth’s rotation (from west to east). An equatorial mount (Figure 2) is designed to compensate for that motion, allowing you to easi- ly “track” the movement of astronomical objects, thereby keeping them from drifting out of the telescope’s field of view while you’re observing.
This is accomplished by slowly rotating the telescope on its right ascension (R.A.) axis, using only the R.A.
Polar Alignment
For Northern Hemisphere observers, approximate polar align- ment is achieved by pointing the mount’s R.A. axis at the North Star, or Polaris. It lies within 1° of the north celestial pole (NCP), which is an extension of the Earth’s rotational axis out into space. Stars in the Northern Hemisphere appear to revolve around the NCP.
To find Polaris in the sky, look north and locate the pattern of the Big Dipper (Figure 4). The two stars at the end of the “bowl” of the Big Dipper point right to Polaris.
Observers in the Southern Hemisphere aren’t so fortunate to have a bright star so near the south celestial pole (SCP). The star Sigma Octantis lies about 1° from the SCP, but it is barely visible with the naked eye (magnitude 5.5).
For general visual observation, an approximate polar align- ment is sufficient.
Level the equatorial mount by adjusting the length of the three tripod legs.
Loosen the latitude lock
5