Note: Do not bend needles during this procedure.
5.Turn the speaker on its side and insert one steel needle (centering pin) into each alignment hole in the backplate of the woofer (total of 8—these are the small diameter holes, not the larger holes—see figure below), Ensure that the pins are inserted completely.
Steel needles (shown inserted)
Partial View
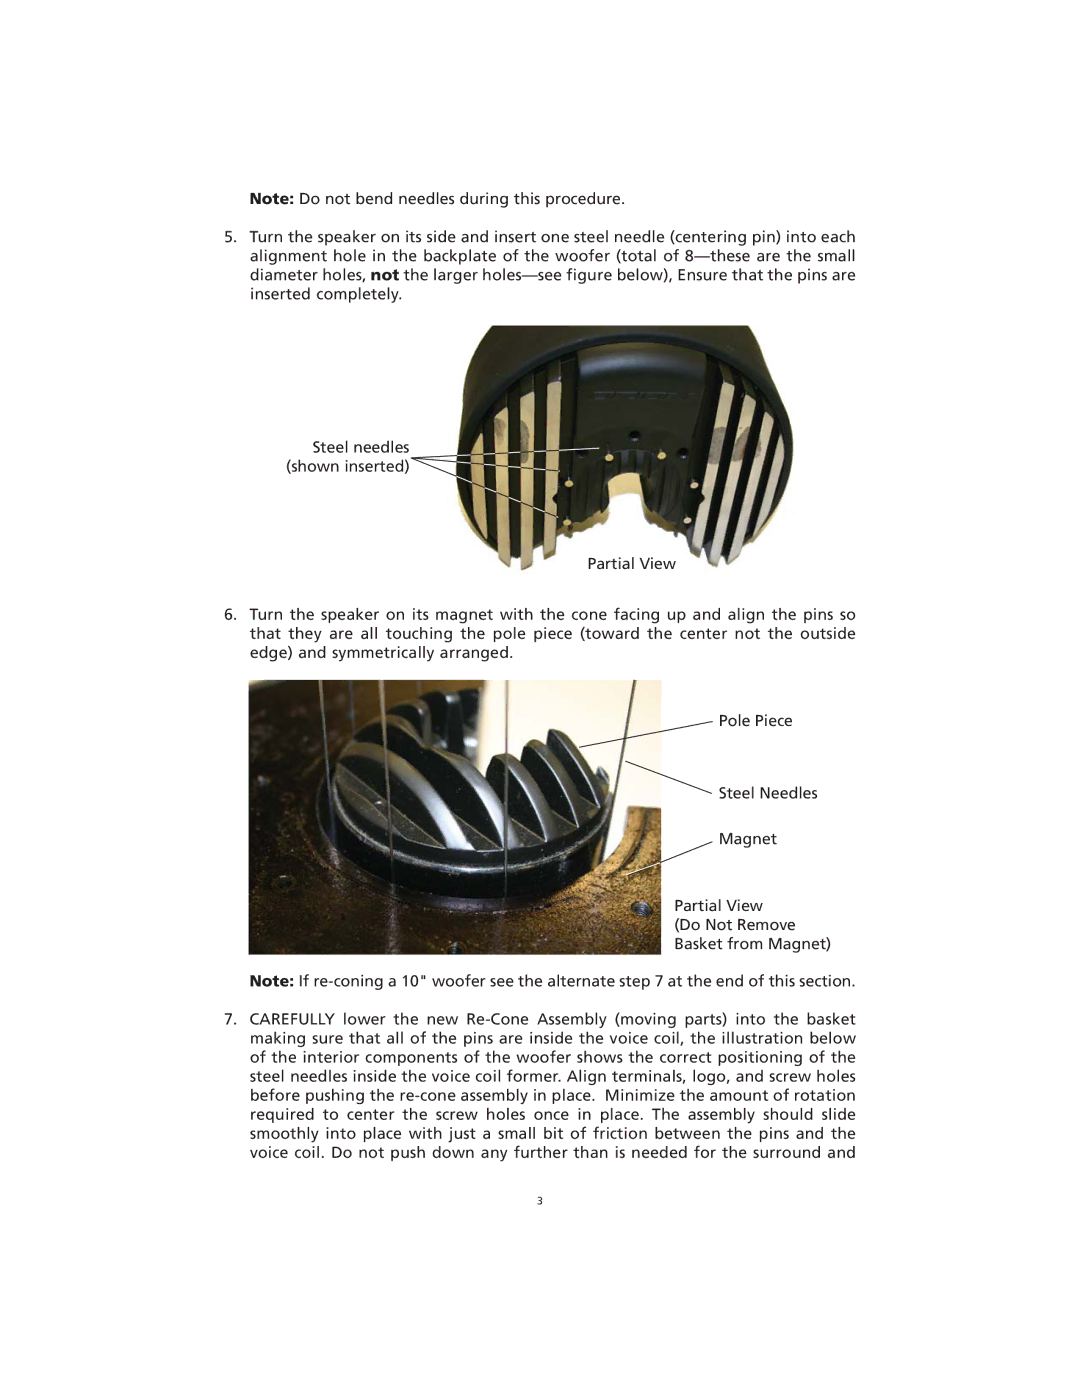
6.Turn the speaker on its magnet with the cone facing up and align the pins so that they are all touching the pole piece (toward the center not the outside edge) and symmetrically arranged.
Pole Piece
Steel Needles
Magnet
Partial View (Do Not Remove Basket from Magnet)
Note: If re-coning a 10" woofer see the alternate step 7 at the end of this section.
7.CAREFULLY lower the new Re-Cone Assembly (moving parts) into the basket making sure that all of the pins are inside the voice coil, the illustration below of the interior components of the woofer shows the correct positioning of the steel needles inside the voice coil former. Align terminals, logo, and screw holes before pushing the re-cone assembly in place. Minimize the amount of rotation required to center the screw holes once in place. The assembly should slide smoothly into place with just a small bit of friction between the pins and the voice coil. Do not push down any further than is needed for the surround and