RE-CONE KIT
A
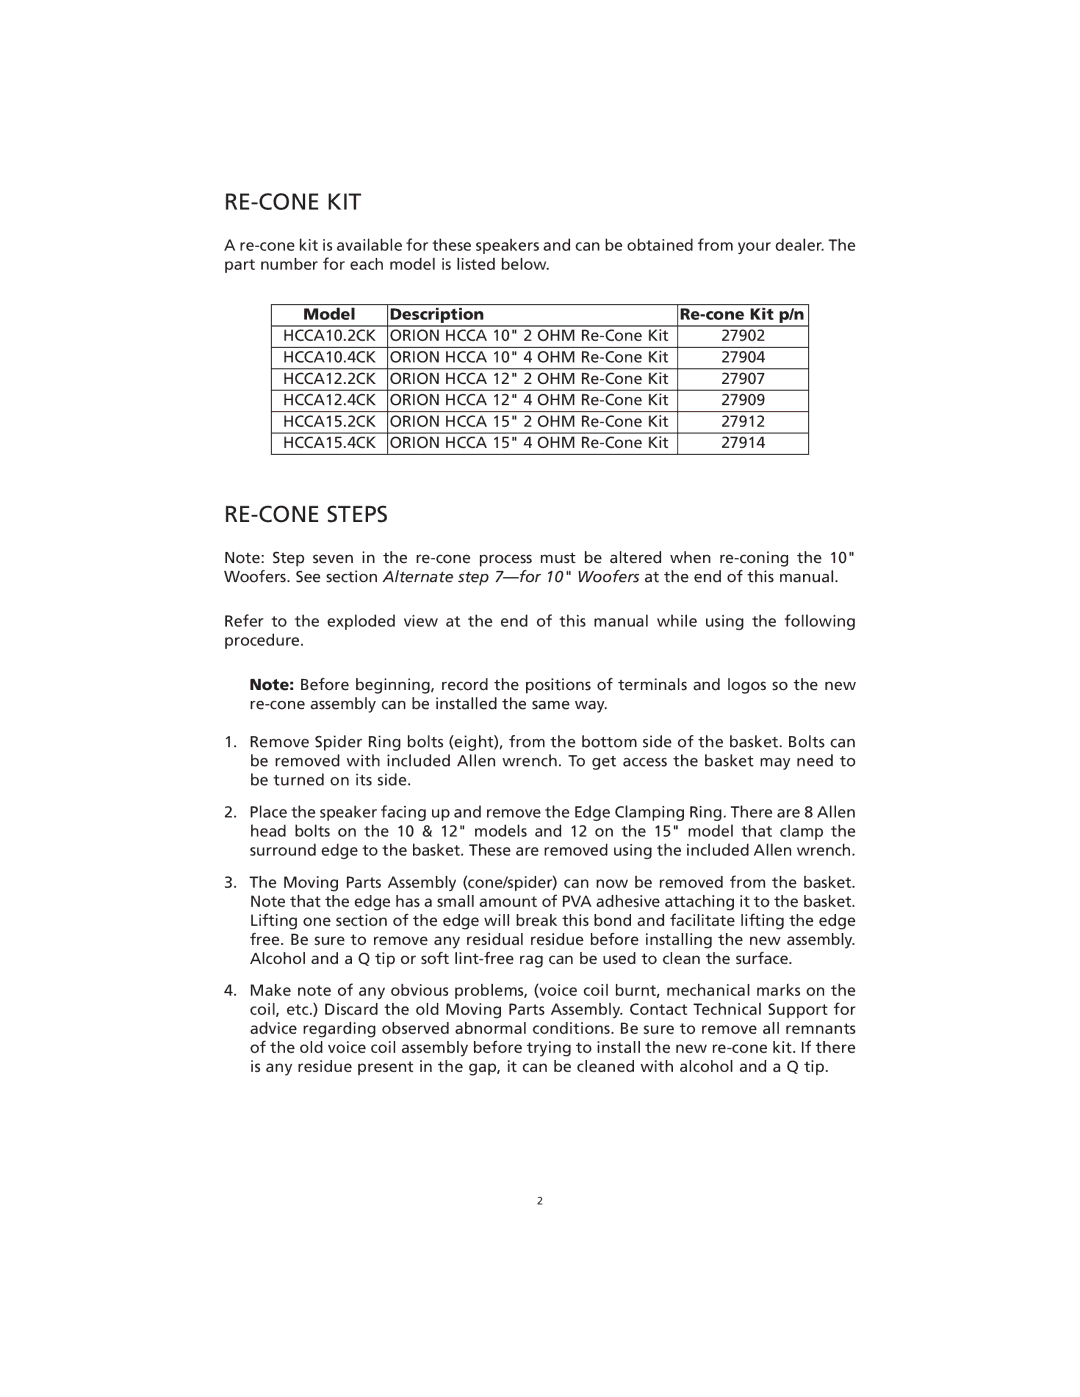
Model | Description |
|
HCCA10.2CK | ORION HCCA 10" 2 OHM | 27902 |
HCCA10.4CK | ORION HCCA 10" 4 OHM | 27904 |
HCCA12.2CK | ORION HCCA 12" 2 OHM | 27907 |
HCCA12.4CK | ORION HCCA 12" 4 OHM | 27909 |
|
|
|
HCCA15.2CK | ORION HCCA 15" 2 OHM | 27912 |
|
|
|
HCCA15.4CK | ORION HCCA 15" 4 OHM | 27914 |
|
|
|
RE-CONE STEPS
Note: Step seven in the
Refer to the exploded view at the end of this manual while using the following procedure.
Note: Before beginning, record the positions of terminals and logos so the new
1.Remove Spider Ring bolts (eight), from the bottom side of the basket. Bolts can be removed with included Allen wrench. To get access the basket may need to be turned on its side.
2.Place the speaker facing up and remove the Edge Clamping Ring. There are 8 Allen head bolts on the 10 & 12" models and 12 on the 15" model that clamp the surround edge to the basket. These are removed using the included Allen wrench.
3.The Moving Parts Assembly (cone/spider) can now be removed from the basket. Note that the edge has a small amount of PVA adhesive attaching it to the basket. Lifting one section of the edge will break this bond and facilitate lifting the edge free. Be sure to remove any residual residue before installing the new assembly. Alcohol and a Q tip or soft
4.Make note of any obvious problems, (voice coil burnt, mechanical marks on the coil, etc.) Discard the old Moving Parts Assembly. Contact Technical Support for advice regarding observed abnormal conditions. Be sure to remove all remnants of the old voice coil assembly before trying to install the new
2