Preparing To Use Your Toaster Oven for the First Time

If you are using your toaster oven for the first time, please be sure to: Remove any stickers from the surface of the oven.

Open oven door and remove all printed documents and paper from inside the toaster oven.

Clean the rack, tray, and pan with hot water, a small amount of dishwashing liquid and a non-abrasive sponge or cleaning pad.

DO NOT IMMERSE THE BODY OF THE UNIT IN WATER.

Dry the unit thoroughly before using.

Select a location for the toaster oven. The location should be in an open area on a flat counter where the plug will reach an outlet.

Plug the toaster oven into a 120 Volt AC electrical outlet.

Using Your Toaster Oven

Setting the Clock

Push the Clock button and hold for three seconds. The clock will flash. Use the arrow keys to set the hour. Push the Clock button again.

Use the arrow keys to set the minutes.

Push the Clock button once more and the time will be set.

Preheating the Oven

Place oven rack into the desired position before heating the oven. (See “Positioning Rack” Section)

Push oven button once.

Use arrows to set desired temperature.

Push Timer/Temp button, then the down arrow until seven minutes is displayed. Push the Start button.

Cómo usar la función Pizza

Coloque la rejilla en la posición deseada antes de calentar el horno. (Consulte la sección “Cómo colocar la rejilla”)

Ponga la pizza en la rejilla.

Apriete el botón Pizza y aparecerá el tiempo predeterminado de 20:00. Use las flechas para ajustar el tiempo deseado. Apriete el botón Start.

NOTA – La temperatura de la función Pizza está fijada en 400°F y no puede ajustarse.

Si se desea otra temperatura, anule la función Pizza y use la función Bake (Hornear).

Función de deshidratar

Apriete el botón Dehydrate (Deshidratar). El control de temperatura está fijado ya en 250°F.

Use los botones de las flechas para seleccionar el tiempo deseado.

Apriete el botón Start.

Función de descongelar

Cuando descongele no caliente el horno. El control de temperatura está fijado ya en 150°F.

Apriete el botón Defrost (Descongelar). Use los botones de las flechas para ajustar el tiempo. Para descongelar carnes o pescado se necesitan entre 15 y 20 minutos por cada lado. Cocine rápidamente los alimentos después de descongelarlos.

Apriete el botón Start.

To Use the Bake Function

Place oven rack into the desired position before heating the oven. (See “Positioning Rack” Section)

Arrange food on the wire rack or in the baking pan.

Push the Oven button once. Use the arrow keys to select desired temperature. Push Timer/Temp button. Use the arrow keys to select desired time.

Push the Start button.

NOTE – Both heating elements will cycle ON and OFF to maintain the desired temperature. When baking is completed, open door fully and remove food carefully.

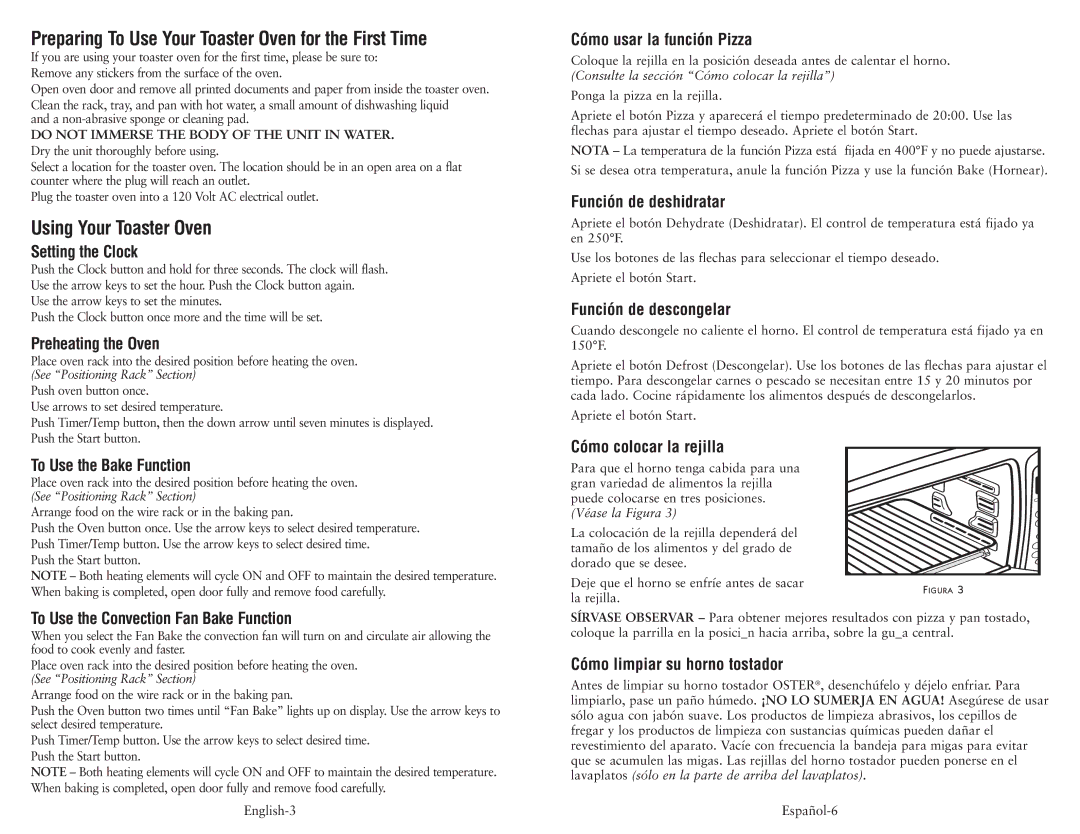
Cómo colocar la rejilla

Para que el horno tenga cabida para una gran variedad de alimentos la rejilla puede colocarse en tres posiciones. (Véase la Figura 3)

La colocación de la rejilla dependerá del tamaño de los alimentos y del grado de dorado que se desee.

Deje que el horno se enfríe antes de sacar la rejilla.

FIGURA 3

To Use the Convection Fan Bake Function

When you select the Fan Bake the convection fan will turn on and circulate air allowing the food to cook evenly and faster.

Place oven rack into the desired position before heating the oven. (See “Positioning Rack” Section)

Arrange food on the wire rack or in the baking pan.

Push the Oven button two times until “Fan Bake” lights up on display. Use the arrow keys to select desired temperature.

Push Timer/Temp button. Use the arrow keys to select desired time. Push the Start button.

NOTE – Both heating elements will cycle ON and OFF to maintain the desired temperature. When baking is completed, open door fully and remove food carefully.

SÍRVASE OBSERVAR – Para obtener mejores resultados con pizza y pan tostado, coloque la parrilla en la posici_n hacia arriba, sobre la gu_a central.

Cómo limpiar su horno tostador

Antes de limpiar su horno tostador OSTER®, desenchúfelo y déjelo enfriar. Para limpiarlo, pase un paño húmedo. ¡NO LO SUMERJA EN AGUA! Asegúrese de usar sólo agua con jabón suave. Los productos de limpieza abrasivos, los cepillos de fregar y los productos de limpieza con sustancias químicas pueden dañar el revestimiento del aparato. Vacíe con frecuencia la bandeja para migas para evitar que se acumulen las migas. Las rejillas del horno tostador pueden ponerse en el lavaplatos (sólo en la parte de arriba del lavaplatos).

English-3

Español-6

Page 4
Image 4
Oster 6058 user manual Preparing To Use Your Toaster Oven for the First Time, Using Your Toaster Oven

6058 specifications

The Oster 6058 is a versatile and robust kitchen appliance designed to meet the various needs of home cooks. Known for its exceptional performance and user-friendly design, this blender stands out in a saturated market of kitchen gadgets.

One of the most notable features of the Oster 6058 is its powerful 600-watt motor, which ensures efficient blending, chopping, and pureeing. This motor is designed to handle tough ingredients, including ice and fibrous vegetables, making it a great choice for smoothies, soups, and sauces. The blade system consists of a stainless-steel, 4-point design that effectively crushes ice and blends ingredients evenly, resulting in smooth textures.

In terms of versatility, the Oster 6058 comes with multiple speeds, allowing users to blend at a pace that suits their particular recipe. This model typically features a variety of settings, from low to high, enabling precise control over the blending process. Additionally, the pulse function provides an extra layer of control, allowing cooks to achieve desired textures without over-processing their ingredients.

Another feature that sets the Oster 6058 apart is its 6-cup glass jar, which is not only durable but also safe for hot ingredients. The glass construction resists scratches and stains, ensuring that the blender maintains its aesthetic appeal even after multiple uses. The graduated marks on the jar also facilitate easy measurement of ingredients.

Safety is a key aspect of the Oster 6058’s design. It incorporates a safety locking mechanism, ensuring that the blender operates only when the lid is securely in place. This reduces the risk of spills and accidents in the kitchen, particularly when blending hot or vibrant ingredients.

The Oster 6058 is also designed for easy cleaning. Most components, including the jar and blades, are dishwasher safe, which simplifies the post-cooking cleanup process for busy home cooks.

In summary, the Oster 6058 combines power, versatility, and safety features in a sleek design, making it an excellent addition to any kitchen. Whether you’re blending smoothies, soups, or sauces, this blender is sure to meet a wide range of culinary needs. Its blend of powerful motor, precise controls, and user-friendly features make it a standout choice for anyone looking to enhance their cooking experience.