
TSSTTV0000, Oster Countertop Oven specifications
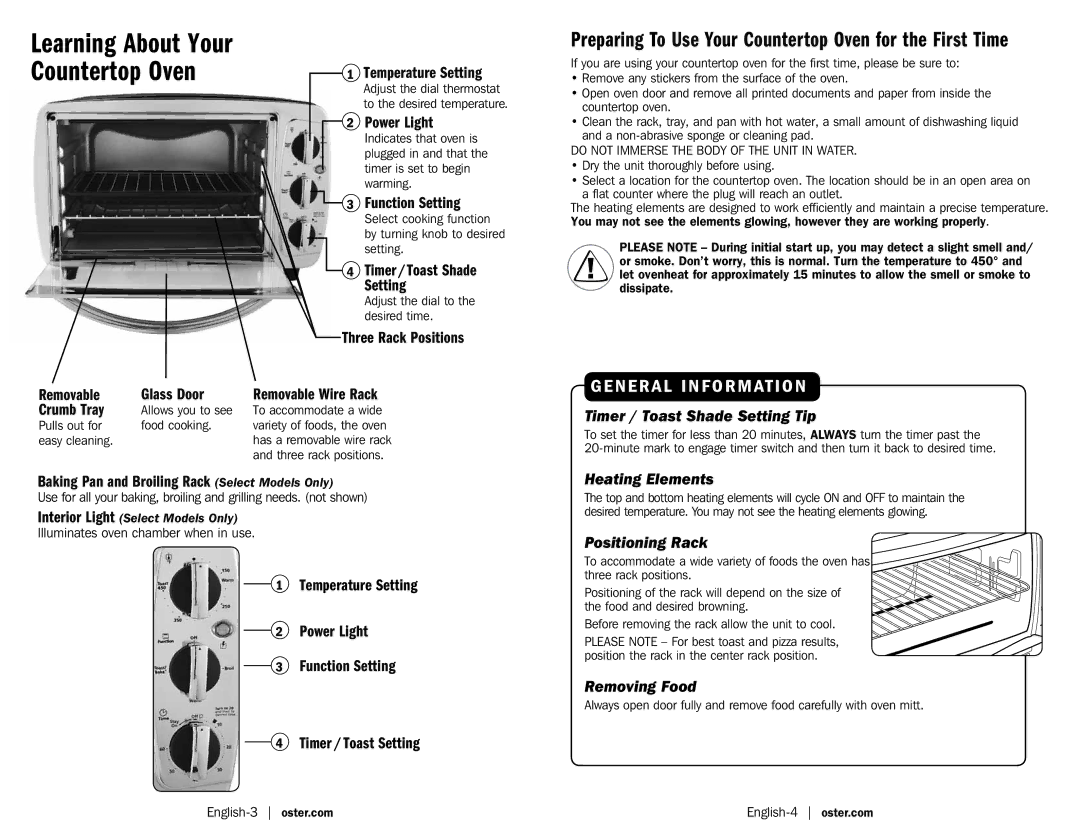
The Oster Countertop Oven, model TSSTTV0000, is a versatile kitchen appliance that combines the convenience of traditional ovens with modern technology. Designed for cooking enthusiasts and busy households alike, this countertop oven offers an array of features that enhance culinary experiences while saving time and energy.One of the standout features of the Oster TSSTTV0000 is its spacious interior, which can accommodate up to six slices of bread or a 12-inch pizza, making it ideal for both small meals and larger gatherings. This generous capacity allows users to prepare a variety of dishes simultaneously, from toasting and baking to broiling and reheating.
The oven features a versatile range of cooking options, including bake, broil, toast, and keep warm settings. The adjustable temperature control allows users to set precise cooking temperatures up to 450°F, ensuring that each dish is cooked to perfection. Additionally, the 60-minute timer with an auto shut-off feature adds convenience and safety, allowing users to multitask without the worry of overcooking.
Incorporating advanced heating technology, the Oster Countertop Oven boasts even heating and cooking results. The oven utilizes a combination of top and bottom heating elements, which ensures that food cooks evenly from all sides. This means that whether you’re baking cookies or roasting vegetables, you can expect consistent results every time.
For added convenience, the TSSTTV0000 comes equipped with a removable crumb tray, making cleanup a breeze. The oven’s sleek, compact design fits seamlessly on any countertop, and its stylish stainless-steel exterior is not only durable but also complements any kitchen decor.
Energy efficiency is another advantage of this countertop oven, as it uses significantly less energy compared to traditional ovens. This makes it an environmentally friendly choice while still delivering exceptional cooking performance.
Overall, the Oster Countertop Oven TSSTTV0000 is a powerful and versatile cooking appliance that brings efficiency and ease to kitchen tasks. With its generous capacity, multiple cooking functions, and innovative heating technology, this countertop oven is an essential tool for anyone looking to elevate their cooking experience while managing their time effectively. Whether baking, broiling, or toasting, it delivers satisfying results with every use.