Manuals
/
Outback Power Systems
/
Computer Equipment
/
Power Supply
Outback Power Systems
FW-X240
installation manual
Models:
FW-X240
1
9
16
16
Download
16 pages
35.41 Kb
6
7
8
9
10
11
12
13
Safety
About OutBack Power Systems
Page 9
Image 9
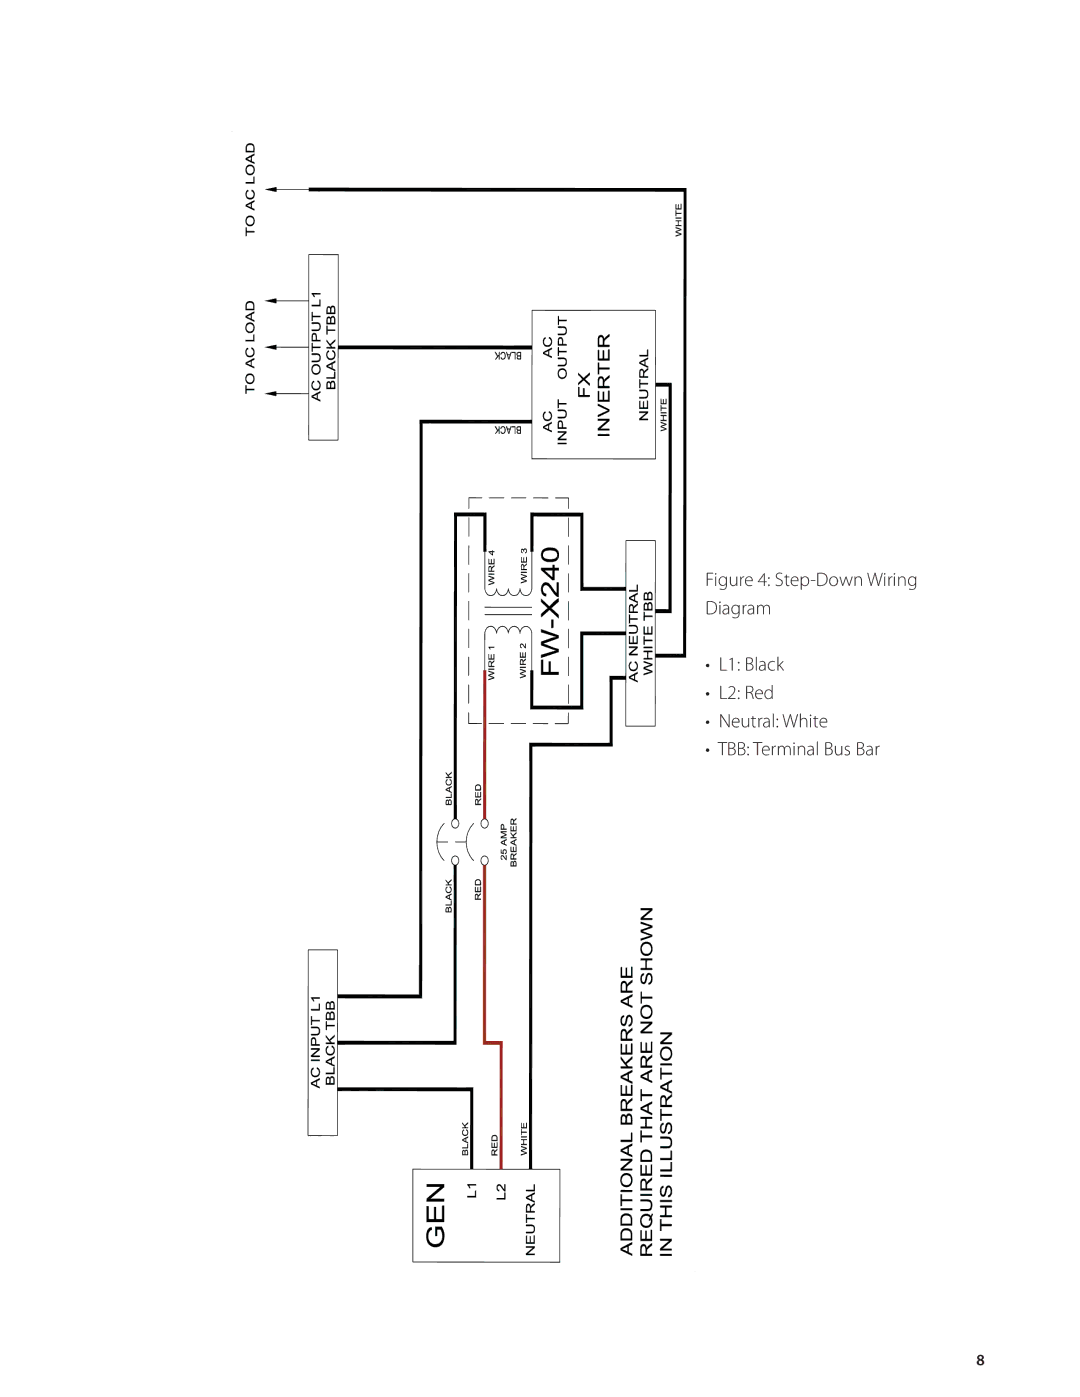
Figure 4:
Step-Down
Wiring Diagram
•
L1: Black
•
L2: Red
•
Neutral: White
•
TBB: Terminal Bus Bar
8
Page 8
Page 10
Page 9
Image 9
Page 8
Page 10
Contents
Auto Transformer
FW-X240 Auto Transformer
About OutBack Power Systems
Important Safety Instructions
Grounding Instructions
R t u e n
FW500 AC Chassis
FW1000 AC Chassis
Page
L1 Black L2 Red Neutral White TBB Terminal Bus Bar
OutBack Stacking Wiring Diagram
4500WATTS
Page
FLEXware Product Registration
Page
REV C
Top
Page
Image
Contents