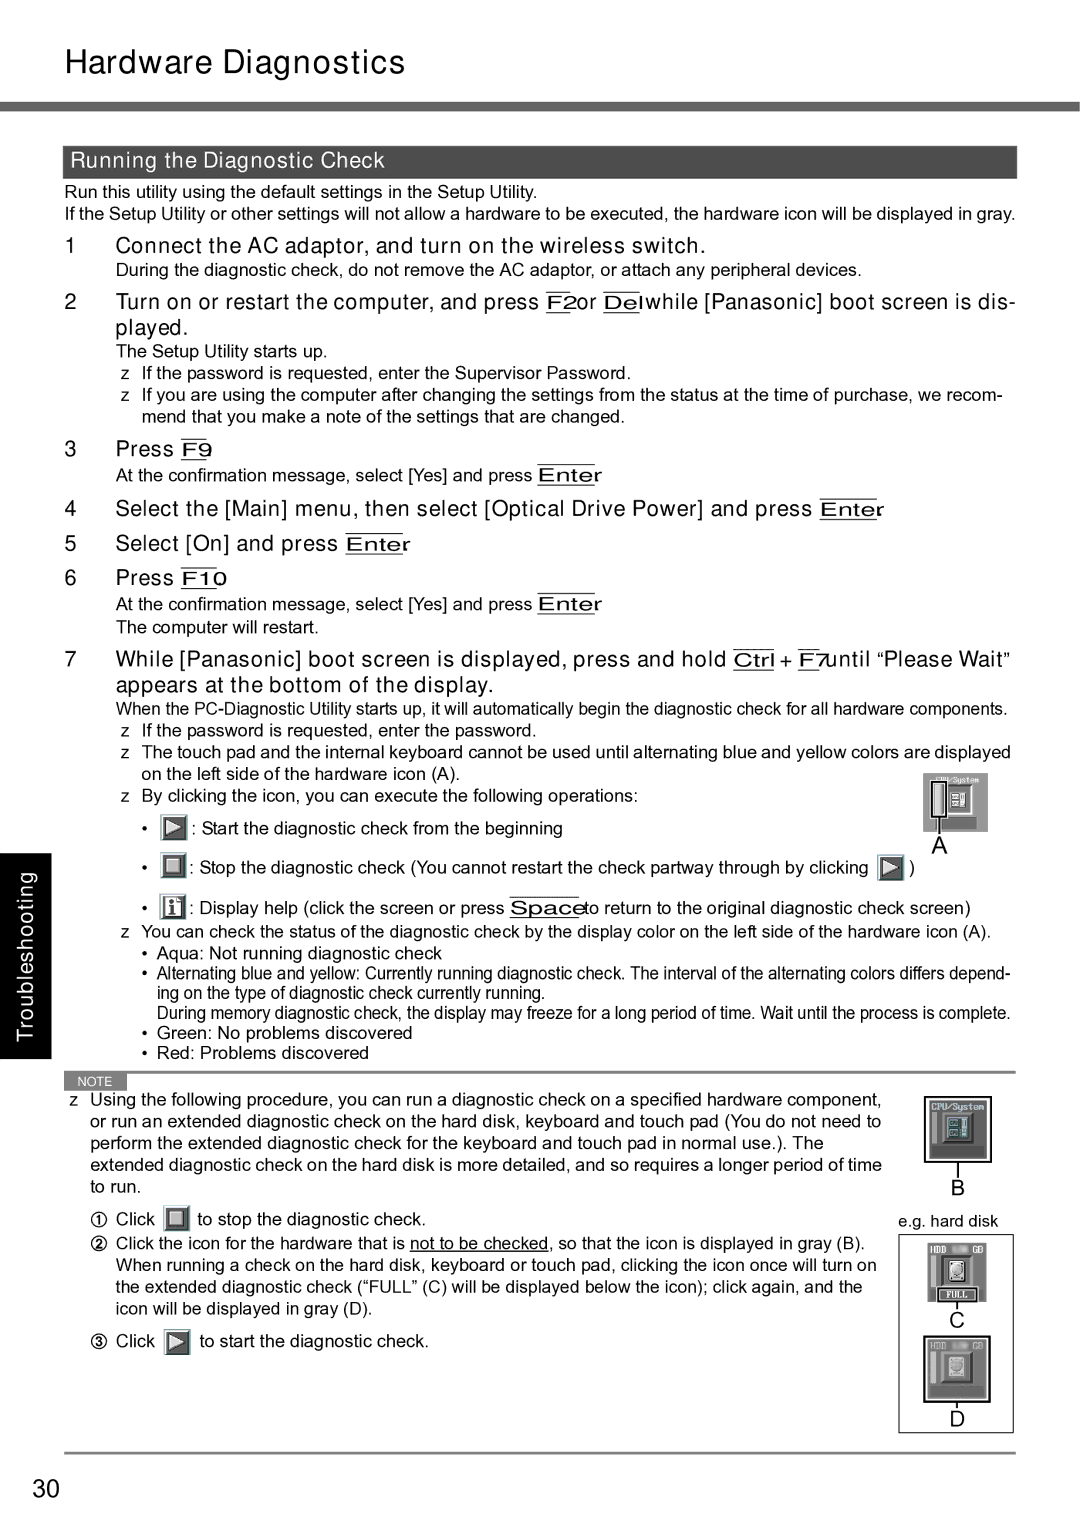
Hardware Diagnostics

Troubleshooting Useful Information Getting Started

Running the Diagnostic Check

Run this utility using the default settings in the Setup Utility.

If the Setup Utility or other settings will not allow a hardware to be executed, the hardware icon will be displayed in gray.

1 Connect the AC adaptor, and turn on the wireless switch.

During the diagnostic check, do not remove the AC adaptor, or attach any peripheral devices.

2 Turn on or restart the computer, and press F2 or Del while [Panasonic] boot screen is dis- played.

The Setup Utility starts up.

zIf the password is requested, enter the Supervisor Password.

zIf you are using the computer after changing the settings from the status at the time of purchase, we recom- mend that you make a note of the settings that are changed.

3 Press F9.

At the confirmation message, select [Yes] and press Enter.

4Select the [Main] menu, then select [Optical Drive Power] and press Enter.

5Select [On] and press Enter.

6Press F10.

At the confirmation message, select [Yes] and press Enter.

The computer will restart.

7 While [Panasonic] boot screen is displayed, press and hold Ctrl + F7 until Please Waitappears at the bottom of the display.

When the PC-Diagnostic Utility starts up, it will automatically begin the diagnostic check for all hardware components.

zIf the password is requested, enter the password.

zThe touch pad and the internal keyboard cannot be used until alternating blue and yellow colors are displayed

on the left side of the hardware icon (A).

z By clicking the icon, you can execute the following operations:

• : Start the diagnostic check from the beginning

A

: Stop the diagnostic check (You cannot restart the check partway through by clicking )

: Display help (click the screen or press Space to return to the original diagnostic check screen) z You can check the status of the diagnostic check by the display color on the left side of the hardware icon (A).

Aqua: Not running diagnostic check

Alternating blue and yellow: Currently running diagnostic check. The interval of the alternating colors differs depend- ing on the type of diagnostic check currently running.

During memory diagnostic check, the display may freeze for a long period of time. Wait until the process is complete.

Green: No problems discovered

Red: Problems discovered

Appendix

NOTE

zUsing the following procedure, you can run a diagnostic check on a specified hardware component, or run an extended diagnostic check on the hard disk, keyboard and touch pad (You do not need to perform the extended diagnostic check for the keyboard and touch pad in normal use.). The extended diagnostic check on the hard disk is more detailed, and so requires a longer period of time to run.

A Click to stop the diagnostic check.

B Click the icon for the hardware that is not to be checked, so that the icon is displayed in gray (B). When running a check on the hard disk, keyboard or touch pad, clicking the icon once will turn on the extended diagnostic check (“FULL” (C) will be displayed below the icon); click again, and the icon will be displayed in gray (D).

C Click to start the diagnostic check.

B

e.g. hard disk

C

D

30

Page 30
Image 30
Panasonic CF-F8 manual Hardware Diagnostics, Connect the AC adaptor, and turn on the wireless switch, Press F9

CF-F8 specifications

The Panasonic CF-F8, part of the Toughbook series, stands out as a rugged and reliable notebook designed to withstand the rigors of professional use in challenging environments. This laptop is particularly popular among professionals in industries such as field service, emergency services, and military applications where durability and performance are paramount.

One of the key features of the CF-F8 is its rugged design. Built to meet military specifications, this device can endure extreme temperatures, vibrations, and moisture, making it suitable for outdoor and industrial use. The magnesium alloy case provides exceptional strength while keeping the weight manageable, further enhancing its portability.

In terms of display, the CF-F8 boasts a sunlight-readable 14-inch LED screen, which remains usable in bright outdoor conditions. The touchscreen functionality adds versatility, allowing for easier navigation in various settings. The resolution of 1366 x 768 pixels ensures that users can view detailed images and read text with clarity, making it ideal for technical applications.

Powered by a robust Intel Core i5 or i7 processor, the Panasonic CF-F8 delivers impressive performance for multitasking and running demanding applications. Coupled with sufficient RAM, it handles data-heavy tasks without a hitch, making it a reliable partner for professionals on the go.

The CF-F8 also excels in connectivity options. It offers multiple USB ports, HDMI output, and a built-in Ethernet port, alongside Wi-Fi and Bluetooth capabilities, ensuring seamless integration with other devices and network environments. This makes it easier for users to share data or connect to peripheral devices in the field.

Security features are another highlight of the CF-F8. It includes options for a smartcard reader and biometric fingerprint authentication, safeguarding sensitive information and access to the device. These features are essential for industries that handle confidential data, providing peace of mind for professionals who require secure computing.

Battery life is a crucial factor for field use, and the CF-F8 does not disappoint. With a long-lasting battery, it offers extended usage without the constant need for a recharge, allowing users to remain productive for hours on end.

In summary, the Panasonic CF-F8 encapsulates strong performance, robust durability, and advanced features, establishing itself as a trusted device for professionals who need a laptop that can keep up with their demanding work environment while ensuring reliability and security.